How do I pull detail reports that correspond to the AR by Accounting Code report?
Overview
Zuora's Standard Accounts Receivable Report (called AR by Accounting Code) is a summary of transactions by accounting code within a specified date range. If you are not using accounting codes on your charges, the accounting code field on this report will be blank. We recommend assigning accounting codes to your product rate plan charges, since this provides better reporting and can help integrate Zuora with your accounting system. Zuora accounting codes map to GL accounts in your accounting system.
This article provides instructions for obtaining reports on Zuora activity for your accounting period close. If you use summarized GL entries for revenue in your accounting system, these reports list the transactions behind the summary totals.
Solution
The AR by Accounting Code report, or AR report, is based on of the transaction date, for example, Invoice Date for Posted Invoices or Payment Date for Successfully Processed Payments. The AR report gives you summarized totals for each transaction type, and you'll be comparing these totals with totals from the detailed reports provided through Z-Reporting, data source exports, or CSV extract files. For this purpose, of course, it is extremely important that you run all your reports with the same date range.
We list all the options currently available for validating the AR report transaction totals. However, you can choose the option that you prefer. When possible, Zuora recommends using Z-Reporting, because these reports can be saved and re-run without requiring you to re-enter your criteria as you would with data sources. Z-Reporting also saves you from having to filter information from CSV extracts after each download.
Invoice Totals
Option 1: Z-Reporting "Summary of Invoices" Report
Navigation: Reporting > Reporting and select this report from the Report List. Run this report using the same date range you used for the AR report.
Verify that the Invoice Amount With Tax total matches the Invoice total on your AR report.
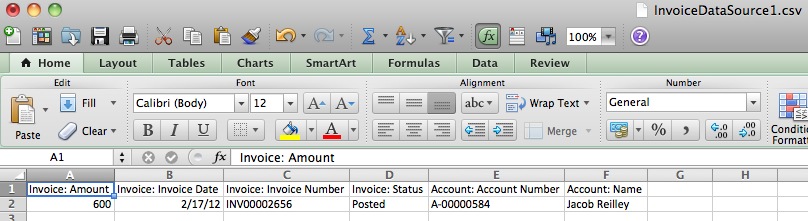
Option 2: Invoice Data Sources Report
Go to Reporting > Data Exports > Data Sources and run a report on the Invoice data source.
Filter to include only Posted invoices and extract by Invoice Date using the same date range that you used for the AR report. Once you retrieve the report, sum up the Invoice Amount column to validate that it matches the Invoice total on the AR report.
Option 3: Invoice CSV Extract
Download the invoice CSV extract by going to Reporting > Data Exports > Exports > Invoice CSV.
Select only Posted invoices and use the same date range (for Invoice Date) that you used for the AR report. Create a pivot table on unique invoice #s and sum the invoice amount.

Payment Totals
Please note there are two types of payments: payments applied to an invoice (invoice payment) and payments applied to a credit balance (credit balance payment). These reports provide you the totals for payments applied to invoices only.
Option 1: Z-Reporting "Invoice Payments Processed" Report
Go to Reporting > Reporting > Reporting and select this report from the Report List. Run this report using the same date range you used for the AR report. Verify that the total invoice payment amount matches your AR report.
Option 2: Payments CSV Extract
Download the payments CSV extract by going to Billing > Reports > Exports > Payments CSV.
Select only Processed Payments and extract by Payment Date range using the same dates as in your AR report. Once you extract the report, filter on Applied Payment Type (column AA) so that your report only includes Invoice Payments. Sum the Applied Amount and verify that it matches your AR report.
Option 3: Invoice Payments Data Sources Report
Go to Billing > Reports > Data Sources and run a report on the Invoice payments data source. Include the fields you require, such as:
- Invoice Date
- Invoice Number
- Payment Amount
- Payment Effective Date
- Payment Number
- Payment Status
- Payment Type
- Payment Method Type
- Applied Credit Balance Amount (note: this is the Credit Balance Payment)
- Account Number
- Account Name
The Payment Effective should be the same date range you used for the AR report. Once you retrieve the report, sum up the Invoice payment amount column and make sure the total matches the AR report.
Refund Totals
Option 1: Z-Analytics "Refunds Processed Successfully" Report
Go to Reporting > Reporting > Reporting and select this report from the Report List. Run this report using the same date range you used for the AR report. Also, when running the report, you will be prompted to choose one or more Applied Refund Types. You should select only the Payment as the Applied Payment Type. Verify that the total refund amount matches your AR report.
Option 2: Refunds Data Sources Report
Go to Reporting > Data Exports > Data Sources and run a report on the Refunds data source. Include the fields you require, such as:
- Refund Amount
- Refund Method Type
- Refund Date
- Refund Source Type
- Refund Status
- Refund Type
Filter to include only Refund Status = Processed and Refund Source Type = Payment.
The refund date should be the same date range you used for the AR report. Once you retrieve the report, sum up the Refund Amount column and make sure that total matches the AR report.
Option 3: Refunds CSV Export
Download the refunds CSV extract by going to Payment Operations > Refunds (top navigation) > Export Refunds (under Action, on the right). Filter the report or delete records so that the report:
- Includes only Refund Status (column S) = Processed
- Includes only refunds with the Effective Date (column C) which matches the date range for the AR report.
- Includes Applied Refund Type (column I) = Payment Refund
Sum up the Applied Amount (column F) to make sure it matches the refund total amount on the AR report.
Invoice Adjustment (Credit) Totals
Invoice Adjustment is deprecated on Production.
Option 1: Invoice Adjustments CSV Export
Download the Invoice adjustments CSV extract by going to Billing Operations > Invoice Adjustments, then select Export Invoice Adjustments (under Action, on the right). Filter the report or delete records so that the report:
- Includes only adjustments with the Adjustment Date (column C) which matches the date range for the AR report.
- Includes Adjustment Type (column D) = Credit
- Includes only Invoice Adjustment Status (column G) = Processed
Sum up the Total Amount (column H) to make sure it matches the invoice adjustment (credit) total amount on the AR report.
Option 2: Invoice Adjustments Data Source Report
Go to Z-Reporting > Data Exports > Data Sources and run a report on the Invoice Adjustments data source. Include the fields you require, such as:
- Adjustment Date
- Adjustment Number
- Amount
- Type
- Accounting Code
- Invoice Number
- Status
- Created Date
Filter the report to include only Invoice Adjustment Status = Processed and Invoice Adjustment Type = Credit.
The invoice adjustment date should be the same date range you used for the AR report. Once you retrieve the report, sum up the Invoice Adjustment Amount column and make sure the total matches the AR report.
Option 3: Z-Reporting "Invoice Adjustments Processed" Report
Go to Reporting > Reporting and select this report from the Report List. Run this report using the same date range you used for the AR report.
Verify that the total Invoice Adjustment Amount matches the total on your AR report.
Invoice Adjustment (Charge) Totals
Invoice Adjustment is deprecated on Production.
Follow the same steps for Invoice Adjustment (Credit) with one exception: instead of filtering your reports to include the Adjustment Type of Credit, you will now exclude Credit and include Charge.
Credit Balance Increase (Payment) Totals
Option 1: Payments CSV Extract
You can follow the same instructions for Payments with one exception: filter on Credit Balance payments instead of Invoice Payments.
Download the payments CSV extract by going to Reporting > Data Exports > Exports > Payments CSV. Select only Processed Payments and extract by Payment Date range using the same dates as in your AR report. Once you extract the report, filter on Applied Payment Type (column AA) so that your report only includes Credit Balance Payments. Sum the Applied Amount and verify that it matches your AR report.
Option 2: Credit Balance Transactions CSV Extract
Download the credit balance CSV extract by going to Payments > Payment Operations > Payments, then select Export Credit Balance Transactions (under Action, on the right).
Filter the report or delete records so that the report:
- Includes only credit balance transactions with Adjustment Date (column C) which matches the date range for the AR report.
- Includes only Status (column G) = Processed
- Includes only Applied Credit Balance Type (column H) = Credit Balance Payment
Once you have filtered the report so it includes only the transactions you need, sum up the Amount (column E) and make sure the total matches the AR report.
Credit Balance Decrease (Refund) Totals
Option 1: Credit Balance Transactions CSV Extract
You can follow the same instructions for the Credit Balance Increase (Payment) with one exception: you will filter on Credit Balance Refund instead of Credit Balance Payment.
Download the credit balance CSV extract by going to Payments > Payment Operations > Payments, then select Export Credit Balance Transactions (under Action on the right navigation panel).
Filter the report or delete records so that the report:
- Includes only credit balance transactions with Adjustment Date (column C) which matches the date range for the AR report.
- Includes only Status (column G) = Processed
- Includes only Applied Credit Balance Type (column H) = Credit Balance Refund
Once you have filtered the report so it includes only the transactions you need, sum up the Amount (column E) and make sure thet total matches the AR report.
Option 2: Refunds CSV Extract
You can follow the same instructions for the Refunds with one exception: you will filter on Credit Balance Refund instead of Payment Refund.
Download the refunds CSV extract by going to Payment Operations > Refunds, then select Export Refunds (under Action on the right). Filter the report or delete records so that the report:
- Includes only refund with the Effective Date (column C) which matches the date range for the AR report.
- Includes Applied Refund Type (column I) = Credit Balance Refund
- Includes only Refund Status (column S) = Processed
Sum up the Applied Amount (column F) to make sure it matches the refund total amount on the AR report.
Credit Balance Increase (Invoice) Totals
Download the credit balance CSV extract by going to Payments > Payment Operations > Payments, then select Export Credit Balance Transactions (under Action, on the right).
Filter the report or delete records so that the report:
- Includes only credit balance transactions with Adjustment Date (column C) which matches the date range for the AR report.
- Includes Adjustment Type (column D) = Increase
- Includes only Status (column G) = Processed
- Includes only Applied Credit Balance Type (column H) = Invoice Applied
Once you have filtered the report so it includes only the transactions you need, sum up the Amount (column E) and make sure the total matches the AR report
Credit Balance Decrease (Invoice) Totals
You can follow the same instructions for the Credit Balance Increase (Invoice) with one exception: you will filter on the Adjustment type Decrease instead of Increase.
Here are the instructions:
Download the credit balance CSV extract by going to Payments > Payment Operations > Payments, then select Export Credit Balance Transactions (under Action, on the right).
Filter the report or delete records so that the report:
- Includes only credit balance transactions with Adjustment Date (column C) which matches the date range for the AR report.
- Includes Adjustment Type (column D) = Decrease
- Includes only Status (column G) = Processed
- Includes only Applied Credit Balance Type (column H) = Invoice Applied
Once you have filtered the report so it includes only the transactions you need, sum up the Amount (column E) and make sure thet total matches the AR report.