Configure headers and footers in HTML templates
The HTML Templates feature is generally available for invoices as of Zuora Release 2022.02.R2, and for credit and debit memos as of Zuora Release 2022.05.R1.
After an HTML template is created, you can configure a header and footer for the HTML template in the following approaches:
- Using predefined headers and footers
- Configuring a header and footer with a predefined page number
- Configuring a header and footer with a customizable page number
Use predefined headers and footers
To use the predefined header and footer in an HTML template through the Zuora UI, perform the following steps:
-
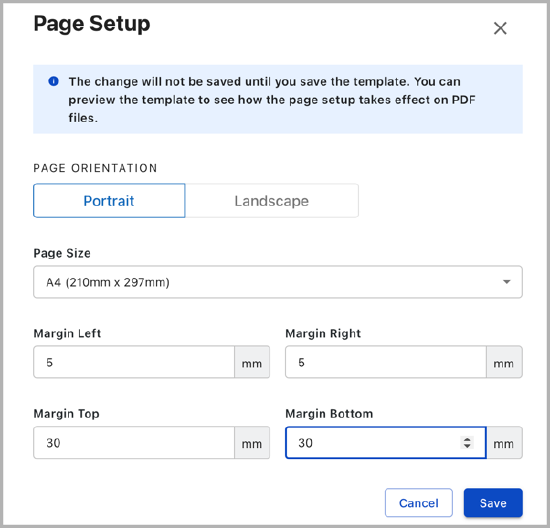
Follow the steps in Configure page setup for HTML templates to set the top and bottom margins to have space to add a header and footer.
The following image shows how the header and footer work with the content within the whole page, given the page size is A4 (210mm x 297mm), left margin is 5 mm, right margin is 5 mm, top margin is 30 mm, and bottom margin is 30 mm:
-
In the Blocks tab, navigate to Header > All to see all the predefined headers.
-
Drag one of the predefined headers into the HTML template, and place it at the top of the HTML template.
-
In the HTML template, click the header Row block. You can add additional columns if the default columns cannot meet your needs.
-
In the header Row block, modify the content for each column.
For example, you can drag an image component to add your company logo, or update the text to add the detailed addresses for your company. -
Follow the same steps to configure a footer for the template.
Configure headers and footers with predefined page numbers
To add a predefined page number into a header or footer through the Zuora UI, perform the following steps:
-
Follow the steps in Configure page setup for HTML templates, set the top and bottom margins to have space to add a header and footer.
For example, you can set the page size to A4 (210 mm x 297 mm), left margin to 5 mm, right margin to 5 mm, top margin to 30mm, and bottom margin to 5 mm. -
In the Blocks tab, navigate to Header > All to see all the predefined headers.
-
Drag one of the predefined headers into the HTML template and place it at the top of the HTML template.
For example, the predefined header contains the first column to place the company logo, the second column with blank content, and the third column to place the company address.

-
In the HTML template, click the header Row block and modify the content for each column.
For example, you can drag an image component to add your company logo, and update the text in the third column. -
In the Content tab, drag the predefined Page Number component into the HTML template, and place it into the third column of the header Row block.

-
In the HTML template, click the Page Number component.
The Content panel is displayed on the right of the template editor. -
In the Content panel, configure the following information:
-
In the Page Number section, configure the text color, background color, content alignment, font family, font size, padding, and number option.
Note: The predefined Page Number component only supports the texts "Page" and "of" in English. If you want to use another language for the texts "Page" and "of", see Configure headers and footers with customizable page numbers. -
Configure the container padding for the Page Number component in the General section.
-
-
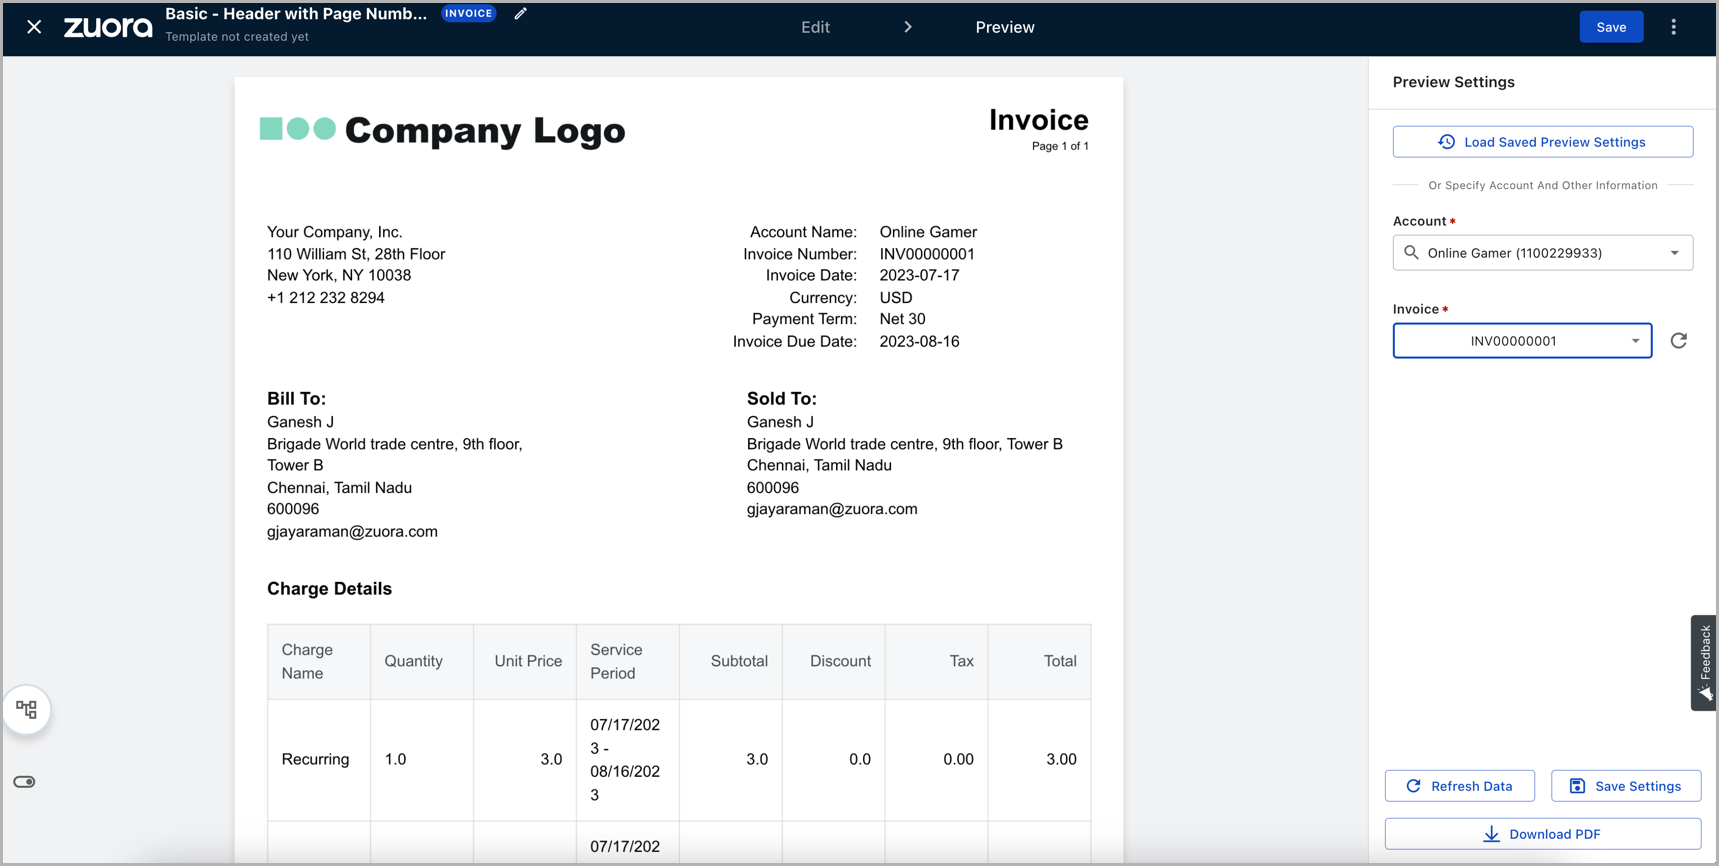
In Preview mode, select an account and a billing document to preview the corresponding PDF file online.
The preview PDF file displays the configured header with a page number.
-
Follow the same steps to configure a footer with a predefined page number.
Configure headers and footers with customizable page numbers
To add a customizable page number into a header or footer through the Zuora UI, perform the following steps:
-
Follow the steps in Configure page setup for HTML templates set the top and bottom margins to have space to add a header and footer.
For example, you can set the page size to A4 (210 mm x 297 mm), left margin to 5 mm, right margin to 5 mm, top margin to 30 mm, and bottom margin to 30 mm. -
In the Blocks tab, navigate to Header > All to see all the predefined headers.
-
Drag one of the predefined headers into the HTML template, and place it at the top of the HTML template.
For example, the predefined header contains one column with a customizable Page Number component.
-
In the HTML template, click the header Row block, add two more columns, and then modify the content for each column.
For example, you can drag an image component to add your company logo to one column and update the text in the third column. -
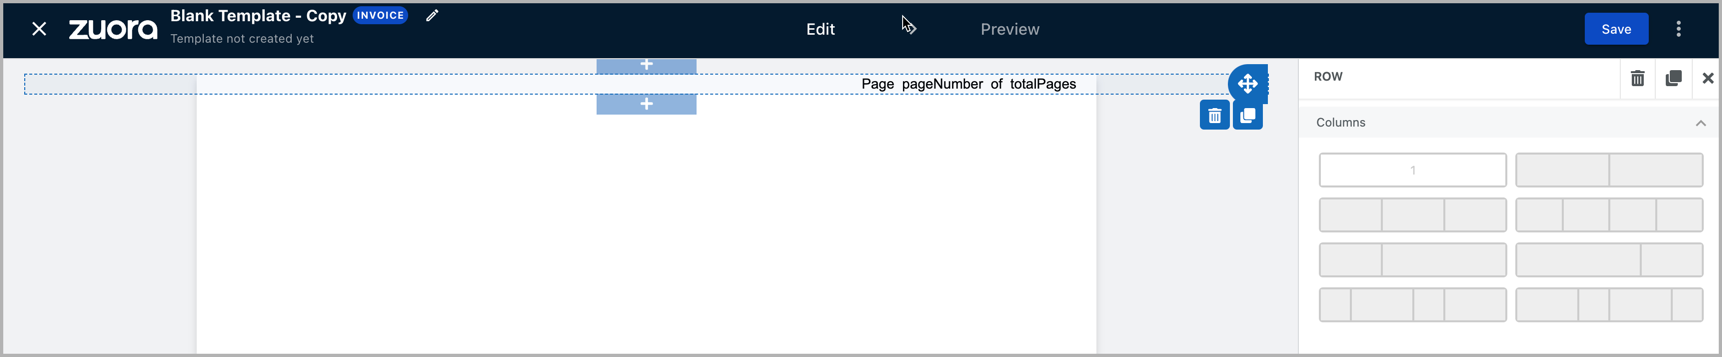
In the HTML template, click the header Row block, and then click the customizable Page Number component.
You can see the HTML source code as follows:<!- This section is to customise the header and footer by writing custom HTML. Note: Styles must be inline string in the style attribute instead of using classes here. -> <div style="font-size:14px;padding:0px 20px;color:#000000;display:flex;justify-content:flex-end;"> <span>Page </span> <!- The pageNumber will be replaced by the real page number here-> <span class="pageNumber">pageNumber</span> <span> of </span> <!- The totalPages will be replaced by the real nubmer of total pages here-> <span class="totalPages">totalPages</span> </div>
-
In the HTML source code of the customizable Page Number component, replace the texts "Page" and "of" with another language.
You can also modify the page number style by changing the font size, font color, font family, and so on. See HTML Tutorial for more information. The HTML source code is updated as follows:<<!- This section is to customise the header and footer by writing custom HTML. Note: Styles must be inline string in the style attribute instead of using classes here. -> <div style="font-size:12px;padding:0px 20px;color:#000000;font-family:Arial;display:flex;justify-content:flex-end;"> <span>Page </span> <!- The pageNumber will be replaced by the real page number here-> <span class="pageNumber">pageNumber</span> <span> de </span> <!- The totalPages will be replaced by the real number of total pages here-> <span class="totalPages">totalPages</span> </div>
-
In the HTML template, click the customizable Page Number component.
The Content panel is displayed on the right of the template editor. In the General section of the Content panel, you can configure the padding for the Page Number component. -
In the HTML template, view the information in the header Row block as follows.
Facture means "Invoice" in French, Page means "Page" in English, and de means "of" in French. -
In Preview mode, select an account and an invoice to preview the corresponding invoice PDF file online.
The preview PDF file displays the configured header with a page number. -
Follow the same steps to configure a footer with a customizable page number.
Restrictions and limitations
When configuring headers and footers in HTML templates, keep the following restrictions and limitations in mind:
- An HTML template can only contain one header Row block and one footer Row block.
- You can only place the Page Number component into the header Row block, or the footer Row block. If a Page Number component is included in Row blocks other than the header or footer Row block, it cannot generate any page number.
- You have to adjust the top and bottom margins in the page setup to display the header and footer on PDF files, for example, setting the top margin to 30 mm and the bottom margin to 30 mm. You can follow the steps in Configure page setup for HTML templates to adjust the margins based on the size of the header and footer.
- You may face harder or footer alignment issues If you have not updated your browser, such as Google Chrome, to the latest one. To fix this, adjust the font size that is configured in the header or footer. Alternatively, use the following code by changing the zoom value as per your template:
- If you encounter any alignment issues in the header or footer, modify the font size settings to maintain consistency with your previously configured templates. Alternatively, use the following code to adjust the zoom value based on your template requirements. The provided zoom value (1.5) is a sample; you must adjust the ratio in your template as necessary.
.page_footer {
 zoom: 1.5 /* This is a sample number; adjust the ratio as needed. */
 }
 .page_header {
  zoom: 1.5 /* This is a sample number; adjust the ratio as needed. */
 }