Component Registration
This article explains component registration process in Zuora Quotes.
Starting with the Q1 2014 release of Zuora Quotes, you can register your own custom components and dynamically override or extend plugin implementation of existing components.
The component registration feature allows you to focus on the plugin development to apply relevant business logic without the routine overhead of preparing and re-deploying code changes. You can dynamically change the plugin implementation for registered components at runtime without having to redeploy updated code to production.
In order to use the component registration feature, you must be able to create and edit Apex classes and deploy them to your Salesforce organization.
This setting is effective exclusively in legacy CPQ and does not apply to CPQ X.
Access the Component Registration Page
To access the Component Registration page:
- Click the Zuora Config tab.
- Click Component Registration. The Component Registration page appears.

Edit a Registered Component
You can override or extend an existing plugin for a component. See Component Registration Examples for code sample to override and extend plugins. The steps to edit a component on the Component Registration page to override or extend a plugin are the same.
To edit a registered component:
- In the Registered Component(s) section of the Component Registration page, click Edit for the component you want to edit.
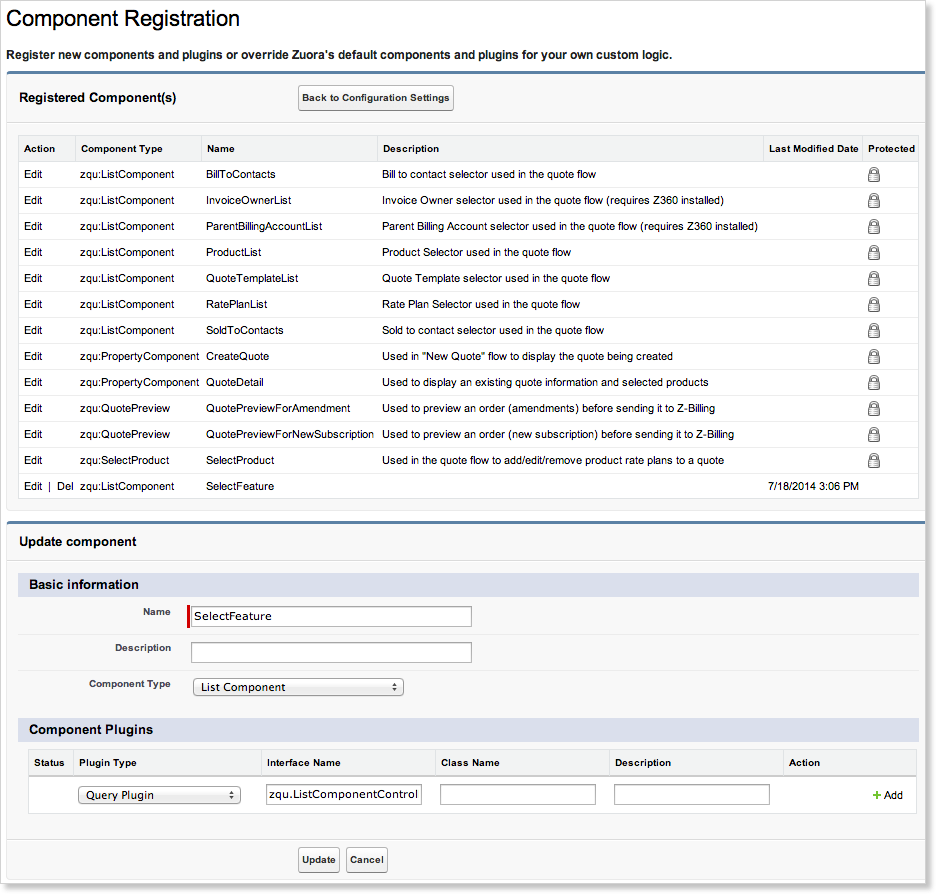
- In the Component Plugins section, update the following fields:
- Class Name: Enter the new plugin class name to override or extend the current plugin.
- Description: Enter an optional description of this plugin.
- For custom components, you can add additional plugins. Click +Add to add another plugin.
- Click Update.
Restore a Component to the Default Setting
After making changes to a component, you can restore component to the default setting if it is a standard component.
To restore a registered component:
- In the Registered Component(s) section of the Component Registration page, click Edit for the component you want to restore.
- In the Update component section, click Restore to Defaults.
- Click Confirm to restore.
Delete a Registered Custom Component
You can delete custom component. The standard components are protected and cannot be deleted. The protected components are marked with a lock icon in the Protected field in the component list.
To delete a registered component:
- In the Registered Component(s) section of the Component Registration page, click Del for the component you want to delete.
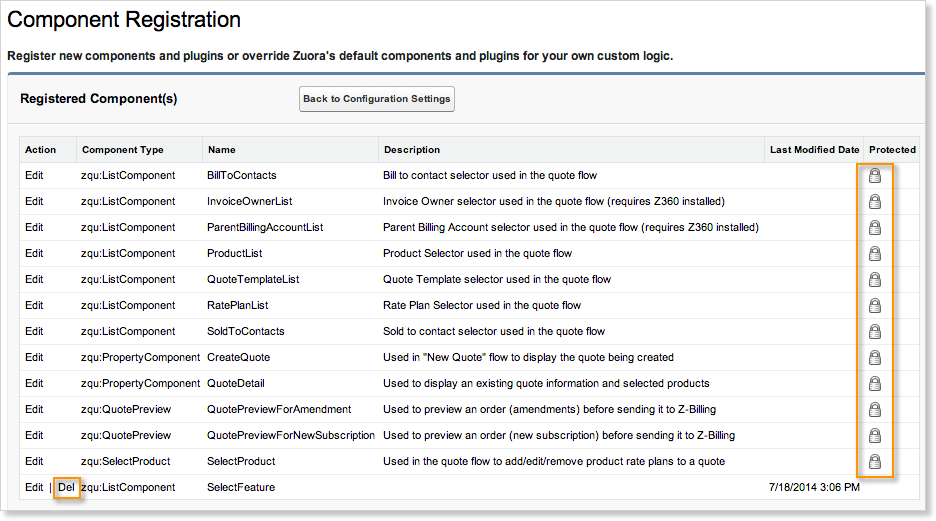
- Click Confirm to delete the component.
Register a New Component
To register a new custom component:
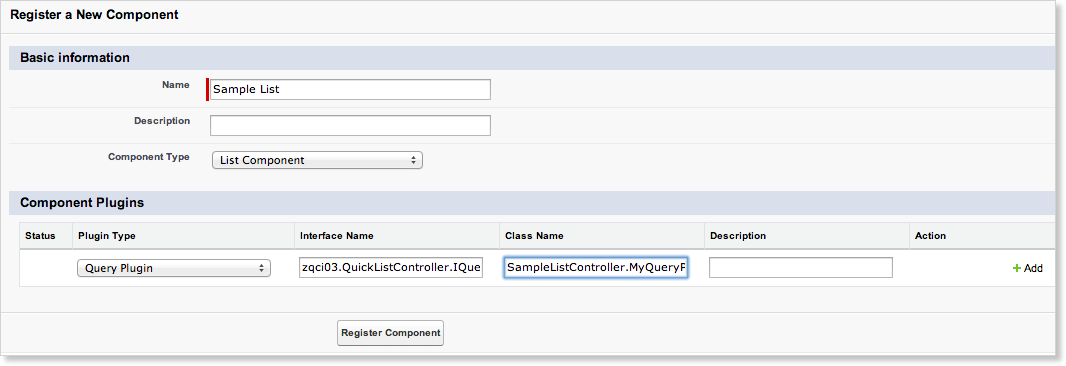
- In the Register a new component section, fill in the following fields:
- Name: Enter the name of the new component. Each component must have a unique alphanumeric name. The name can contain up to 49 characters.
- Description: Enter an optional description.
- Component Type: Click and select the component type of this new component.
- Fill in the fields in the Component Plugins section.
- Plugin Type: Click and select a plugin type available for the component type.
- Interface Name: When you select a plugin type, the default interface name is automatically filled in.
- Class Name: Enter the class name of this plugin.
- Click +Add to add another plugin. You can then add one or more plugins associated with custom components.
- Click Register Component.
Import or Export Components
You can download a JSON file of your registered components, including overridden plugins for the standard components. You can then import this file in another Salesforce organization to customize the same components. This is an effective and less error prone way to propagate custom components and overridden plugins.
To export component definitions to a file:
- In the Import/Export Components section, click Export to File. Component definitions are downloaded to a file that is named with the current date and time,
components-year-month-date-hour-minute-second.json.
To import components file:
- In the Import/Export Components section, click Choose File and select the file you want to import.
- Click Import from File.