Example Implementation
The example implementation covers the following:
- How to build the rule in the Zephr Admin Console
- How to test the rule
- How to augment your decision data
We refer to the following HTML page in the example:
Note: You might need to change the version used in the example page to match the latest version number.
<HTML>
    <head>
        <script src="https://assets.zephr.com/zephr-browser/1.3.11/zephr-browser.umd.js"></script>
        <script>
          let baseUrl = 'https://v4-demo-chris-my-site.cdn.demo.zephr.com';
          document.addEventListener('DOMContentLoaded', (event) => {
             zephrBrowser.run(baseUrl);
          });
       </script>
    </head>
    <body>
       <h1>Zephr JS test</h1>
       <div class="private">
          Don't look here!
       </div>
    </body>
</html>
Build the Rule
When you have added the JavaScript to a site, as shown in the example page, you can configure a feature rule.
To configure a feature rule in the Admin console, complete the following steps:
- Select Products from the main menu
- Select Features from the menu options
The Features screen displays.
- Select the Add a Feature button
The Add a Feature screen displays.
- Complete the Add a Feature screen as follows:
- Enter a name for the Feature in the Title text box
- Optionally, add a description of the feature, using no more than 100 characters, in the Description text box
- Select the HTML radio button from the Types of Integration options
- Select the Continue button to create the Feature
The Developer Interface screen displays.
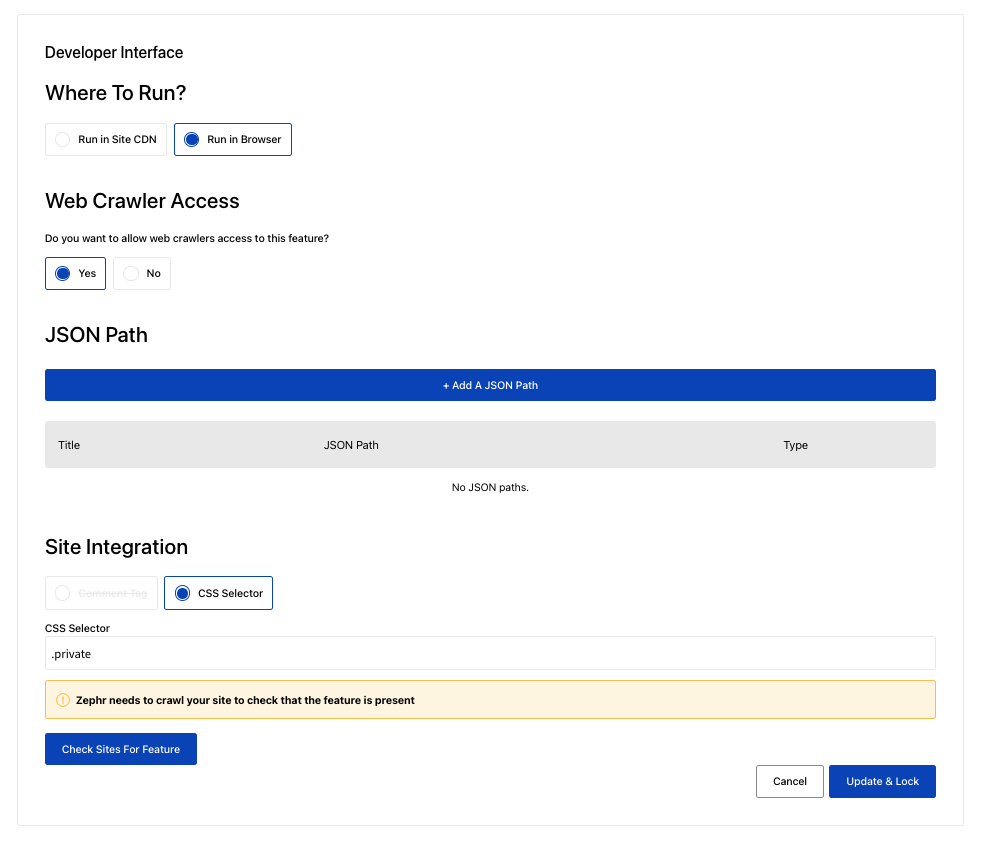
- Complete the Developer Interface section to configure the type of integration as follows:
- Select the Run In Browser radio button from the Where to Run options
- Enter a CSS Selector for the feature in the CSS Selector text box, as illustrated below:
-
Define JSON paths that could be used to make decisions in the rule. The JSON paths should match the JSON object that is passed as custom data. Click Add A JSON Path to add a JSON path. Available data types are String, Number, Boolean, and DateTime. You can later create Custom Data decisions based on the JSON Path defined here.
- Select the Update & Lock button. Selecting the Cancel button closes and locks the Developer Interface without making changes
Note: If you return to an existing feature, the Developer Interface section is locked by default and located at the bottom of the page. You can unlock and open the Developer Interface section by clicking inside the border.
The rules canvas section displays.
- Create a basic rule to test the integration as follows:
- By default, the Anonymous user journey is selected, select Outcomes from the decision bar
- Select Add Outcome from the listed decision points
The Add an Outcome screen displays.
- Enter a name for your Outcome in the Title text box
- Optionally, add a description of the outcome in the Description text box
- Select the Add a New Form Or Custom Component Block button
- Select the Add Custom Component Block button
The Custom Content Block dialog box displays.
- Enter a name for the custom content block in the Title text box
- Enter a message in the large text box, as illustrated below:
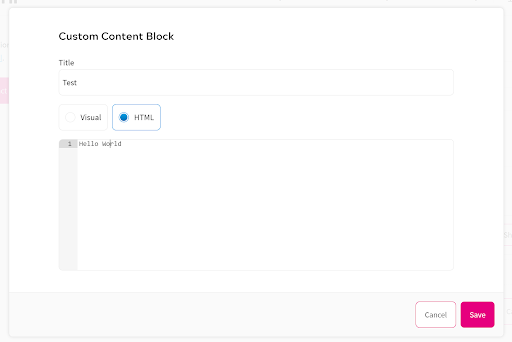
- Select the Save button
The Add an Outcome screen displays.
- Select the Save button to save your Outcome
Your new outcome is added to the palette, with the title you entered.
- Drag your outcome to the rules canvas
- Connect your outcome to the Page View node
- Scroll to the bottom of the screen and select the up arrow next to the Save button
- Select Save and Publish
Test the Rule
To test the rule, complete the following steps:
- Open the page you created in a browser
For example, the provided example page.
- Open the Console log
To open the console log, complete the following steps:
- Right click in the browser
The context menu for the browser displays.
- Select Inspect from the context menu options
The Inspection frame opens.
- Select Console from the main menu of the Inspection frame
The Console log displays in the Inspection frame.
- Right click in the browser
- Refresh your browser
The console log updates as illustrated below:

Augment Your Decision Data
With this integration, you can add a custom data argument in the run command. This can be used in a Zephr feature to determine a customer’s journey.
The following example determines whether a user has Ad Block running on their browser:
document.addEventListener('DOMContentLoaded', (event) => {
zephrBrowser.run({
  cdnApi: 'https://{zephr-cdn-url}',
  customData: {
    hasAdBlock: true
  }
});
        });
As you can see, the user does have Ad Block running.
This information is passed to the custom object. You can use the Custom Data Node in your Zephr Feature Builder to make a decision based on the response as follows:
- Navigate to the relevant feature
- Select Content from the decision bar
- Drag the Custom Data decision point to the rules canvas
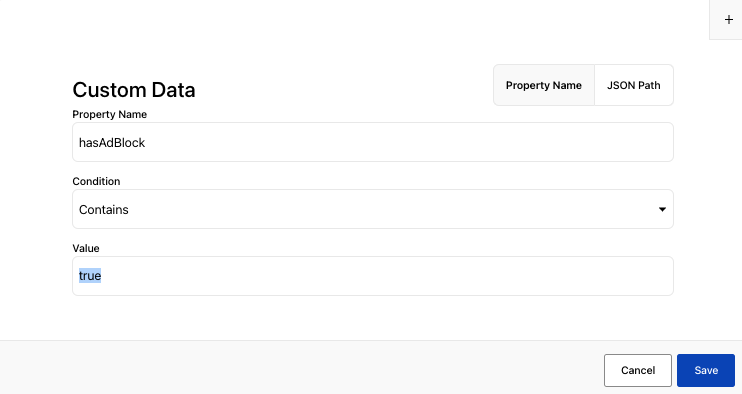
The Custom Data dialog box displays.
- Select the object that you want to query from the Property Name options
In our example, we select hasAdBlock.
- Select the condition from the Condition drop-down menu
In our example, we select Contains.
- Enter the value to search for in the Value text box
In our example, we enter true.
The Custom Data dialog box with our selections is as illustrated below:
- Select the Save button
Your rule now includes branches for the following user journeys:
- Using Ad Block
- Not using Ad Block
Common Custom Data Objects
You might want to make decisions based on whether a user has an Incognito Window, as well as whether they are running Ad Block.
You can use the following examples to pass this information to a custom data object for use in a browser-side rule: