Access
The available Access decision nodes depend on whether you are defining a rule for an anonymous, registered or customer user type.
For anonymous users, the only Access decision nodes are Trials and Gift URL. These nodes are also available for registered and customer user types.
For all user types, if you have defined B2B on-premises access as described in the Premises Options topic, the On-Premises decision node is available.
For registered and customer user types, the following decision nodes are also available:
- Feature
- Has Product
- Churned
- Renewal
Trials
Trials allow the end user to access the feature for a defined number of views over a set period (view-based trials), or for a defined duration of time (time-based trials).
You can define basic or advanced view-based trials. By default, the options for basic trials display.
You can use the Trials node to set up the following:
- Basic trials for a specific user type in a single rule
- Advanced trials for a specific user type in a single rule
- Basic or advanced trials across anonymous and/or registered and/or customer user types, and/or across rules
- Basic or advanced trials across anonymous and/or registered and/or customer user types, and/or across rule implementation types; for example across the rules built for your website and app
By default, trials are created for a specific user type in a single rule. If you use multiple Trials decision nodes in your rules canvas, the same consumption tracker is used by default. Note that the same consumption tracker can also be used in different trials across user types or features.
If you want to use different consumption trackers for each trial make sure that you select the Consumption Tracker button and define the tracker you want to use.
Note: If you redefine your Trials decision node, the counters are retained.
You can also use the Legacy Trials decision node, which is located under the Advanced segment title. Zephyr recommends that you use the Trials node, located under the Access segment title, for flexibility and more control over your trials.
What is a Consumption Tracker?
A consumption tracker allows you to follow the features that your end users encounter
You can use the data layer to export this information for further analysis of their use of your site and identify the areas that produce the most engagement. You can then use the resulting information to improve your end user experiences, which results in improved end user engagement and retention.
You can use the same consumption tracker across different features and rule implementations.
For example, you can use the same consumption tracker in each user type to follow your end users through their journey from an anonymous user, through registration to customer; in both your website, using an HTML feature, and your app, using an SDK feature.
For further information on creating trials, see the Example Trials topic.
Define a Basic Trial
Basic trials grant access for a specific period.
Define the number of views and period in the Limit of options as follows:
- Enter the number of views to allow in the first field. By default, this is set to 10
- Select whether the number of views is measured in unique content or page views from the first drop-down menu. The options are Unique Article and Page view(s). By default, Unique Article is selected
- Select the period for which to apply the limit from the second drop-down menu. The options are In a lifetime, In a calendar, and In the last. By default, In a lifetime is selected
- If you select In a calendar, a further drop-down menu displays. Select the calendar period to use from the menu options. The options are Week, Month and Day. By default, Week is selected
- If you select In the last, a further field displays. Enter the period in days for which to count the views in the field. By default, this is set to 30
Notes:
- A calendar week starts on Monday
- A calendar month starts on the 1st of the month
- The In the last option defines a rolling period
- A lifetime is the length of the session for anonymous users, and one year for other user types
By default, the default tracker for the specific user type is used, and the tracker applies only to the current feature. If this is all you require, you can save the Trial without setting any tracker options. If you want to use the same tracker across user types or features, select the Consumption Tracker drop-down. Select the tracker to use from the Consumption Tracker radio buttons. By default, the Use an Existing Tracker radio button is selected, and the default tracker for the user type is used. To use a new tracker, select the Create a New Tracker radio button and enter a name for the tracker in the Tracker Name text box. If you have previously created a tracker in another rule, which you also want to use in this rule, select the Use an Existing Tracker and select the tracker to apply in any of the following ways:
- Enter the name of the tracker in the text box. As you type, the matching options are listed under the text box. Select the tracker you require from the list
- Select the Or browse all trackers link. All existing trackers are listed. Select the tracker you require from the list
If you want to use a different output for a specific number of remaining views, select the Mid Trial Experiences drop-down. For example, if you want to encourage anonymous users with a certain number of views remaining to register, you can define a path that is triggered at the specified number of remaining views and displays a call to register now. Select the Add A Remaining View button, a further field displays. Enter the count at which you want to add an output in the Remaining Count text box. You can add as many Remaining Count outputs as required by repeating the steps.
If you want to report the use of the trial in the Data Layer, select the Data Layer drop-down. Select the Report trial usage in Data Layer toggle, further fields display. Enter the data layer key for the credits used in the Trial credits used data layer key text box. Enter the credits remaining in the Trial credits remaining data layer key text box.
Note: The data layer keys determine the information written to the data layer, in the format of key: value. Zephr recommends that you develop a custom naming convention. For example if you have a trial offering registered users ten views each month, you could name this key registeredMonthlyTrialCreditsUsed.
Define an Advanced Trial
Advanced trials grant access for a specific period with an associated maximum number of views. Advanced trials also provide further options for reporting the used and remaining maximum credits in the data layer.
Define the number of views and period in the Limit of options as follows:
- Enter the number of views to allow in the first field. By default, this is set to 10
- Select whether the number of views is measured in unique content or page views from the first drop-down menu. The options are Unique Article and Page view(s). By default, Unique Article is selected
- Select the period for which to apply the limit from the second drop-down menu. The options are In a lifetime, In a calendar, and In the last. By default, In a lifetime is selected
- If you select In a calendar, a further drop-down menu displays. Select the calendar period to use from the menu options. The options are Week, Month and Day. By default, Week is selected
- If you select In the last, a further field displays. Enter the period in days for which to count the views in the field. By default, this is set to 30
Notes:
- A calendar week starts on Monday
- A calendar month starts on the 1st of the month
- The In the last option defines a rolling period
- A lifetime is the length of the session for anonymous users, and one year for other user types
If you want to limit the views to a certain number within a period, enter the maximum number of views to allow in the With a maximum of field. Select the period in which to apply the maximum use limit from the drop-down menu. The options are Day, Week, Month, and Lifetime.
By default, the default tracker for the specific user type is used, and the tracker applies only to the current feature. If this is all you require, you can save the Trial without setting any tracker options. If you want to use the same tracker across user types or features, select the Consumption Tracker drop-down. Select the tracker to use from the Consumption Tracker radio buttons. By default, the Use an Existing Tracker radio button is selected, and the default tracker for the user type is used. To use a new tracker, select the Create a New Tracker radio button and enter a name for the tracker in the Tracker Name text box. If you have previously created a tracker in another rule, which you also want to use in this rule, select the Use an Existing Tracker and select the tracker to apply in any of the following ways:
- Enter the name of the tracker in the text box. As you type, the matching options are listed under the text box. Select the tracker you require from the list
- Select the Or browse all trackers link. All existing trackers are listed. Select the tracker you require from the list
If you want to use a different output for a specific number of remaining views, select the Mid Trial Experiences drop-down. For example, if you want to encourage anonymous users with a certain number of views remaining to register, you can define a path that is triggered at the specified number of remaining views and displays a call to register now. Select the Add A Remaining View button, a further field displays. Enter the count at which you want to add an output in the Remaining Count text box. You can add as many Remaining Count outputs as required by repeating the steps.
If you want to report the use of the trial in the Data Layer, select the Data Layer drop-down. Select the Report trial usage in Data Layer toggle, further fields display. Enter the data layer key for the credits used in the Trial credits used data layer key text box. Enter the credits remaining in the Trial credits remaining data layer key text box. Enter the data layer key for the maximum credits used in the Max credits used data layer key text box. Enter the maximum credits remaining in the Max credits remaining data layer key text box.
Note: The data layer keys determine the information written to the data layer, in the format of key: value. Zephr recommends that you develop a custom naming convention. For example if you have a trial offering registered users ten views each month, you could name this key registeredMonthlyTrialCreditsUsed.
Define a Time-based Trial
Time-based trial allows you to give users trial access for a duration of time. A trial starts each time when the Trial node is hit.
Similar to view-based trials, the following are available for time-based trials:
- Use Trial Tracker to track the trials
- Define mid-trial experiences for end users
- Use Data Layer for reporting on trial data
You can use the time-based Trial node with the Registered Start decision node for registered users, or the Session Start decision node for anonymous users, to give users who registered or started a session after a specific time point a free trial for a certain period.
The screenshot below displays a simple rule that will give end users who registered after 12:00, 2023/08/01, a 10 days trial and show end users who registered before that time a paywall:
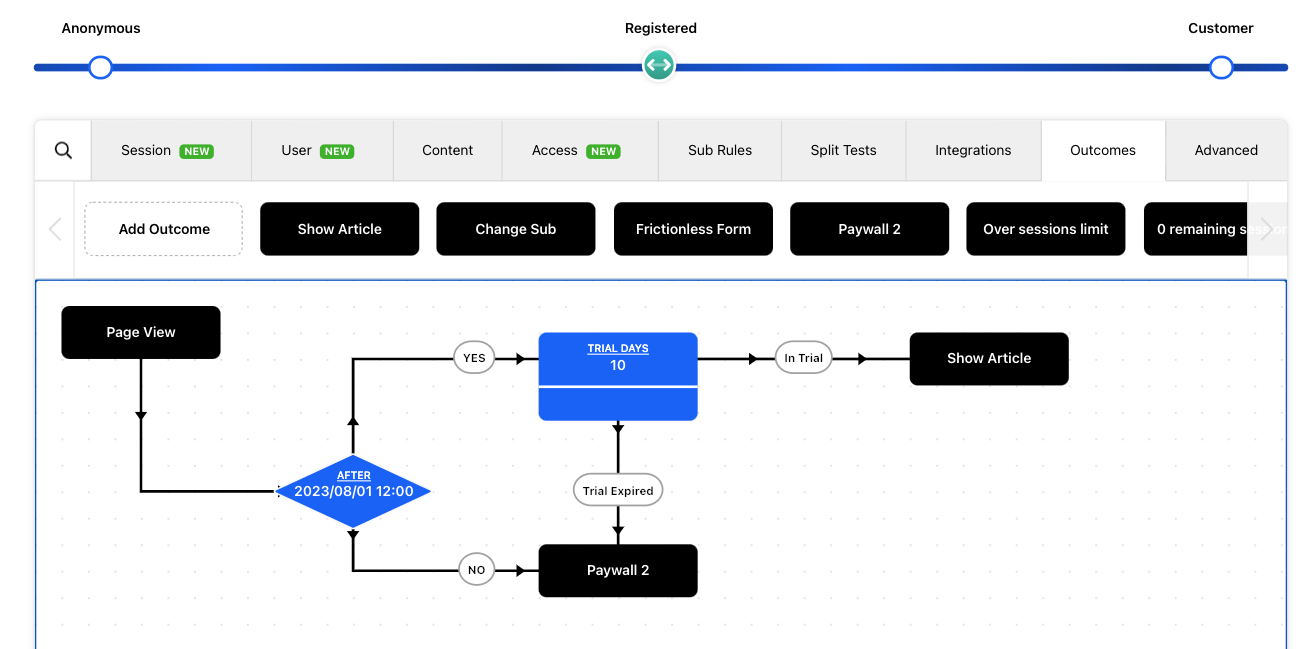
To configure a time-based trial node, take the following steps:
- On the top of the Rules Builder canvas, click Access and then drag the Trials node to the canvas
- Click Time at the top right corner to switch to configuration for the time-based trial
- Specify the duration of time for the trial
- Expand Trial Tracker to set the tracker for the trial. See What is a Consumption Tracker for more information about Consumption Tracker.
- If you want to use a different output for a specific number of remaining time units, select the Mid Trial Experiences drop-down.
- If you want to report the use of the trial in the Data Layer, select the Data Layer drop-down. Select the Report trial usage in Data Layer toggle, further fields display. For definitions of the data layer keys, see Measuring Zephr Trials in the Data Layer.
Gift URL
Use this decision node to define a decision based on whether the end user is accessing the page using a gift URL, for example, “https://<my-site>.com/<article>?gift=<my-gift-token>”.
An example use case is to set up a Gift URL node to allow the anonymous end users using a gift URL to access the page and display a registration form for users that don’t use the gift URL. Gifts can be created using the Create Gift public API.
Gifts can only be claimed by one session by accessing the relevant page and passing the gift token as a query parameter. Once a gift has been claimed, other sessions viewing the page with the same gift token will not be able to claim the gift, and the Gift URL decision node will evaluate to ‘false’.
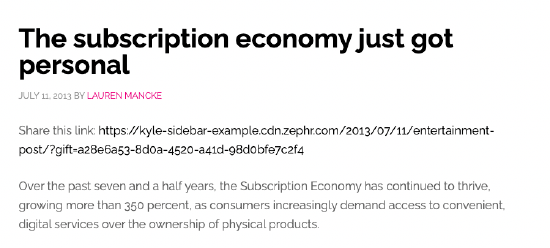
One example of this functionality is being able to offer a 'Share Article' button on pages of your website. When a registered user or customer is presented with this button and clicks it, a call will be made to the Create Gift public API and will be returned to the page. The user can share this link. 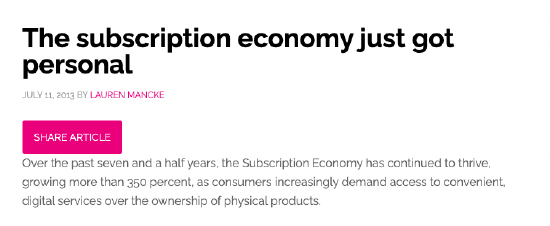
An example code is detailed below, which demonstrates this. The items in bold indicate where you should specify your own website and choose the location of the page response.
<button onclick="issueToken()">Share Article</button>
<script>
function issueToken() {
const xhr = new XMLHttpRequest();
xhr.open("POST", "https://kyle-sidebar-example.
On Premises
This decision node is only available if you have defined at least one account. If B2B on-premises access has not been configured, this decision node always follows the No path in your rule. For further information on configuring B2B on-premises access, see the Premises Options topic.
Use this decision node to define a decision based on the matching of on-premises IP addresses, and optionally the related tags, with the end user’s IP address from which the end user accesses your content.
Note: This decision node does not check whether the end user has an account, only if the IP address from which they access your content is linked to an account. This means, for example, that if a registered user accesses your site from a defined IP address, they are granted the related access, but if they login to their account from a different IP address, they are not granted this access.
Select the condition to apply from the Condition drop-down menu. The options are as follows:
- Is on-premisesSelect this to base the decision on whether the end user’s IP address matches any defined on-premises IP addresses.
- Premises has tagSelect this to base the decision on whether the tags associated with the account group match the end user’s IP address. A further field displays, enter the name of the tag to match in the Tag Name text box. As you type, a list of existing tags that match the entered characters displays under the text box, as illustrated below:
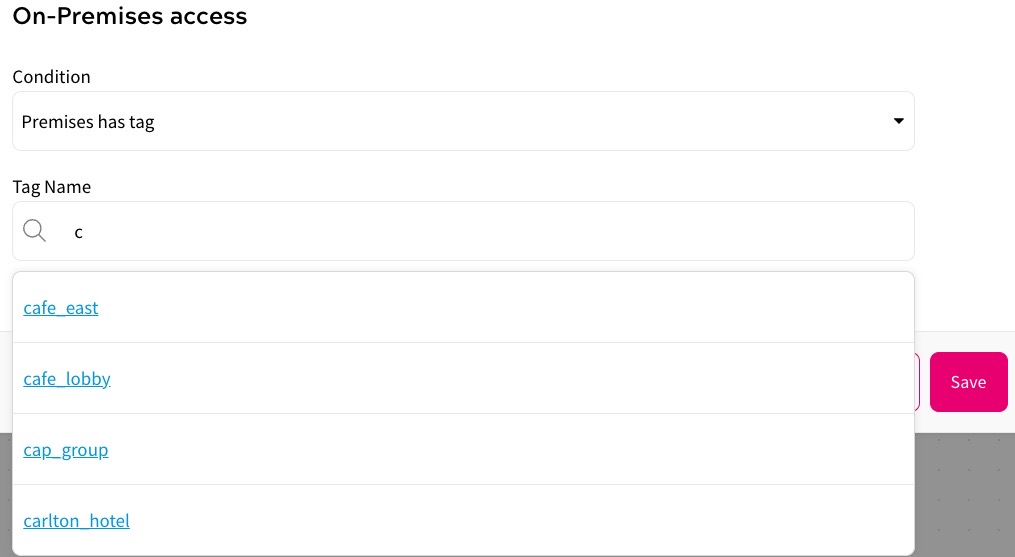
You can select a tag from those listed, or continue typing to create a new tag. If no suggestions display, no existing tag matches the characters you have entered.
Feature
Use this decision point to define a decision based on whether your user has a product grant that provides access to the selected feature.
Select the feature on which to base the decision from the User Feature drop-down menu.
Has Product
Use this decision point to define a decision based on whether your user has a product grant that provides access to the selected products.
Select the product on which to base the decision from the drop-down menu.
Churned
Use this decision point to target end users with a lapsed subscription. For example, you could use targeted offers and promotions to encourage them to re-subscribe.
Select the product to offer from the Product drop-down menu.
Enter the number of days after the end user has churned for which to offer the product from the Within the last text box.
Renewal
Use this decision point to target end users who are approaching the renewal date for their subscription. For example, you could use targeted offers and promotions to encourage them to buy a renewal in advance.
Note: As Zephr does not have access to the details of recurring payments, the Renewal decision node is only effective when used with one-off payments.
Select the product to offer from the Product drop-down menu.
Enter the number of days before the end of the current subscription from which to offer the product from the Within the next text box.