Split Tests
When setting up rules and user journeys on your website, it’s common to want to test alternate strategies for different segments of your audience. Zephr makes this easy with built-in split tests.
Split tests in Zephr allow you to create a range of test groups and apply a percentage based allocation between different groups within that test. Once created, test segments can be used as a Decision Point within a rule, allowing you to trial different transformations and user journeys.
Note: The available split tests must already have been defined.
Creating a Split Test Group
Split tests are managed under the Settings menu. To create a Test, navigate to Settings > Split Tests and then click Add Test.
Give your Test a Name – such as Registration Form Test – then click ‘Add a Group’ to set the number of cohorts you want available within your split test. Each new group will display below, with the option to customise the Group Names.
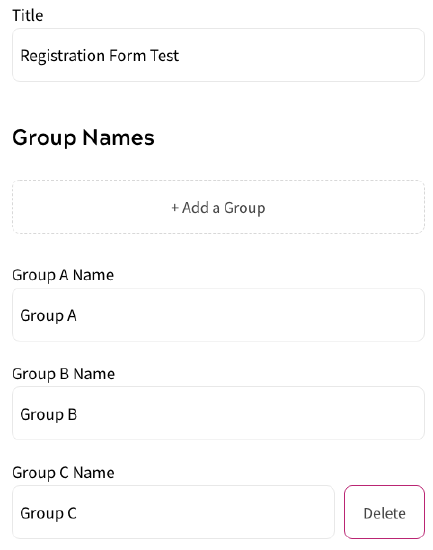
Once these are named, click Next.
On the next page, use the sliding scales to set the size for each group in your split test. This is the percentage of users who will fall into each of the groups named on the previous screen. These groups will be used within your Feature or Request Rule at a later point, and users will randomly be assigned into a group based upon the sample sizes you set.
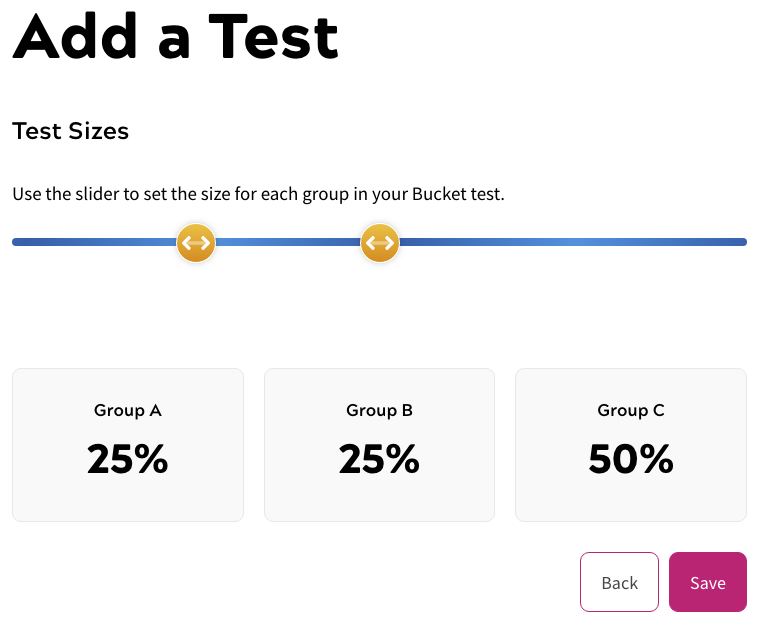
Once you’re happy with your test groups, click Save.
Once created, your test group will appear in a list of split test groups on the main Split Tests page. To edit or delete your test group, find the Split Test in the list, then click the edit or delete button accordingly.
Using a Split Test in a Feature or Redirect
Zephr Split Tests are a powerful tool for optimising your site. Split testing is used to help gather information on which user journey engages your customer most, and which outcome takes you closer to achieving your strategic goals.
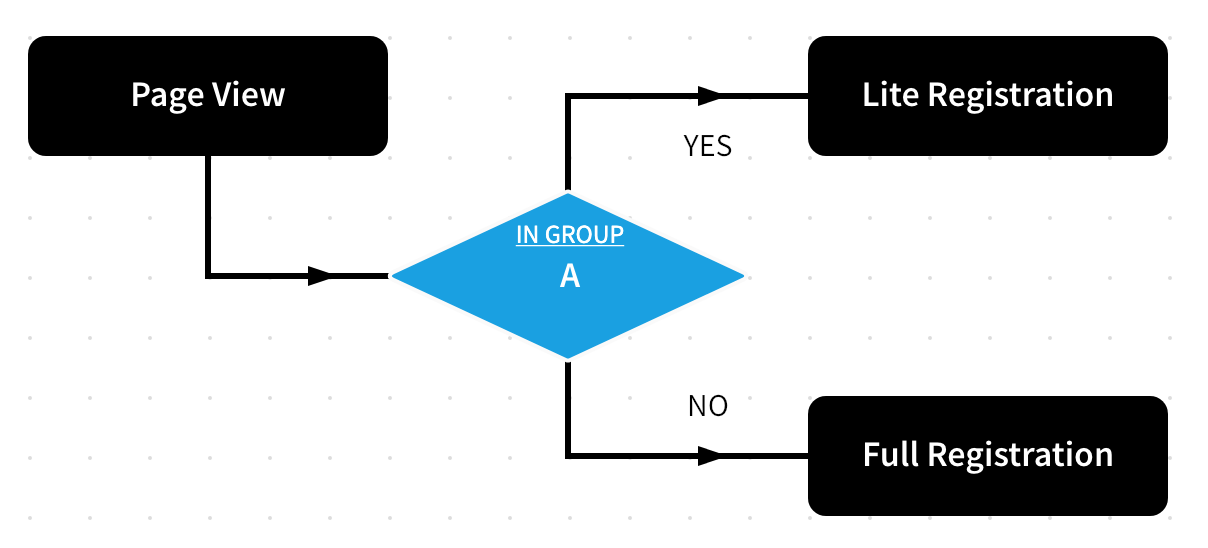
For example, you may wish to test a ‘lite’ registration form, asking for only an email address and password, against a more thorough registration form, and compare which converts anonymous users to registered users more efficiently.
In this example, we will add a test to a Feature to trial two different registration forms.
Firstly, make sure you have a test group set up under Settings > Split Tests.
Once you have your test group set up, navigate to the Products > Features, and locate or create the Feature you wish to run a split test in.
In this example, we’ve created a new version of an Article rule, which performs transformations of article content.
For Anonymous Users, we have added a check so see if which split test group the user falls into for the Registration Form Test.
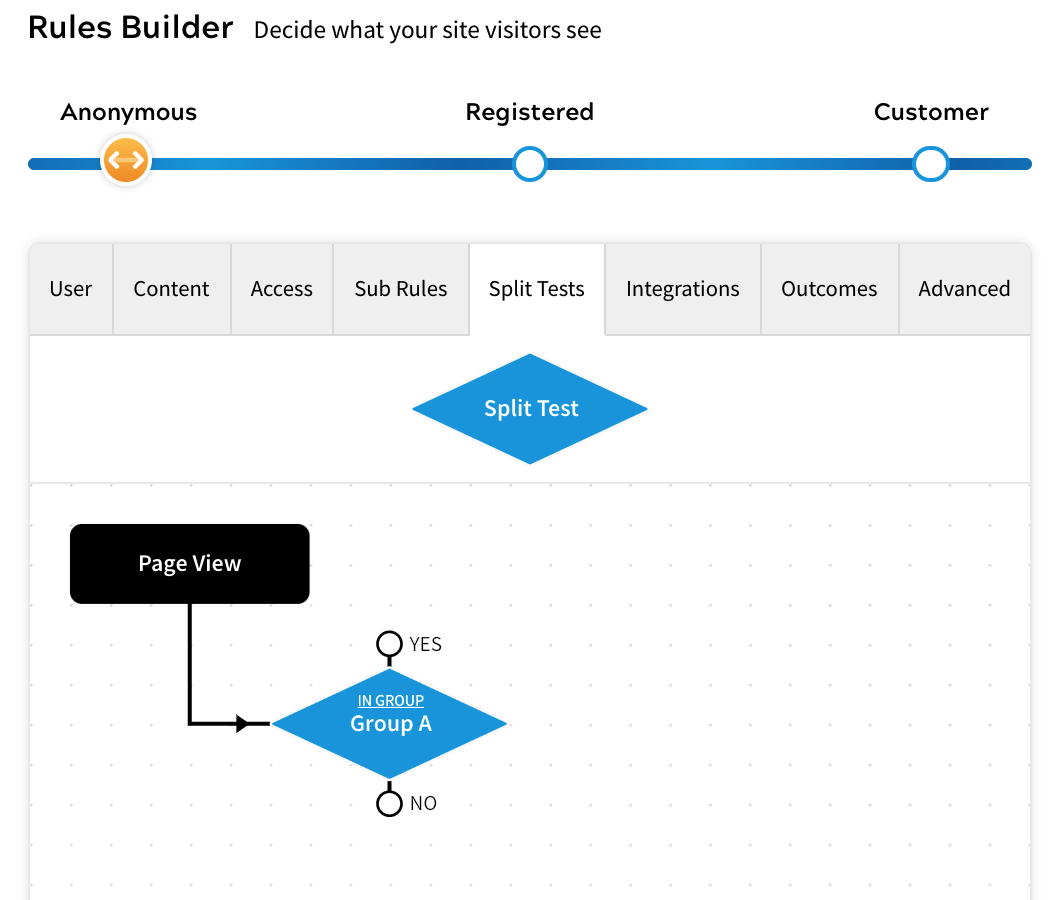
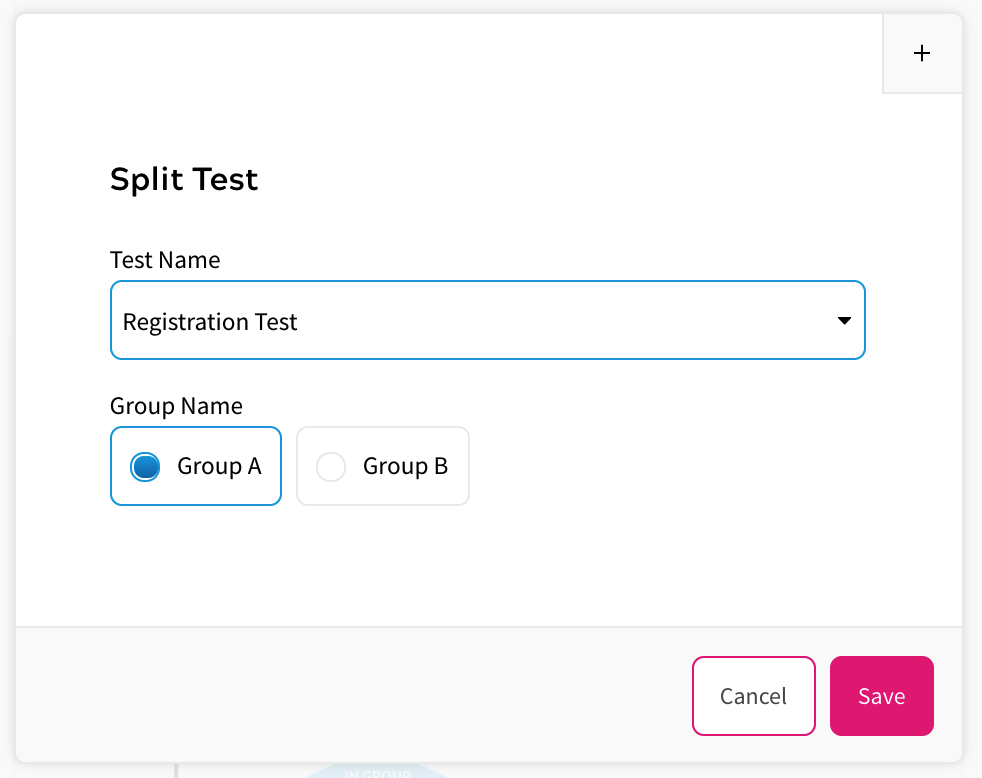
Navigate to the Split Tests decision point within your rules builder and drag it onto your canvas. Select the test group you wish to check for from the dropdown list, and select which test group you wish to focus on. Click Save.
Connect the Split Test decision point to the rest of your rule. Following this, drag the different outcomes you are testing onto your canvas and connect them accordingly.
In the example below, users in Group A will see a Lite Registration form, whilst users in Group B will see the full registration form.
Once you’ve finished, save your rule. Remember you’ll need to Publish your rule before you see it live.
Reporting on Split Tests
Reporting on the performance of your Split Tests is simple with the Zephr Data Layer feature. Simply navigate to Settings > Data Layer and click Add a Field.
From here, choose Test Group as your Selector Type and pick the relevant Test Group in the drop down – e.g. Registration Test.

Set your Label and Key, and click Add. Remember to save your configuration once you’re done. This will then write data to a data layer for your analytics platform to ingest.
With this enabled, you’ll be able to track the results of your test via your analytics platform.