Users
If you use Zephr as an Identity Management platform, you can manage your registered users using the Admin Console.
Zephr can identify a user by their email address and/or their username. By default, Zephr is configured to use email addresses to identify the user. If you use both email address and username to identify users, either can be used for authentication.
Zephr configures your console to match your requirements. The fields you see in the Identity module depend on the configuration of your console. The screenshots used in this section apply to the default configuration.
If using username to identify your users, the Email Address field is replaced by the Username field in the Users, Add User and User Details screens.
Note: If you do not require the email address for your users, they might not be able to receive a verification email. Therefore, if you identify your users by username, ensure that the Require email verification checkbox is not selected. For further information on the Require email verification checkbox, see the Authentication topic.
If using both email address and username to identify your users, both the Email Address and the Username fields are included in the screens, as shown below:
The Users screen displays the following headings:

You can perform the following tasks from the Users screen:
Add a new user
To add a new user, click +Add New User to add a new user on the Users screen.
You can also use the Public API to add a new user, and any user that signs up using a Zephr Registration Form is also added to Zephr.
Change user's email address
To change a user's email address, complete the following steps:
- On the Users screen, click an existing user record.
- On the User Details page, click User Actions and select Change Email Address.
- Enter a new email address and click Change Email Address to change the email address and return to the User Details screen. Or, click Cancel to close the dialog box without saving your changes.
Delete a user
To delete a user, complete the following steps:
- On the Users screen, click an existing user record.
- On the User Details page, click User Actions and select Delete User to delete a user. The Delete User dialog box displays.
- Click Delete User to delete the user and return to the Users screen. Or, click Cancel to go back to the Users screen without deleting the user.
You cannot undo a deletion.
Export user data
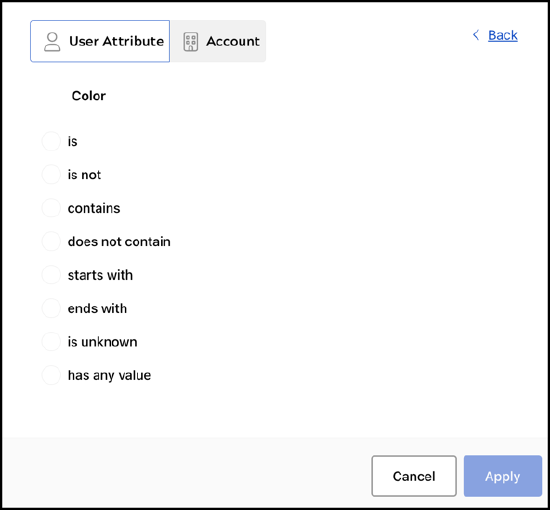
To export user data, click the download icon  on the Users screen. Prior to downloading, you have the option to filter user records based on the attributes within your tenant and the account details. You can use the filter operators to refine your filters further, as shown in the following image:
Once you export the file, the user records in the exported CSV file will contain the filtered records. Each row within the file corresponds to a subscription purchased by the end user. Comprehensive details regarding both the users and their purchased subscriptions are presented within the data table.
Other tasks
You can also perform other tasks on the Users screen:
- View and Update a User’s Details
- Reset Password
- Send a Verification Link
- Send a Complete Registration Link