Create a Page
To create a page, complete the following steps:
- Select Delivery from the main menu
- Select Pages from the menu options
- Select the Add a new Page button
- Enter a name for your page in the Title text box
- Select the type of page you want to create from the Page Type radio buttons. The options are as follows:
- Login/Registration
- Company Account Management
This option is only displayed if you have enabled email verification and set a user as account owner for the company account. For further information on enabling email verification, see the Authentication topic. For further information on setting a user as an account owner, see the Companies & Accounts topic.
- Preference Centre
- If you select the Login/Registration radio button, the Login URL and Registration URL text boxes are pre-filled with /login and /registration respectively. You can edit these URLs as requiredThe URL specifies the address at which you want to access the pages. For example, if you specify /register, your registration page is accessed at www..com/register.
- If you select the Preference Centre or Company Account Management radio button, the URL text box is filled with the text entered in the Title text box. You can edit the URL as required
- Select whether you want to specify an account-specific logo and URL to create branded pages for each company account from the Use this page as a template for account branded page radio buttons. By default, the No radio button is selected. If you want to set the page as a template, select the Yes radio button
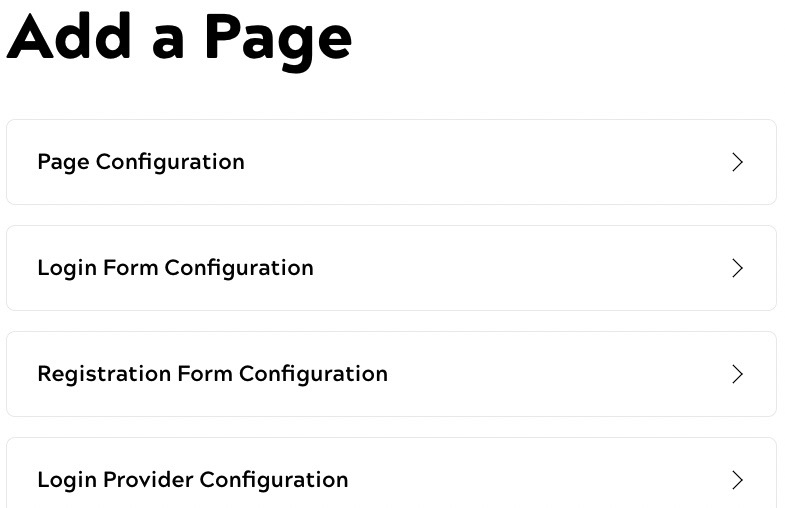
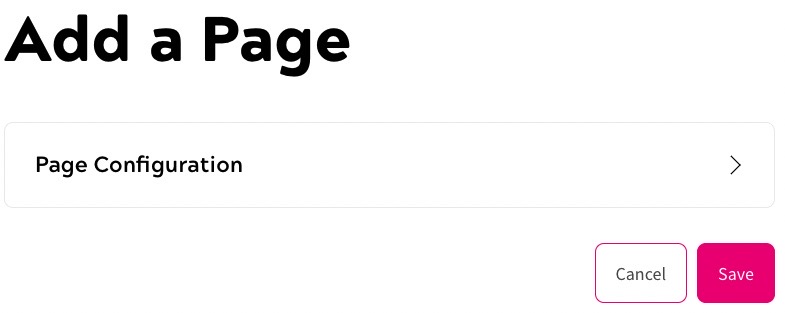
- Select the Continue buttonThe configuration options for the page type display.If you selected the Login/Register radio button, the screen displays as illustrated below:
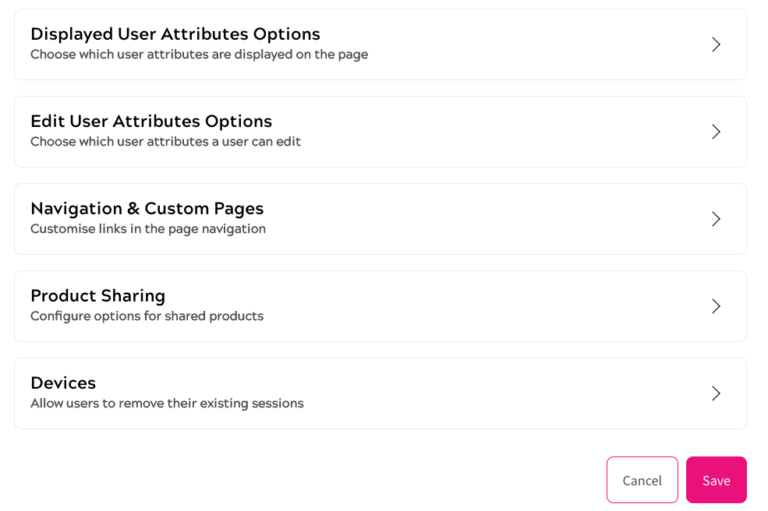
If you selected the Preference Centre radio button, the screen displays as illustrated below:
If you selected the Company Account Management radio button, the screen displays as illustrated below:
- Select the relevant option and configure the settings, as described in the following topics:
- For Login/Registration and Company Account pages, You can click Page Configuration to edit the page title and introduction. Note: Preference Centre pages are configured using the Style Guide. For further information on defining your style guide, see the Define Your Style Guide topic.
- For Login/Registration pages:
- For Preference Centre pages:
- Configure the Displayed User Attributes Options
- Edit the User Attributes Options
- Configure Navigation & Custom Pages
- Configure Shared Product Pages
- Configure whether to allow the end user to remove their existing sessions on the Devices page. If the Allow users to remove their existing sessions setting is enabled, the end user can sign out of their existing sessions from the Devices section of the Preference Center page in their accounts. Note that the end user cannot sign out of the session that is in use now from the Devices section.
- Select the Save button to save your changes and return to the Pages screen. Selecting the Cancel button displays the Pages screen without saving any changes
The page is listed under Your Pages.