Create a Payment Form
The Zephr application allows you to manage and optimize your payment processes. In this screen, you can:
- Customize all the texts that will be displayed in your payment form, as desired.
- Preview and validate your payment forms in real-time.
- Enjoy seamless functionality by testing your forms under different conditions to verify that they meet your expectations.
- Experience increased agility through our revised payment forms that are customizable to your unique demands.
- Visualize exactly how your form will appear on your website.
- Save time and resources by making informed adjustments to your payment forms without requiring extensive technical expertise.
To create a Payment Form, complete the following steps in Zephr:
- Select Product > Features.
- Click Add a Feature.
- Enter or select the required details and click Continue. The Developer Interface screen is displayed.
- Click Update & Lock. The Rules Builder screen is displayed.
- Select the Outcomes tab.
- Click Add Outcome. The Add an Outcome screen is displayed.
- Click Add a Component or Form > Payment. The Add Payment Form screen is displayed.
- Start customizing your payment form. As you make adjustments to the form, a preview will be shown to help you visualize precisely how your form will look on your website. However, the links and buttons in the preview form will not be functional unless the website is live.
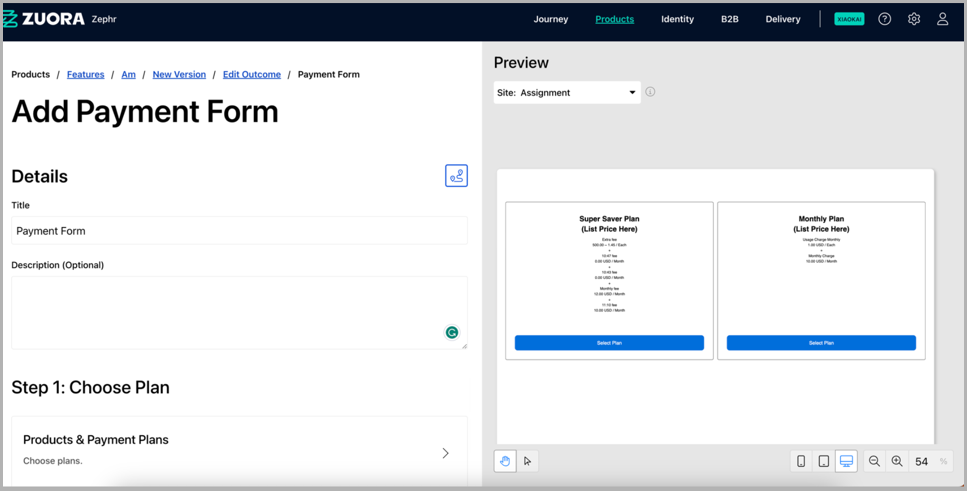
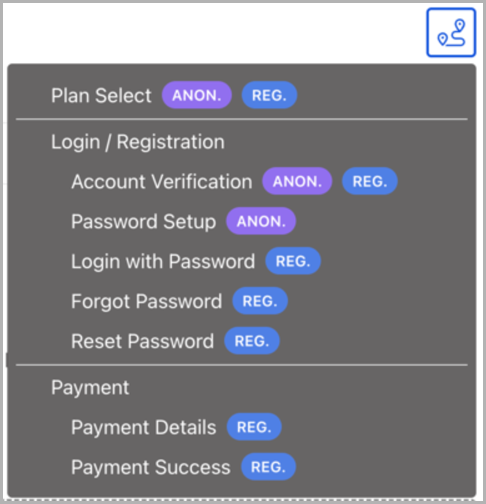
Additionally, you can preview how the payment form will be presented on various devices, including iPad, mobile, and laptop screens. At any point in time, you can click theicon available in all the Preview screens to navigate to a specific step in the workflow.
- Select the Products & Payment Plans button to define the products and payment plans offered in the options. The Products & Payment Plans screen is displayed.
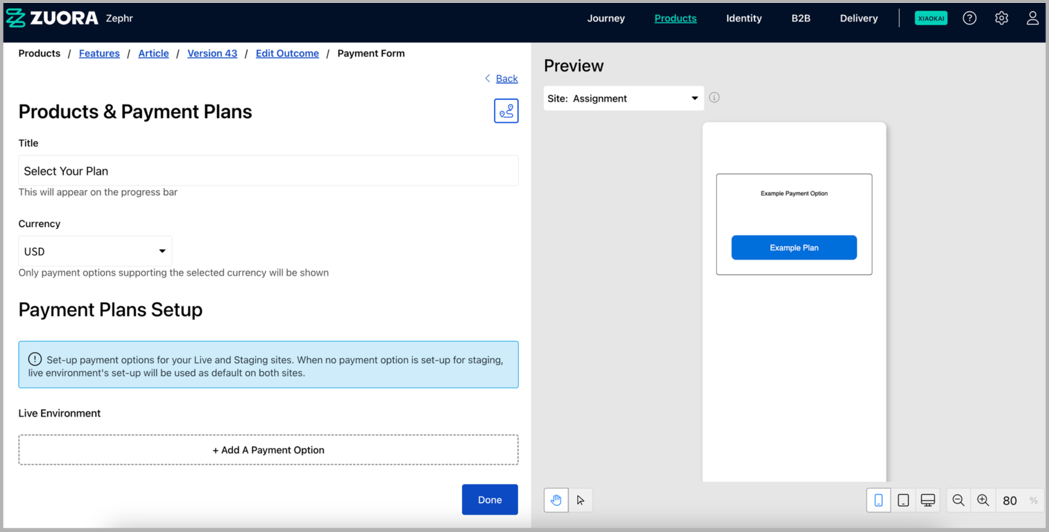
Complete the screen as described in the Define Your Products and Payments topic.
-
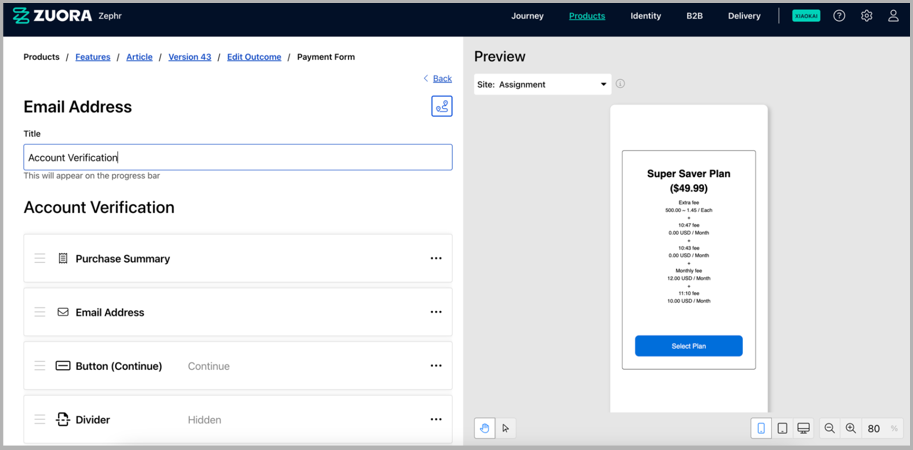
Select the Email Address button to define the account verification section of the form. The Email Address screen is displayed.
-
Complete the screen as described in the Define the Email Address Options topic.
-
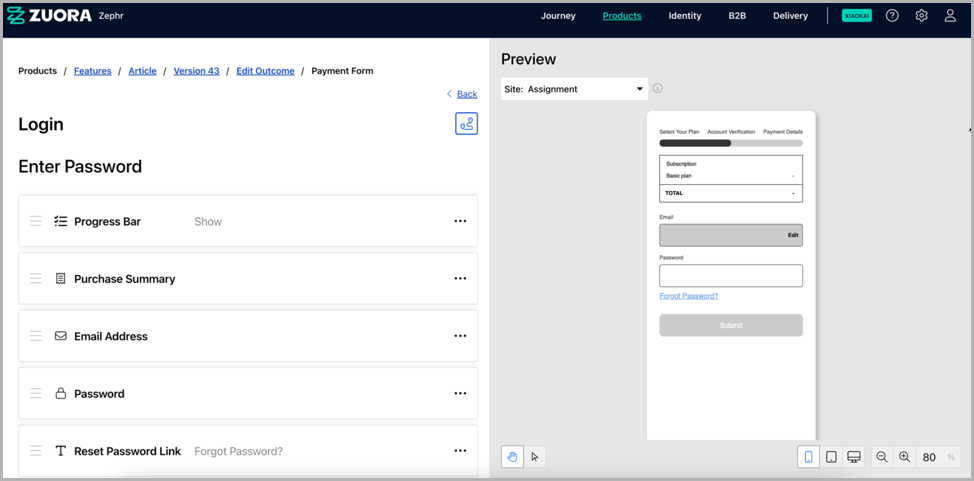
Select the Login button to define the account verification section of the form. The Login screen is displayed.
-
Complete the screen as described in the Define the Login Options topic.
-
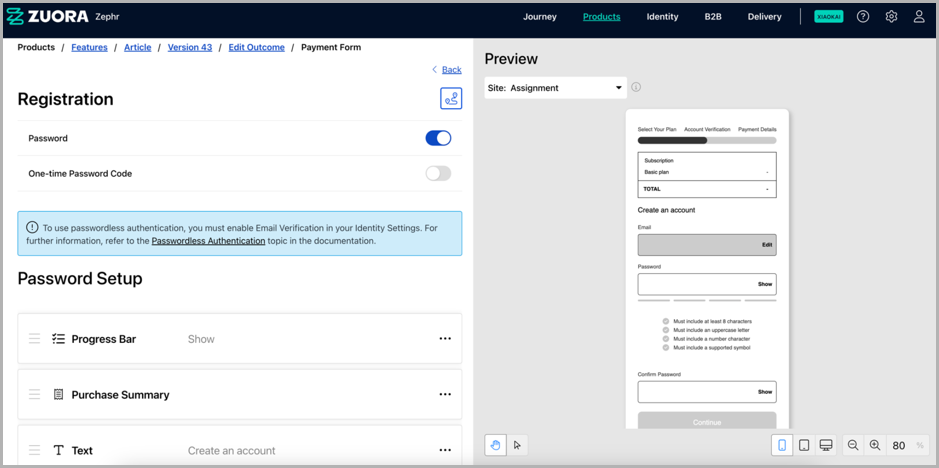
Select the Registration button to define the account verification section of the form. The Registration screen is displayed.
-
Complete the screen as described in the Define the Registration Options topic.
-
Select the Payment button to define the account verification section of the form. The Payment screen is displayed.
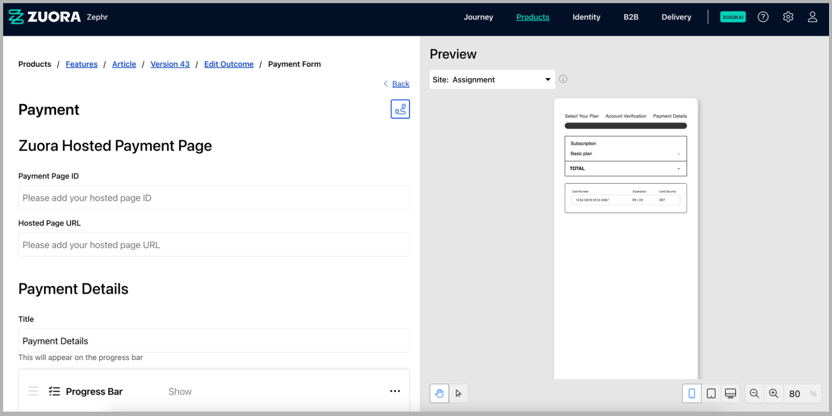
Complete the screen as described in the Define the Payment Information topic. -
Select the Additional Settings button to define the account verification section of the form. The Additional Settings screen is displayed. Complete the screen as described in the Define the Additional Settings topic.
-
Select the Save button to save your changes and return to the Add an Outcome screen. Selecting the Cancel button to display the Add an Outcome screen without saving any changes
-
Select the Save button to add your outcome.
You can now use the Payment Form in your feature rule.
Notes:
- In general, you can edit the fields defined in steps 4 to 8 above as follows:
- To edit any field, select the three dots at the end of the row for the field and select Edit.
- To move a field up or down the list, drag it to the position you want it to display.
- If the Add Custom Text button is available, select it to add a custom field to your form. If this button is unavailable, you cannot add a custom field to this step in your form.
- If the Add A User Attribute button is available, select it to add a field to gather information from your users. If this button is unavailable, you cannot add user attributes to this step in your form.
- If the Add a Section button is available, select it to add a section to your form. If this button is unavailable, you cannot add a section to this step in your form.
- If a section can be removed from your form, select the delete icon from the top right of the box. If this icon is unavailable, you cannot remove sections from this step in your form.
- You can edit the colours, fonts, and styling used in your form using the Style Guide to ensure they match your brand. For further information on defining your style guide, see the Define Your Style Guide topic.