Create a feature rule
To conclude the basic onboarding process, set up your first Feature Rule. In this tutorial, we will show you how to create an HTML Feature Rule, however, Feature Rules can also be created using JSON. Read our JSON Feature Rule guide to learn more.
Select Rules > Feature Rules within your Zephr Admin Console, then click the Add Feature button.
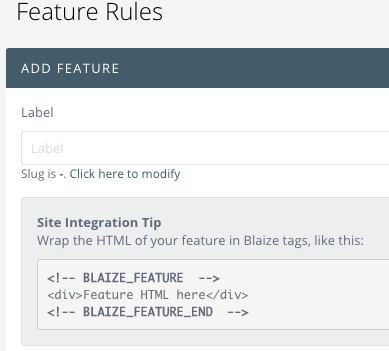
Give your Feature Rule a Label – this is the name of your rule. We suggest naming it after the Feature you wish to restrict access to. For example, if you are looking to add a Registration Form over an Article, then set the Label to Article.
After adding your Label, Zephr provides you with a Site Integration Tip which shows you how to update your HTML code so that Zephr can understand what the feature corresponds to. Learn more about how to add these tags to your site in our Tagging Your Site for Feature Rules guide.
You can now use the drag and drop Feature Builder to construct the logic of your Feature Rule.
The Zephr Rule Builder allows your to create custom access decisions on the fly, without the need for code releases.
Below is a high level run down of the different features that make up the Rules Builder for both Feature and Request rules. Take a look at the Feature Rules and Request Rules pages for in depth information on each option.
Zephr Rules Canvas
When creating a new Rule, you will first note the Rule Canvas. The Canvas is the area in which you build your rules. It contains a starting point Page View function and leave the remaining space to build your dynamic rule.
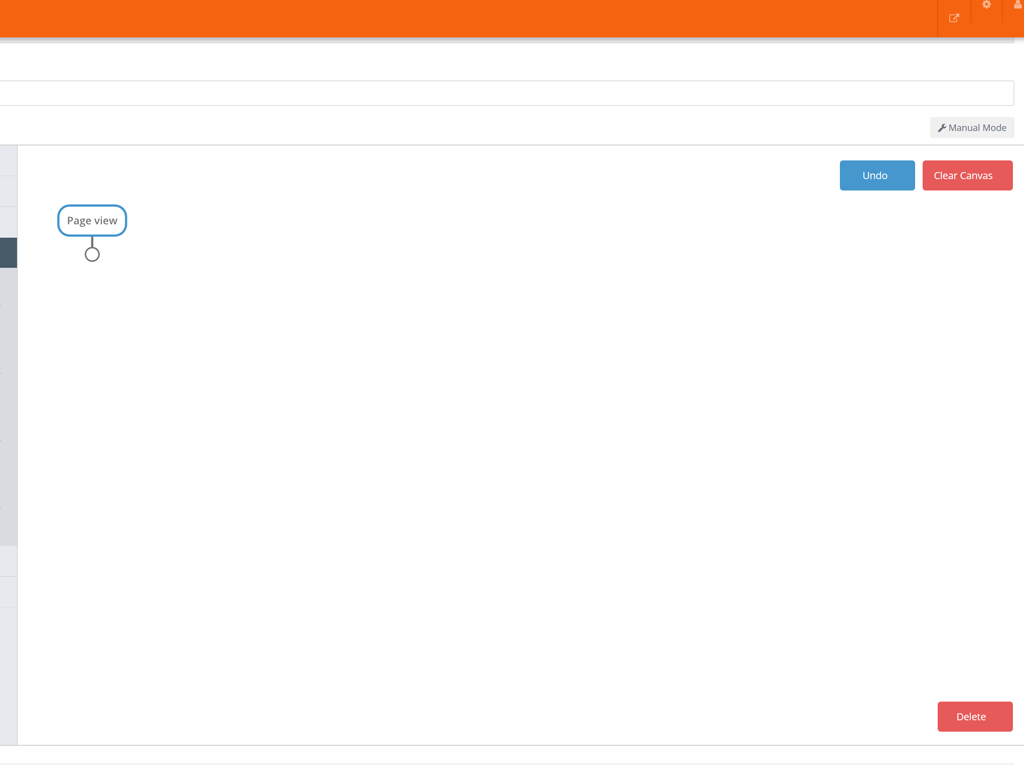
At any time, clicking the Clear Canvas button will return it to a blank state, whilst clicking Undo reverts your latest change.
Rule Builder Palette
To the left of your Canvas, you will see the Rule Builder Palette. This works as an accordion menu, where clicking each option expands the menu to reveal the different options available for your rule.
In most instances, diamond shaped options from the palette refer to decision points – a place where Zephr will make a yes or no decision based upon the option you have chosen. Rectangular options within the palette can refer to Transformations, outcomes, or actions, depending on the option chosen.
When creating or viewing a Rule, think of it as a decision tree or flow diagram, where Decision Points split your Rule into different branches based upon the outcome of the decision.
Using the Rules Builder
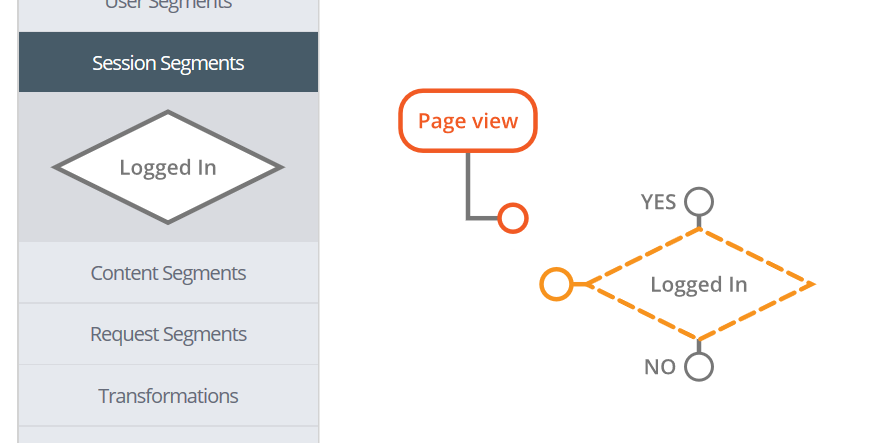
To create a Rule, click and drag the relevant options from the Rule Builder Palette onto your Rule Canvas. You’ll see the function colour will change to orange while selected.
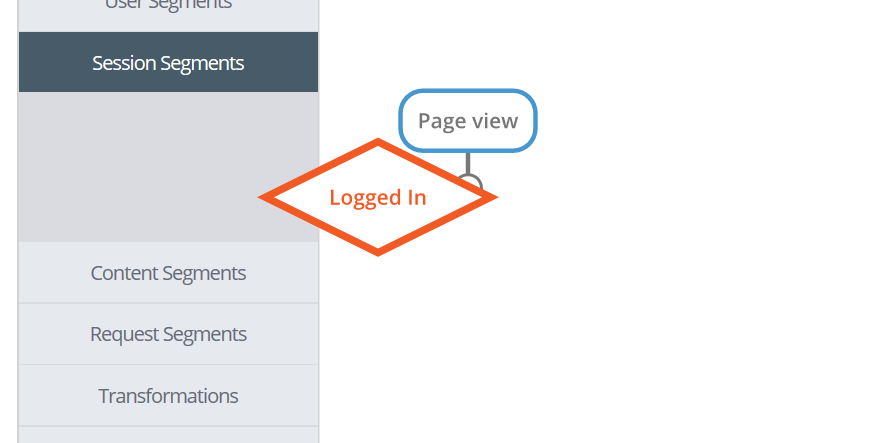
Place the function onto your preferred canvas location. The function will Snap to Grid to retain layout consistency. Once placed onto the canvas, the colour of the function will return to its original blue and the connector points will appear.
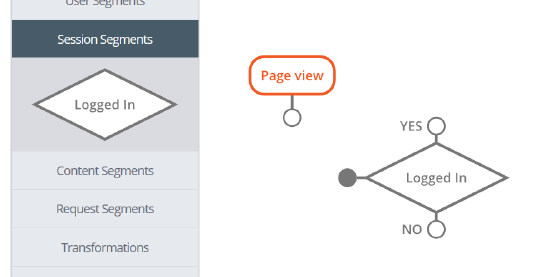
Once the function is on your Canvas, you’ll note that connectors appear on it. These connectors link your Rule into the decision flow. Click on any available Connector and drag to connect to your preferred function. Whilst doing this, the connector will change to orange in colour and the nearest available function will change to an orange dashed outline.
Once connected, the connected line will change to a blue colour and display an arrow to highlight the direction of the workflow.

From here, keep building your Rule by dragging and dropping different options and functions onto your canvas, and connecting them to form the logic you require from your rule.
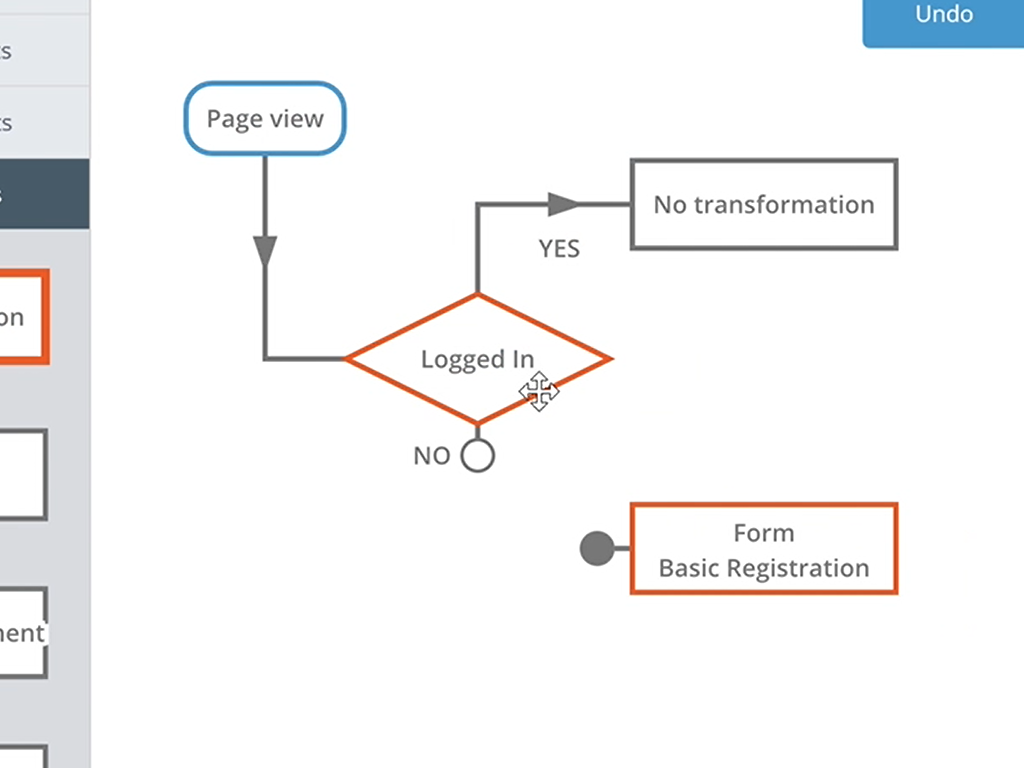
In this example, if a User is Not Logged in you can insert your Basic Registration Form, created previously.
The rule below shows:
- If a user is logged in, then they will experience no change (transformation) to the base content coming from your CMS, and will proceed to their desired page/article.
- If a user is not logged in, they will see the Basic Registration form instead of the Article content, and will need to register or log in to proceed.
Once you’re happy with your rule, click the Add button below your Canvas. You will be redirected to a page showing the different versions of your rule. Click Publish next to the version you just created, and your rule will go live.