Add fulfillments to order line items
You can add fulfillments to existing order line items that have been activated. A fulfillment can be added to an order line item only when the billing rule of the order line item is configured as Trigger As Fulfillment Occursand the order line item is in the Booked state.
Add fulfillments to sales order line items
You can add fulfillments to sales order line items either through Zuora UI or API.
Add fulfillments to sales order line items through Zuora UI
To add fulfillments to a sales order line item from the UI, complete the following steps:
- In the Sales Order Line Item area of the order details page, click the item name of the sales order line item to which you are to add fulfillments. The order line item details page opens.
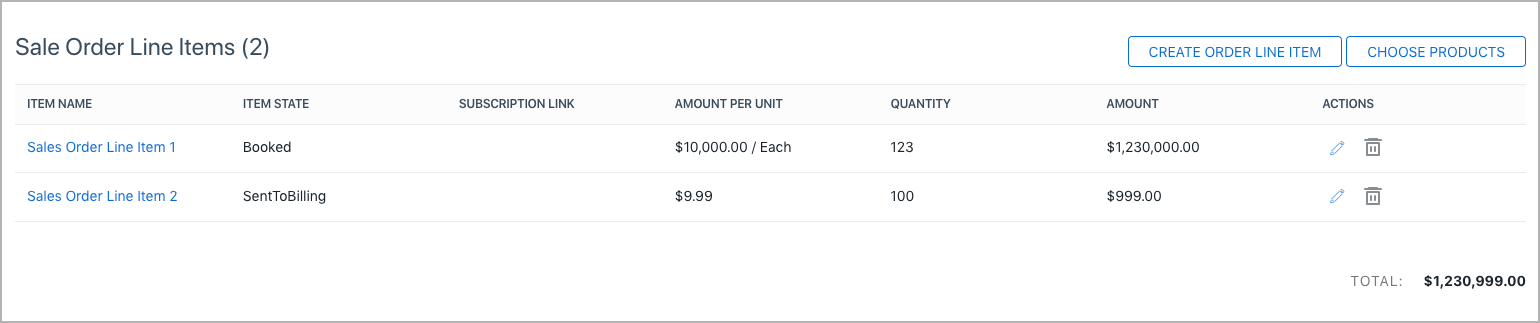
- Click Create Fulfillments at the top right. The Create Fulfillment page opens.
- Provide detailed information about the fulfillment you are to add.
Section Field name Description Overview Fulfillment Type Type of a fulfillment. Valid values are Delivery and Return.
This field is automatically set to Delivery if you select New Sales in Step 5 of Task 1: Create an order and add a sales order line item.
Quantity Remaining for Delivery The quantity that is remaining to deliver. This is a reference field that you cannot edit. This field indicates the quantity that you can still fulfill for the order line item. Fulfillment Quantity Required field. The quantity you are to fulfill in this fulfillment. The quantity to fulfill cannot exceed the quantity that is remaining for delivery. Fulfillment Date Required field. The date you are to assign to a fulfillment. Carrier The carrier that you choose to fulfill the order line item. The options for the carrier can be configured in Billing Settings > Fulfillment Settings. See Configure Fulfillment Settings. Tracking Number The tracking number of a fulfillment. State State of a fulfillment. Valid values are Executing, Sent To Billing, Complete, Canceled, and Booked. By default, the starting state of a fulfillment is Executing. For more information, see State transitions for an order line item, fulfillment, and order.
Set the Item State field to Sent To Billing to generate billing documents for the fulfillment.
When a fulfillment is in a state other than Executing, you can create fulfillment items for the fulfillment.
Billing Target Date The date when the fulfillment is invoiced.
Set the bill target date to generate billing documents for the fulfillment.
Description A brief description of the fulfillment for reference. Fulfillment Integration Fulfillment System The fulfillment system. The options for the fulfillment system can be configured in Billing Settings > Fulfillment Settings. See Configure Fulfillment Settings. Fulfillment Location The fulfillment location. The options for the fulfillment location can be configured in Billing Settings > Fulfillment Settings. See Configure Fulfillment Settings. External ID The ID of the fulfillment in an external system. -
(Optional) To add fulfillment items to a fulfillment, perform the following steps:
You cannot add fulfillment items to a fulfillment if the fulfillment is still in the Executing state.
a. In the Fulfillment Items section, click Add Item to add a fulfillment item to the fulfillment.
b. In the Item Identifier field, enter the identifier information you are to add for the fulfillment item.
c. In the Description field, enter the description for the fulfillment item.
d. Click the save icon
 at the right end. A fulfillment item is now added to the fulfillment.
f. Repeat steps a - d to add more fulfillment items as you need in the current fulfillment. The maximum number of fulfillment items allowable in a fulfillment is 100. For more information about the limits, see Order Line Items limitations.
-
Click Save at the top right. The fulfillment details page opens. A fulfillment is now successfully created and added to the sales order line item.
-
(Optional) To add more fulfillments to the sales order line item, click the left arrow icon at the top left to return to the order line item details page, and then repeat steps 2 - 5. The maximum number of fulfillments allowable for an order line item is 100. For more information about the limits, see Order Line Items limitations.
-
(Optional) To generate billing documents for the fulfillment in the Sent To Billing state, create a bill run. For instructions, see Creating Bill Runs.
Add fulfillments to sales order line items through API
Add fulfillments to return order line items
You can add fulfillments to return order line items either through Zuora UI or API.
Add fulfillments to return order line items through Zuora UI
After activating the return order line item, you can create fulfillments on the return order line item by performing the following steps:
- On the return orders details page, click the item name in blue in the ITEM NAME column in the Return Order Line Items area. The order line item details page opens.
- Click Create Fulfillment at the top right. The fulfillment details page opens.
- On the fulfillment details page, edit the following fields in the Overview and Fulfillment Integration areas:
Field name
Description
Fulfillment Quantity
Required field. The quantity of the fulfillment items to be returned. The value must be less than or equal to the value shown in the Quantity Remaining for Delivery field.
Fulfillment Date
Required field. The date of the fulfillment.
Carrier
The express company.
Tracking Number
The express number from the express company.
State
The state of the fulfillment. Valid values are Executing, Booked, Sent To Billing, Complete, and Canceled. The default value is Executing.
- If the fulfillment is in the Executing state, you can edit the fields in this table.
- If the fulfillment is specified to other states, you can add fulfillment items to the fulfillment. To generate billing documents, you need to specify the fulfillment to the Sent To Billing state and set the Billing Target Date field.
Billing Target Date
Specify the date when the fulfillment will be invoiced.
After setting this field to the Sent To Billing state and specifying a value for this field, you can create a bill run. For instructions, see Create Bill Runs.
Description
The description of the fulfillment for reference purposes.
Fulfillment System
The value that maps an external value from the ERP system, for example, the value can be NetSuite, SAP, or other specific fulfillment partners.
Fulfillment Location
The occurring location of the fulfillment.
External ID
Specify the ID of the fulfillment. The ID is generated based on the external system.
- (Optional) Change the State to a state except Executing to add fulfillment items, click Add Item to add a fulfillment item, and then edit the following fields in the Fulfillment Items area.
Field name
Description
Item Identifier
Specify the ID of the fulfillment item. The ID is provided by customers.
Description
The description of the fulfillment item for reference purposes.
After editing, click the save icon
 to finish adding the fulfillment item. You can create multiple fulfillment items, but the number of fulfillment items should not be greater than the value of the Fulfillment Quantity field.
 - Click Save at the top right on the fulfillment details page to finish the fulfillment creation. If you return to the order line item details page, you can view the created fulfillments in the Fulfillment Details section. For more information, see View the details of a fulfillment.
- (Optional) To generate billing documents for the fulfillment in the Sent To Billing state, create a bill run. For instructions, see Create Bill Runs.
Add fulfillments to return order line items through API