Configure the GL Interface
You need to configure the app before you can perform summary runs. The file mapping settings must be configured. If you want to use custom fields in the file mapping settings, you must create them before creating the app so the system can recognize them. Fields created after the app is installed will not be visible.
Other settings can be configured or revised when you create a schedule or perform an ad-hoc summary run.
Procedure
- Start the app.
- Select the Summary Runs tab and click Settings.

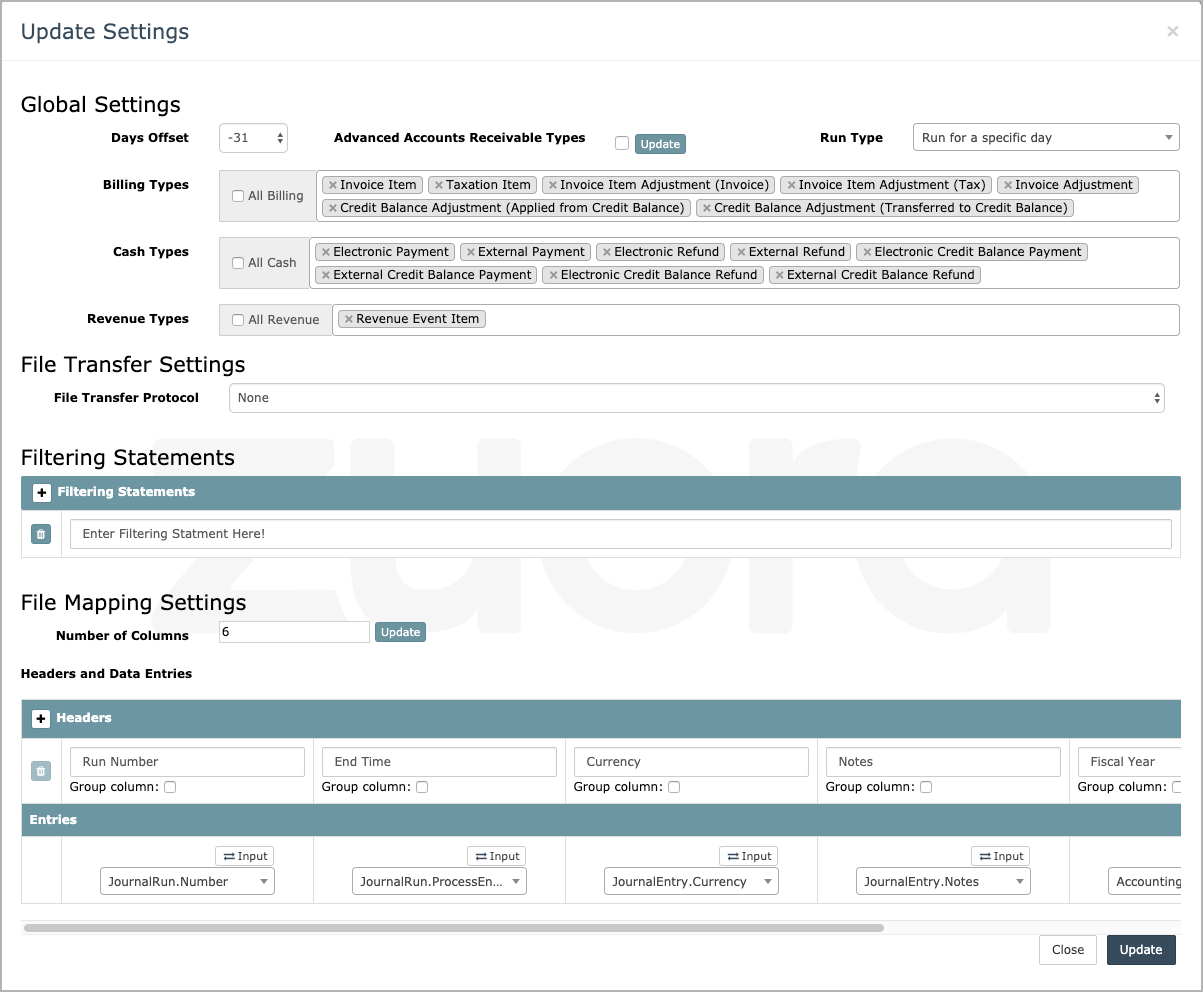
- Configure global settings. Global settings will be used as default settings for ad-hoc or scheduled summary runs. You can modify these settings when you initiate a summary run or create a schedule.
- Days Offset - Enter the number of days offset from the end of the desired accounting period. Use positive numbers to indicate the accounting period is in the future and negative numbers to indicate the accounting period is in the past.
- Advanced Accounts Receivable Types - Select this option if the Invoice Settlement feature is enabled in your Zuora tenant. With the Invoice Settlement feature enabled, some transaction types are replaced by other transaction types. For example, Electronic Payment is replaced by Electronic Payment Application. This option ensures that the app uses the appropriate transaction types. For more information about which transaction types are available with the Invoice Settlement feature, see Journal Runs.
- Run Type:
- Run for a specific day (default): If this option is selected, the summary run will collect transactions posted on a specified date.
- Run a catch up for each past day in the accounting period: If this option is selected, a summary run will be performed each day to collect transactions that are posted on the last day for the whole accounting period.
- Run for the whole accounting period: If this option is selected, the summary run will collect transactions for the whole accounting period.
- Billing Types - The types of translations related to customer invoices, including taxes and adjustments. Enable All Billing or select specific transaction types to be included in the summary run.
- Cash Types - The types of transactions related to payments and refunds. Enable All Cash or select specific transaction types to be included in the summary run. If you enable Invoice Settlement and Invoice Item Settlement you can select the application items associated with it. If you want to have access to the feature, see Invoice Settlement Enablement and Checklist Guide for more information.
- Revenue Types - Transactions related to revenue schedules. Currently, Revenue Event Item is only type available.
- Configure file transfer settings.
- None: Select this option if you want to download the exported file manually.
- SFTP: If you want the exported file to be placed on an SFTP server, select this option and specify the complete file directory (including the IP address of the SFTP server).
-
Add filtering SQL statements, or delete statements that you have added previously. The SQL statement can be only used against the Journal Entry Item object. An example of this statement is
JournalEntry.AccountBrand__s = 'ABC'.
If you do not use any filtering statements, click the delete icon to remove the prompt message in the text field. Otherwise, this message will be used as a filtering statement and your summary run may fail.

-
Configure file mapping settings. The file mapping settings will be used for all ad-hoc or scheduled summary runs.

-
Select the number of columns in the exported file.
-
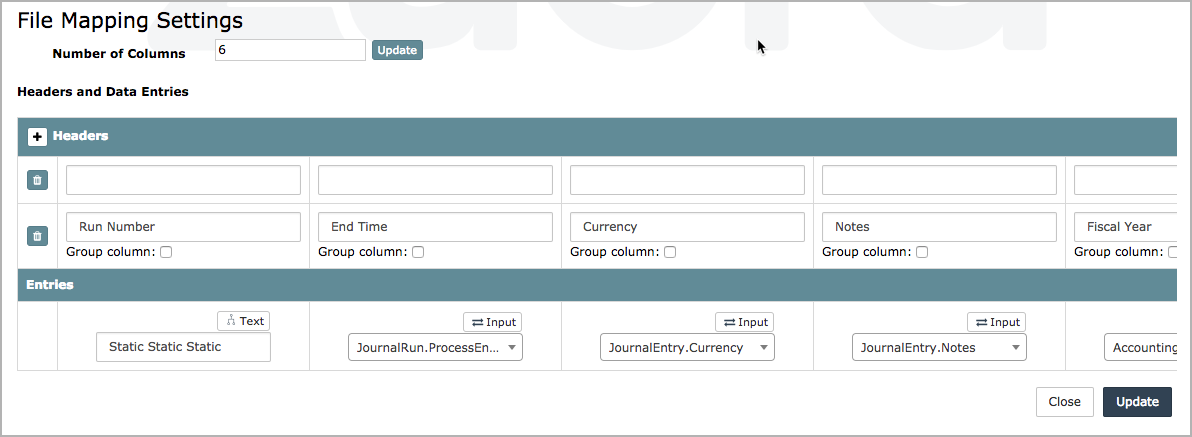
Headers - Configure the headers to be used in the exported file.
-
Add new header rows or delete existing header rows as necessary.
-
Select Group column to display data from multiple columns in one transaction line. Only the name in the last header row of each column will be displayed in a grouping.
Note: Only JournalEntryItem.Amount and JournalEntryItem.AmountHomeCurrency will be summed if the grouping function is utilized. -
Duplicated headers will cause errors in summary runs.
-
The bottom header row cannot be left blank.
-
-
Entry Source - Choose the appropriate header data entry source by toggling through the options of Input, Text, or Custom. Custom fields that are mapped after the initial setup will not be visible in the dropdown list as required.
-
A custom entry source must be formatted using Liquid.
Liquid does not strip newlines or return carriages automatically. Place a string to the left of the bar in quotes and the command strip_newlines to the right of the bar. For further information about Liquid templates, please visit https://shopify.github.io/liquid/basics/. - Entry - Enter the desired input field. Posting Period and Currency are required fields.
-
- Click Update to save the settings.
