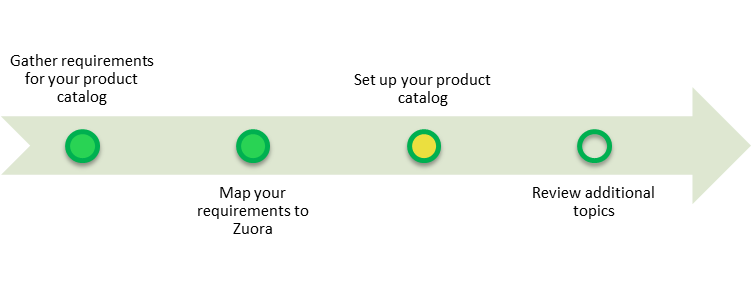
Part 3: Set Up Your Product Catalog
Overview
Zuora Internal Documentation. This article is intended for Zuora only. Do not share or distribute publicly.
Now that you have a worksheet that defines your Products, Product Rate Plans, and Charges, it's time to configure this in Zuora.
Start by watching the video screencasts we have provided below to develop an understanding on how to set up your product catalog. Then, follow the steps below to complete the process of creating your product catalog.
Video: Understanding The Zuora Product Catalog
These videos are approximately 50 minutes long. We recommend you take some notes as you watch, as this will explain to you most of the major concepts of the Product Catalog.
Now follow the steps below to set up Products, Product Rate Plans and Charges in your Product Catalog. These steps provide examples of setting up a few of the most common rate plan charges, so depending on your worksheet requirements, not all steps may be relevant for you. You may also need to review the Additional Topics provided in this milestone if your business requires charges that are not explicitly covered here.
Step 1: Add Products to Your Product Catalog
To add a new product to your product catalog:
- On the Product Catalog page, click add new product. A New Product page appears.
- Enter a Name for the product. For example, you could call this "Ultimate Screen Capture Software."
- Optionally, enter a description for the product.
- Modify the SKU, if necessary, or use the automatically-generated SKU.
- Enter an Effective Start Date, in MM/DD/YYYY format. The effective start date is the day your product becomes available, which is when you can begin adding the product to a subscription.
- Enter an Effective End Date for the product, in MM/DD/YYYY format.
- Select the Category used to organize this product. Organizing your products makes it possible for you to generate reports by product category. Select one of the following categories:
- Base Products: The main list of products that you offer.
- Add On Services: This can include setup or consulting fees.
- Miscellaneous Products: This can include delinquent payment charges.
- Click save. The product page reappears with the new product information.
Optional: Add an Image for Your Product
You can upload an image to identify your product.
- In Product Information, click edit.
- Under Upload new image, click Choose File to search for the image (on your computer or network) you want to upload.
- Select the image, then click upload. Z-Billing supports the following image file formats:
.jpg,.gif,.png, or.bmp. - Click save.
Step 2: Create Product Rate Plans
When a customer purchases a product, they can pick from one of your available rate plans. For example, if you want to offer customers a single option to purchase your application (e.g., $12 per user per month), then you can set up a single rate plan. Alternatively, if you want to offer monthly, quarterly, and annual price plans (e.g., to offer a discount if the customer purchases for an entire year in advance), you can set up three rate plans.
To create a product rate plan:
- Click Product Catalog in the left navigation bar.
- Click the name of the product for which you want to add a rate plan. This opens the product information page.
- Under Rate Plans, click add rate plan. Complete the following fields:
- Name: Enter a name for the new rate plan. Rate plans dictate how frequently you charge. Some customers include the recurring period in their rate plan name. For example,
Ultimate Screenshot Software MonthlyorUltimate Screenshot Software Yearly. - Description (optional): Enter a description for the rate plan.
- Effective Start Date: Enter the day that your rate plan becomes available, in MM/DD/YYYY format. This is also when you can begin adding the rate plan to a subscription.
- Effective End Date: Enter the date that your rate plan expires and can no longer be added to a subscription, in MM/DD/YYYY format.
- Name: Enter a name for the new rate plan. Rate plans dictate how frequently you charge. Some customers include the recurring period in their rate plan name. For example,
- Click save to save the new rate plan.
Step 3: Create Product Rate Plan Charges
Next, define the pricing for your rate plan by creating one or more rate plan charges. The following sub-sections provide three examples for setting up common rate plan charges within Zuora. Based upon these examples and the follow-up links provided at the bottom of this page, you should be able to set-up all of the charges that you outlined in your requirements worksheet.Example 1: One-Time Charge - Flat Setup Fee
One-time charges are incurred by your customers once, at the start of a new subscription. One-time charges, for example, might be utilized for setup or initiation fees.
In this example, we will show you how to create a flat-fee, one-time charge:
- Using the Zuora product catalog, find the product and rate plan that you want to edit (that is, the rate plan to which you want to add this charge).
- Under the One-Time Charges column for this rate plan, click the + add new link.
- Specify the following information:
- Charge Name: Enter a name for the charge. For example,
Set Up Fee. - Description: Enter a description for the charge. This field is optional.
- Accounting Code: Optionally enter an accounting code for the charge.
- Revenue Recognition Code: This field is displayed if your company has enabled revenue recognition fields. Select a revenue recognition code from the list.
- Revenue Recognition Trigger: This field is displayed if your company has enabled revenue recognition fields. Select one of the revenue recognition trigger conditions.
- Charge Model: Select
Flat Fee Pricingfrom the list. - List Price: Enter a price for the set-up fee. You can change the list price when you add this charge to a subscription
- Trigger Condition: Select a trigger condition from the list. The trigger condition determines when the charge will be applied.
- Charge Name: Enter a name for the charge. For example,
- Click save to save this new charge.
Example 2: Recurring Charge - Per Unit Monthly Charge
Recurring charges can be billed on a monthly, quarterly, semi-annual, or annual basis. This example describes how to set up a monthly recurring charge using the per unit pricing charge model. In this type of charge model, the total amount to charge will be equal to the per unit price multiplied by the total number of units purchased.
To set up a recurring, per-unit charge:
- Using the Zuora product catalog, find the product and rate plan that you want to edit (that is, the rate plan to which you want to add this charge).
- Under the Recurring Charges column for this rate plan, click the + add new link.
- Enter the following information to create a new recurring, per-unit charge:
- Charge Name: Enter a name for the charge. For example, you might call this "Ultimately Screen Capture Monthly."
- Description: Enter a description for the charge. This field is optional
- Accounting Code: Optionally enter an accounting code for the charge.
- Revenue Recognition Code: This field is displayed if your company has enabled revenue recognition fields. Select a revenue recognition code from the list.
- Revenue Recognition Trigger: This field is displayed if your company has enabled revenue recognition fields. Select a revenue recognition trigger condition.
- Charge Model: For this example, select
Per Unit Pricingfrom the list. - List Price: Enter the price for the recurring charge. You can change the list price later, if necessary, when you add this charge to a subscription.
- UOM: Specify the unit of measure for "per unit" prices. For example, software applications frequently charge per
License. - Default Qty: Specify a default quantity. You have the option to override this default value when adding this charge to a subscription.
- Trigger Condition: Select a trigger condition from the list. The trigger condition determines when the charge will be applied.
- Billing Period: The frequency with which the charge repeats. You can configure these options under Define Invoice Periods. For this example, select
Month. - Billing Day: The day the charge begins billing. Select a date from the list. You can configure these options under Define Invoice Periods. See Timing and Frequency of Charges to learn more about the possible options for Billing Day.
Tip: Many of our customers select Default from Customer Account for the billing day. For example, if you select the fifth of the month for the billing date, this charge will be billed every month on the fifth of the month, for all customers who have purchased this product. This setting overrides the bill cycle day specified for the customer.
- Billing Period Alignment: Select the appropriate value from the list. See Billing Period Alignment to learn more about the options for this field.
- Click save to save this charge.
Example 3: Usage Charge - Tiered Pricing with Overage Fees
Usage-based charges are used to track resources that are metered and charged based on the amount consumed.
In this example, we set up a charge for file storage with 500 gigabytes included, as well as per gigabyte pricing for any storage consumed above the included units. The price for storage is based on tiered pricing in which charges vary progressively as the volume of storage units consumed increases. In this example, the final tier is considered overage.
Tiered with Overage Example
The following is an example of what a tiered pricing table might look like with an overage price:
| Tier | From | To | List Price | Price Format |
|---|---|---|---|---|
| 1 | 1 | 500 | 0 | Per Unit |
| 2 | 500 | 1000 | .10 | Per Unit |
| 3 | 1000 | 3000 | .08 | Per Unit |
| 4 | 3000 | 10000 | .06 | Per Unit |
| Overage Price | .15 | USD | Per Unit Thereafter | |
Creating a Tiered Pricing with Overage Usage Charge
To set up a usage charge with tiered pricing and overage:
- Using the Zuora product catalog, find the product and rate plan that you want to edit (that is, the rate plan to which you want to add this charge).
- Under the Usage Charges / UOM column for this rate plan, click the + add new link.
- Complete the following fields to create a new usage charge with a tiered with overage pricing charge model:
- Charge Name: Enter a name for the charge.
- Description: Enter a description for the charge. This field is optional.
- Accounting Code: Optionally enter an accounting code for the charge.
- Revenue Recognition Code: This field is displayed if your company has enabled revenue recognition fields. Select a revenue recognition code from the list.
- Revenue Recognition Trigger: This field is displayed if your company has enabled revenue recognition fields. Select a revenue recognition trigger condition.
- Charge Model: Select Tiered with Overage Pricing from the list. This causes additional fields to appear on the page.
- UOM: The unit of measure (UOM) for the usage charge. The units of measure are defined by your company.
- Price Table: Enter the pricing for each tier, as well as the overage price to charge if there is an overage.
- Trigger Condition: Select a trigger condition from the list. The trigger condition determines when the charge will be applied.
- Billing Period. The frequency with which the charge repeats. Select a billing period from the list. You can configure these options under Define Invoice Periods.
- Billing Day: The day the charge begins billing. Select a date from the list. You can configure these options under Define Invoice Periods. See Timing and Frequency of Charges to learn more about the possible options for this field.
Tip: Many of our customers select Default from Customer Account for the billing day. For example, if you select the fifth of the month for the billing date, this charge will be billed every month on the fifth of the month, for all customers who have purchased this product. This setting overrides the bill cycle day specified for the customer.
- Billing Period Alignment: Select the appropriate value from the list. See Timing and Frequency of Charges to learn more about the possible options for Billing Period Alignment.
- Smoothing Model: Select a smoothing model from the drop-down list to allow your customers to roll over their usage. This is an optional field.
- Click save to save this new charge.
What's Next
Congratulations! You have created your product catalog.
You are now ready to ready about some Additional Topics that may be relevant to your business needs.