Part 4: Update Accounts
Overview
Zuora Internal Documentation. This article is intended for Zuora only. Do not share or distribute publicly.

In this step, you'll update the Zuora Accounts you've loaded and make them active, namely ready to loading subscriptions.
Exercise
You're almost done with loading Accounts! The last step is to make all of your Accounts "Active." This means, that you'll want to update your Accounts and set their Status to "Active." That's about it, although when doing this update you may want to consider a couple of other updates:
- Set the Auto-Pay flag to TRUE, if you selected an electronic Payment Method for this account and would like Zuora to automatically process payments for this account.
- Update the Sold To, Bill To, and Default Payment Method fields, if any mistakes were done during previous steps.
Exporting Customer Accounts
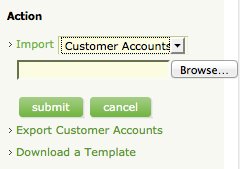
To export the latest Customer Accounts, click the Export Customer Accounts link in the Action area of Z-Billing's Customer Accounts page:

In the zip file, you'll again find three different CSV files. Open the one prefixed with CustomerAccounts.
Updating Customer Accounts
In the CustomerAccounts file, please update the Status column to "Active". Your file should look something like this:

Import this file in the Customer Accounts Action area of Z-Billing:
After clicking submit, you should see the familiar status screen.
At this point, you have successfully migrated all of your customers into Zuora! In the next part, you'll load your customer's subscriptions.
What's Next
Proceed to Part 5: Loading Subscriptions.