Display a Message on Successful Registration
By default, end users who register using an ont-of-the-box Zephr registration form are redirected to the article or page they had been viewing.
In this example, we display a message that confirms the successful registration at the top of the page.
To achieve this, we do the following:
- Create a user segment for newly-registered users
- Build a rule to display the message
Create a Registered Segment
For this example, we use a registered segment to identify when an end user has registered.
To create a registered segment, complete the following steps:
- Select Identity from the main menu
- Select User Segments from the menu options
The User Segments screen displays, as illustrated below:
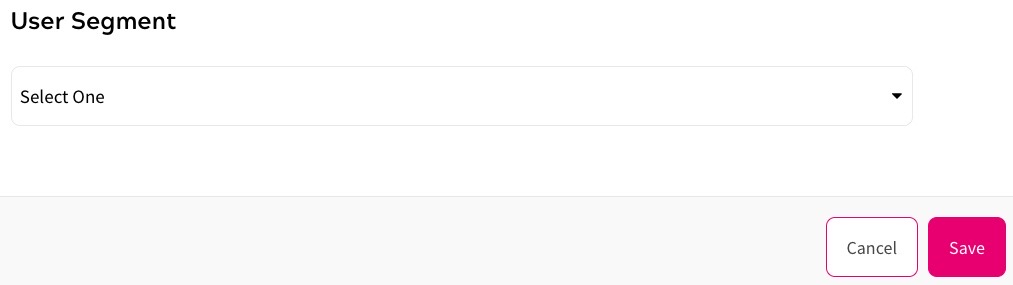
- Select the Create a Segment button
The Create a segment screen displays.
- Enter Registered in the Label text box
- Select the Save button
Next, we use this segment in our Registered rules canvas as described in the Add the Message section.
Add the Message
To display a message to end users who have successfully registered, we build our Registered rule for the feature using the user segment we created in the Create a Registered Segment section.
To build our rule, complete the following steps:
- Create or navigate to the feature for which you want to display the successful registration message
- Select the circle beneath Registered in the user type selector bar
A blank canvas displays.
- Select the User segment title
- Drag the Segment decision node to the rules canvas
The User Segment dialog box displays.
Complete this dialog box as follows:
- Select the Registered segment from the drop-down menu
- Select the Save button
The Registered segment is added to the rules canvas.
- Connect the Page View node to the Registered segment decision node
- Drag the Add to Segment decision node to the rules canvas
The Add to Segment dialog box displays.
Complete this dialog box as follows:
- Select the Registered segment from the drop-down menu
- Select the Save button
The decision node is added to your rules canvas.
Once end users have been added to the Registered segment, we know that they are on their first page view and we can display the Registration Success message.
- Select the Outcomes segment title from the decision bar
- Select Add Outcome
The Add an Outcome screen displays.
Build your outcome as follows:
- Enter Registration Successful in the Title text box
- Select the Add a New Form Or Custom Component Block button
- Select the Add button under the Custom Component Block heading
The Custom Component Block dialog box displays, as illustrated below:

- Enter the message in the text box, formatted as you want it to display.
For example, the following illustration shows a message with bold font and different font sizes defined in the Visual editor:
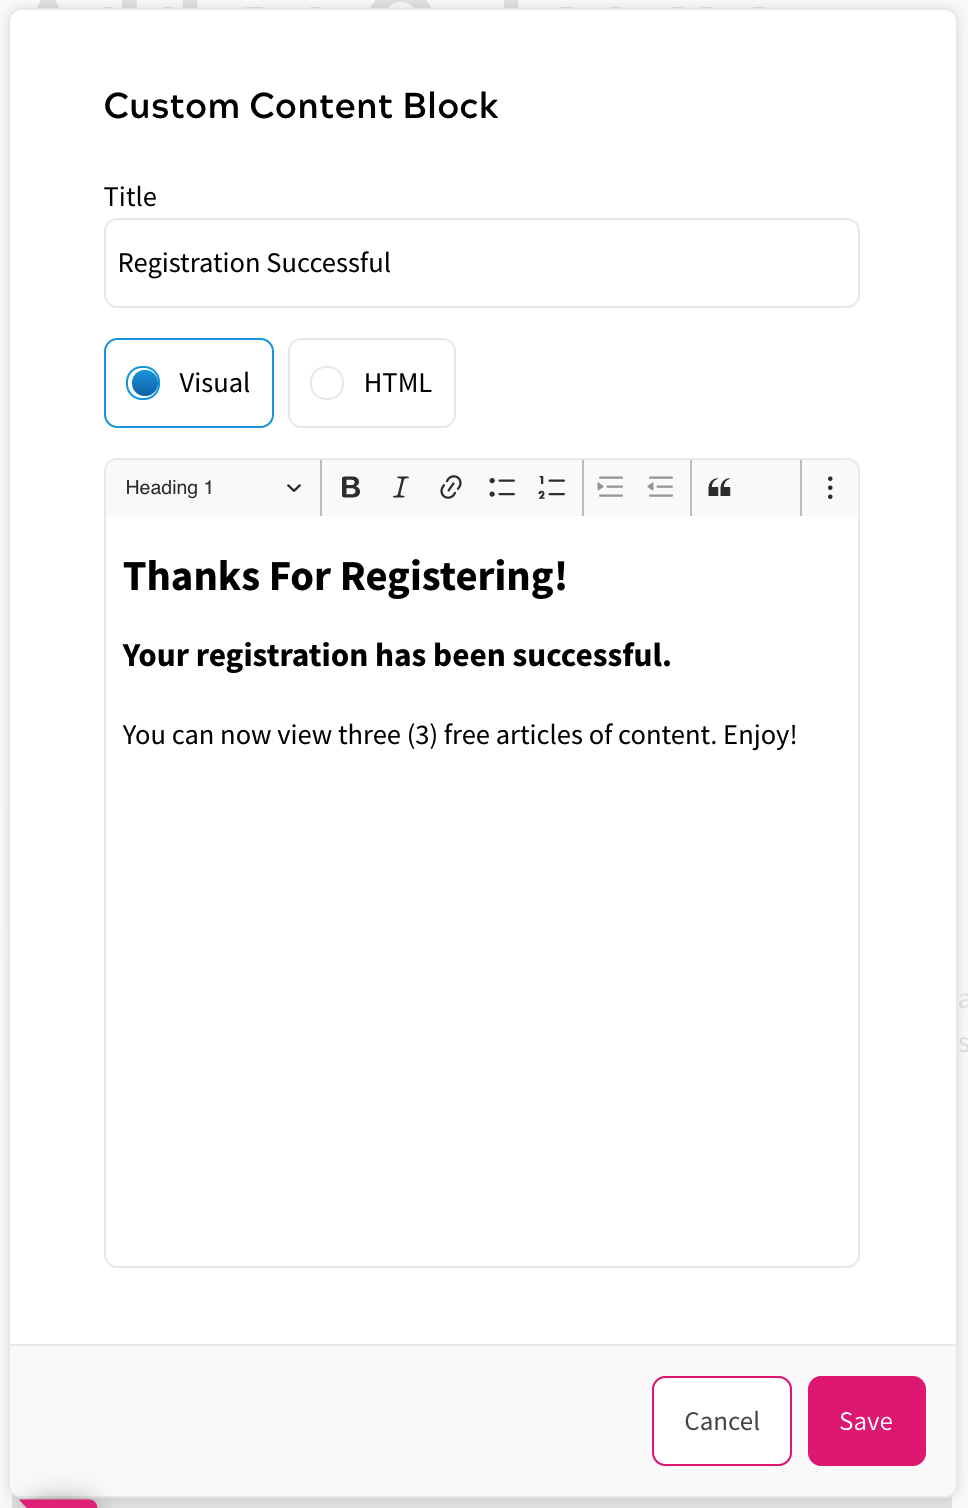
Note: For this example, we create a generic custom component block. If you prefer, you can use a templated component from the Component Library as described in the Custom Variables in Custom Component Blocks topic.
- Select the Save button to add the component to your outcome.
- Drag the Component Block output above the Article component in the Components section
This ensures that the Registration Successful message displays above the content.
- Select Show All Content from the Article Content row
- Select the Save button
The outcome is added to the decision bar.
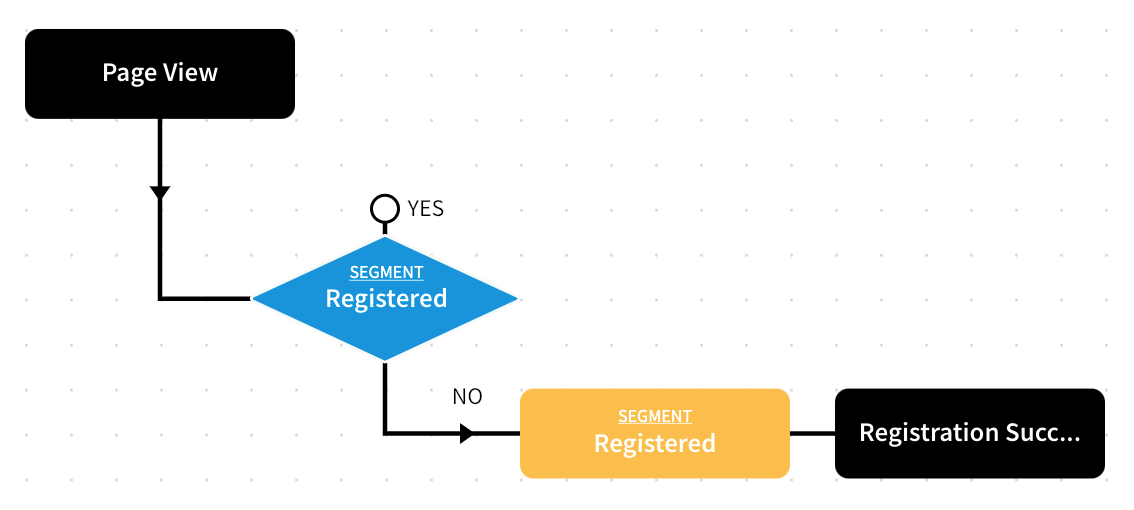
- Drag the Registration Successful outcome to the rules canvas
- Connect the Registered segment to the Registration Successful outcome
The rule is similar to the following:
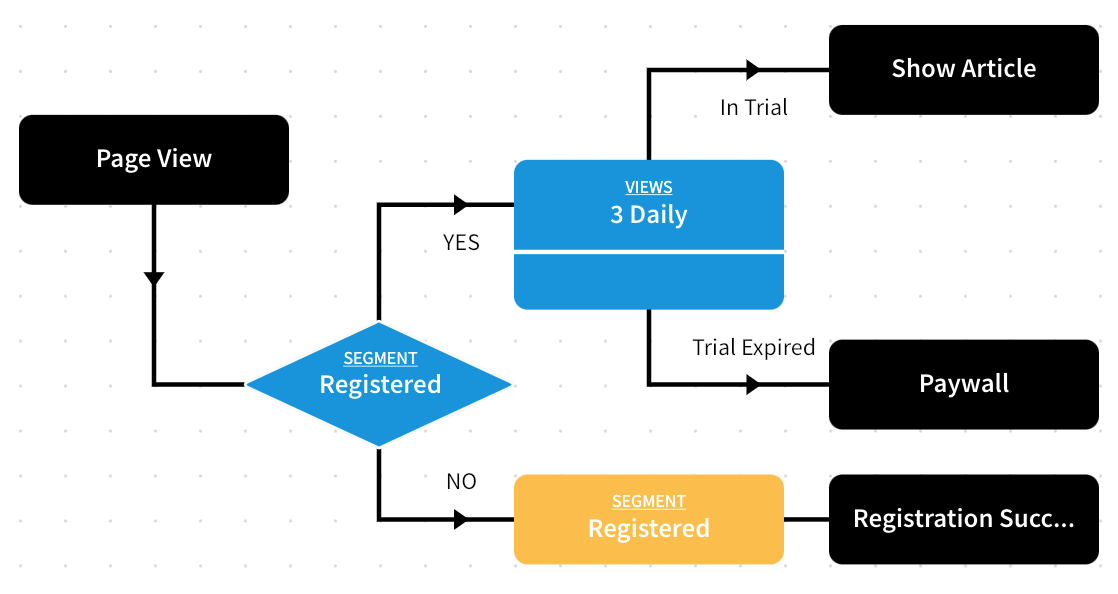
- Complete the rest of your rule for end users who are already registered
For example, in the rule illustrated below, we have added a trial that grants three views of content. When the end user is in the trial, they can view the content; when they reach the limit, they encounter a paywall.
When a newly-registered user views their first piece of content, the message displays at the top as illustrated below:

After the message has displayed, the registered user journey follows the Yes path defined in the rule; in our example, to the trial content views followed by a paywall.