Using the GL Interface
You can create a schedule to have the summary runs performed automatically, view or revise available schedules, or start an ad-hoc summary run in the case of missed runs or errors. After a summary run completes successfully, you can download the exported file (in .csv format).
Create a schedule for summary runs
If you want summary runs to be performed on a schedule, you need to create a schedule. You can have multiple schedules.
To create a schedule:
- Launch the app.
- Select the Schedules tab, and click New Schedule.
- Specify a name to identify this schedule.
- Optionally, modify the settings that are auto-populated from global settings.
To learn about how to configure the global settings, see Configure Settings for the GL Interface.- Day Offset
- Run Type
- Billing Types
- Cash Types
- Revenue Types
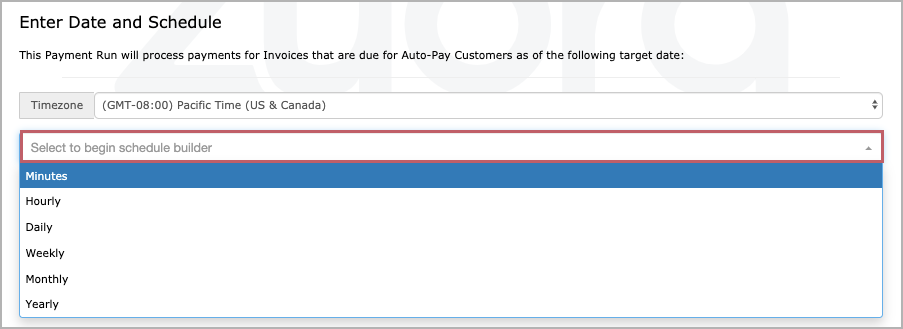
- Select the time zone for the schedule and use the schedule builder to create a schedule.
- Click the schedule builder list and select a frequency for the schedule. After you select a frequency, additional settings for the frequency will be displayed.
The available settings are different for different frequencies. For example, the Monthly settings look like this: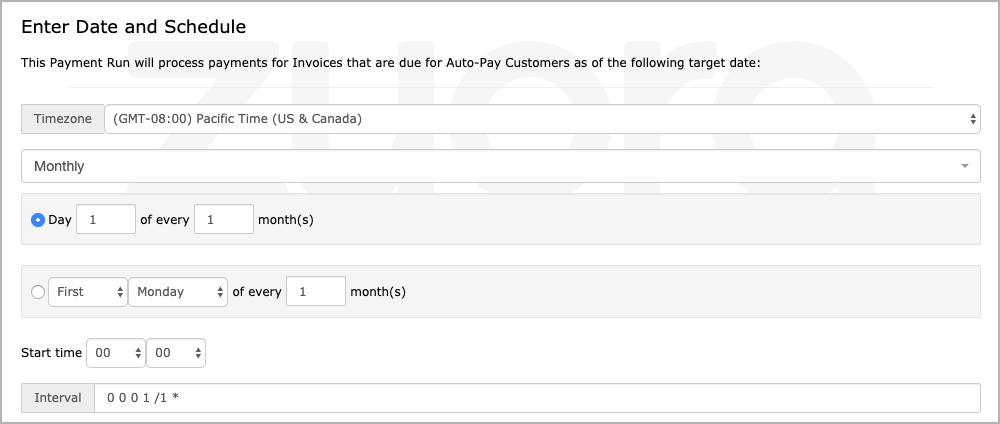
- Configure the settings in the schedule builder. For Monthly, you can configure a schedule to run once every several months. For Weekly, you can pick the days in a week when summary runs will be performed.
- The Interval field displays the corresponding cron expression for the schedule that you have configured. You do not need to configure the expression.
- Click the schedule builder list and select a frequency for the schedule. After you select a frequency, additional settings for the frequency will be displayed.
- Add a filtering SQL statement, or remove a statement that you have added previously.
If you do not use any filtering statements, click the delete icon to remove the prompt message in the text field. Otherwise, this message will be used as a filtering statement and your summary run may fail.

- Click Submit to save the settings.
Once a schedule is created, it displays in the Schedules tab. Using the action menu, you can view the details of a schedule, edit or delete a schedule.
Go to the Summary Runs tab to view summary runs that are completed or in progress.
Perform an ad-hoc summary run
In the case of missed runs or errors, you can perform an ad-hoc summary run.
You must have configured the file mapping settings. See Configure Settings for the GL Interface for details.
-
Launch the app instance.
-
In the Summary Runs tab, click Run Now.
-
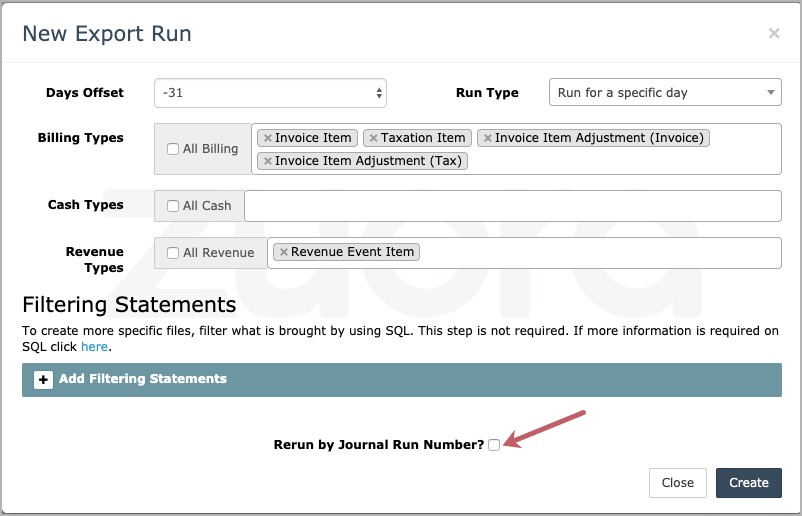
Optionally, modify the settings that are populated from global settings.
-
Optionally, add or delete a filtering SQL statement.
If you do not use any filtering statements, click the delete icon to remove the prompt message in the text field. Otherwise, this message will be used as a filtering statement and your summary run may fail.

-
If you only want to rerun a journal run, select Rerun by Journal Run Number? and enter the journal run number (in the format of JR-xxxxx) in the text field.
-
Click Create to start the run.
The summary run is displayed in the Summary Runs tab. You can click the refresh button to get the latest status.
Download the file exported from a summary run
After a summary run completes successfully, you can download the exported file.
In the Summary Runs tab, find the summary run that you want to download the file from and click the Download link. The downloading process starts automatically. The exported file (in .csv format) uses the summary run ID (GLR-xxxxxxxx) as its name.
The file link is valid for 24 hours. If it expires, you'll get an error message after you click the Download link. In this case, you need to perform a rerun.
To perform a rerun and download the exported file:
- In the Summary Runs tab, copy the number of the journal run (in the format of JR-0000xxxx) that you want to rerun.
- Click Run Now.
- In the settings window, select Rerun by Journal Run Number.
Irrespective of the Days Offset value, the rerun data is collected based on the actual date of the Journal Run. The Days Offset value reflected in the Summary Runs tab is the value selected in the settings window.
- Enter the journal run number that you have copied in step 1, and click Create.
- After the summary run completes successfully, click the Download link for the rerun. The file is then downloaded to your local drive.
