Display previous transactions data in HTML
You can show past transactions on invoices using a Previous Transactions table in HTML, just like with Word templates in Zuora. The following tutorial demonstrates how to configure a previous transactions table. This tutorial takes invoices as an example.
To configure previous transactions in an HTML template through the Zuora UI, perform the following steps.
- Navigate to your user profile and select Billing > Manage Billing Document Configuration.
- Select the Manage Invoice, Credit/Debit Memo Templates tab.
- Click Add New HTML Template.
- Select a predefined HTML or blank template from Invoice.
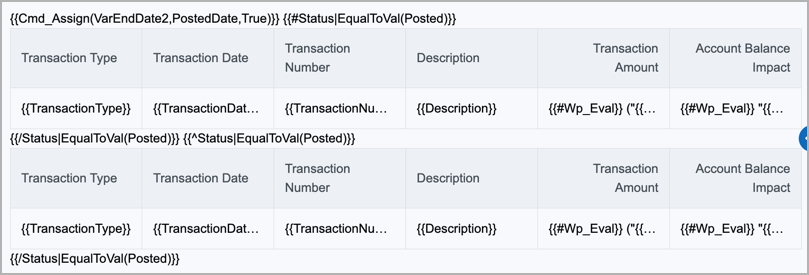
- Select Use. The appearance of the content for Previous Transaction is as follows.

- Click the Content panel and drag the Previous Transactions block in the HTML template editor.
- In the Previous Transactions section, configure the following information by adding different columns:
- Invoice Settlement: Toggle on the invoice settlement option to enable to adjust Invoices or Credit Balances.
- Time Period: Input the number of days you want to consider or select the entire duration from the previous invoice till now.
- Data Display: Toggle on to display full names for merge fields.
- Columns: To modify the Merge Field or Header name, click Edit Column and Save.
Additionally, you have the option to indent the alignments, modify the width, select or unselect a label name under Actions, and rearrange labels by dragging and dropping them. - Sort By: Click Add in the Field column, and configure the following sorting information in the Add Sort By dialog displayed to add a field to sort records to display in the data table.
- Group By: Click Add in the Field column and configure the following sorting information in the Add Group By dialog that is displayed:
- From the Field list, select a field that is used to group the records in the data table.
- In the Group Alias field, enter a name to display for the group.
- Click Add to save the grouping configuration.
- Filters: Click Add in the Field column, and configure the following sorting information in the Add Filter By dialog that is displayed:
- From the Field list, select a field that is used to filter the records in the data table.
- From the Operator list, select an operator that is used in the filter.
- In the Value field, enter a value used in the filter.
- Click Add to save the filtering configuration.
- Header: Configure styles to apply to the table headers, such as the font, font size, formatting, align, text color, and background color.
- Body: Configure styles to apply to the table body, such as the font, font size, formatting, alignment, text color, and background color.
- HTML Source: View the HTML template used.
- Padding: Configure width and length to apply to the table headers and body, such as top,left, bottom, and right or all sides.
- Border: Configure width and length to apply to the table headers and body, such as top,left, bottom, and right or all sides.
- General: Configure the container padding for the image.
