Using the Statement Generator feature
You can generate statements manually or through the scheduler (configured in the Settings tab). Finished or in-progress statement runs can be viewed in the Executions tab.
On average, statements can take approximately 30 seconds for processing. Large-scale processing (for example, 1,000 statements) can take up to 10-20 minutes.
Generate statements manually
Statements can be generated outside of the recurring schedule. Ad-hoc statement runs do not affect the recurring schedule. You will get the recurring statements no matter how many times you manually generated statements.
Ad-hoc statement runs will use the configurations on the Settings page and require a time range that concludes on the current day. There are no limitations to creating multiple statements for the same time period.
-
Navigate to the Executions tab.
-
Click + in toolbar.

-
Configure the details for the ad-hoc statement run.

- Select the batch of accounts to generate statements for.
- Enter the start date for the system to start gathering files.
- Click Start to start the statement run.
Statement Generator is only able to generate statements for a particular batch. If you are trying to generate a statement for a single customer, you will need to move them into their own batch and then execute the process. See Billing and Payment Information for Customer Accounts and Creating Bill Runs for more information about batches.
View statements generated from statement runs
You can view generated statements in your Zuora environment (if configured to be attached to an account) or in the Statement Generator feature.
To view statements in your Zuora environment, navigate to the desired account. On the account landing page, scroll to the Attachment section and view statements.
To view statements in Statement Generator, navigate to the Executions tab. All completed and in-progress statement runs are displayed in this tab. Click the refresh icon on the toolbar to get the latest status of statement runs.
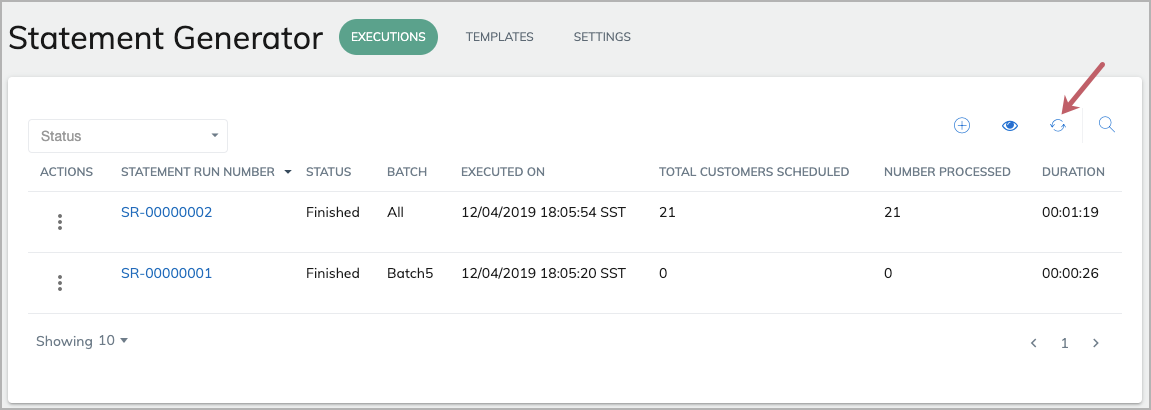
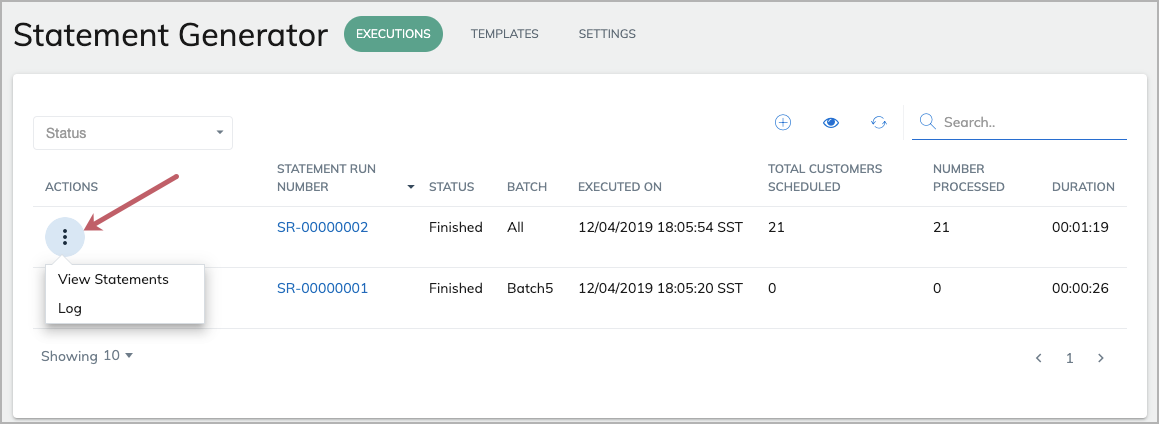
To view all statements generated in a finished statement run, click the desired statement run number or click the menu icon and then select View Statements. You can enter a batch number in the search field to filter statement runs for this batch.
To view the details and errors of a statement run, click the menu icon and select Log.
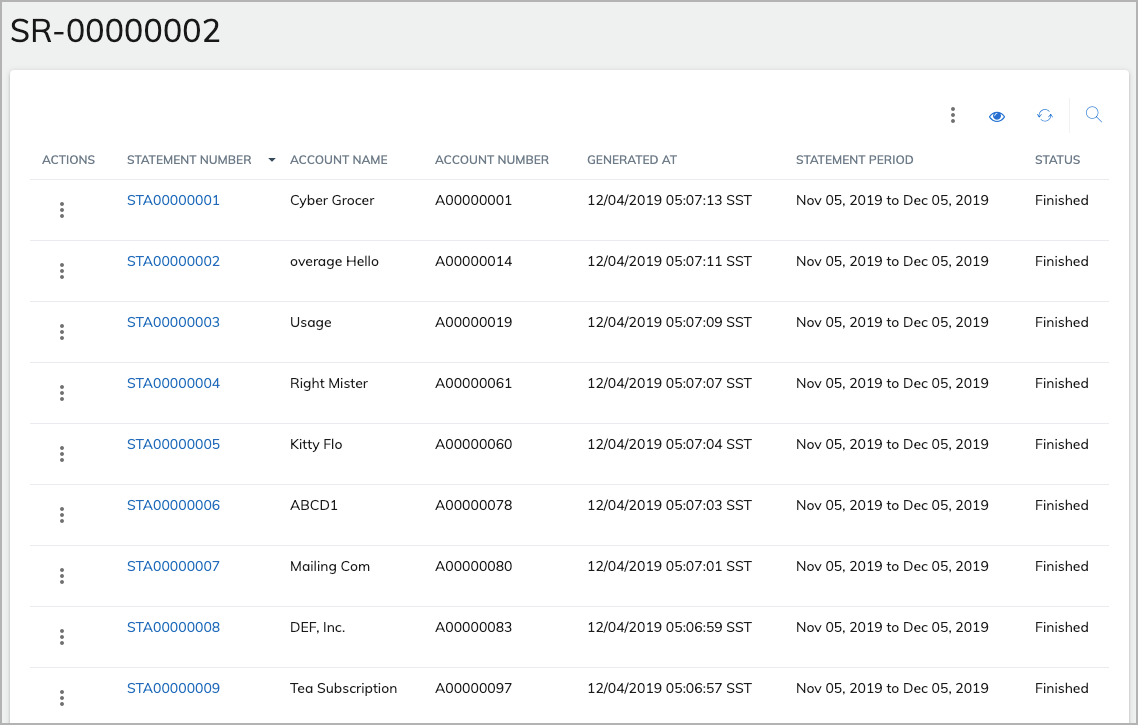
After you click a statement run number or select View Statements on a statement run, the details of the statement run will be displayed. You can filter or sort the statements by account name, account number, statement number, or statement status.
To view a specific statement, click the statement number or click the menu icon and select PDF. To send a statement to the customer email address configured in settings, click the menu icon and select Email.

You can download statements in groups or resend all generated statements to specified account emails by using the menu in the toolbar.
- Download Statement: Download a group of statements. You need to select the group on the page that opens.
- Resend Email Statements: Resend generated statements to emails specified in the Settings tab.
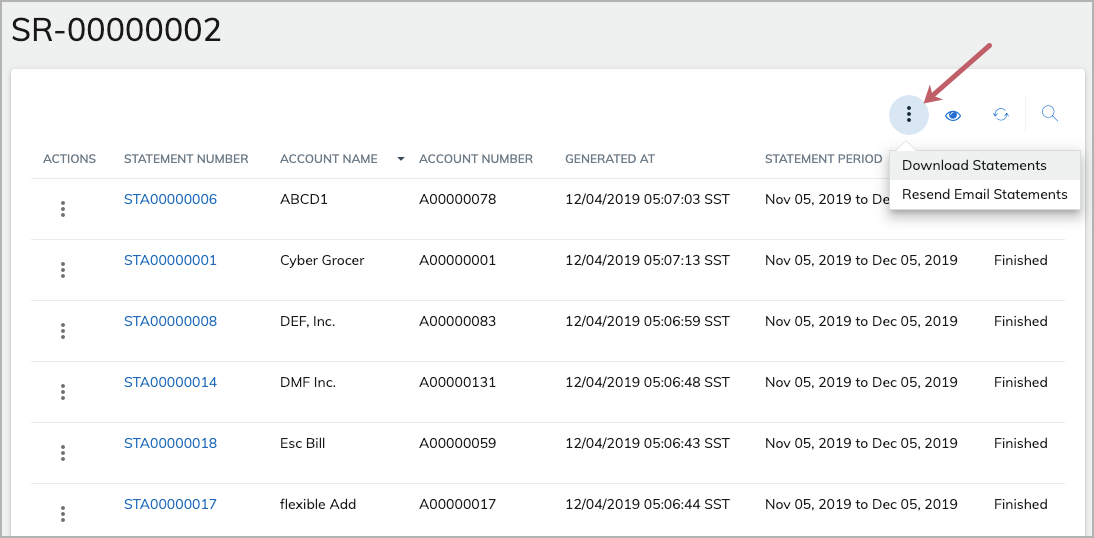
If you select Download Statements, you also need to select the group of statements that you want to download.
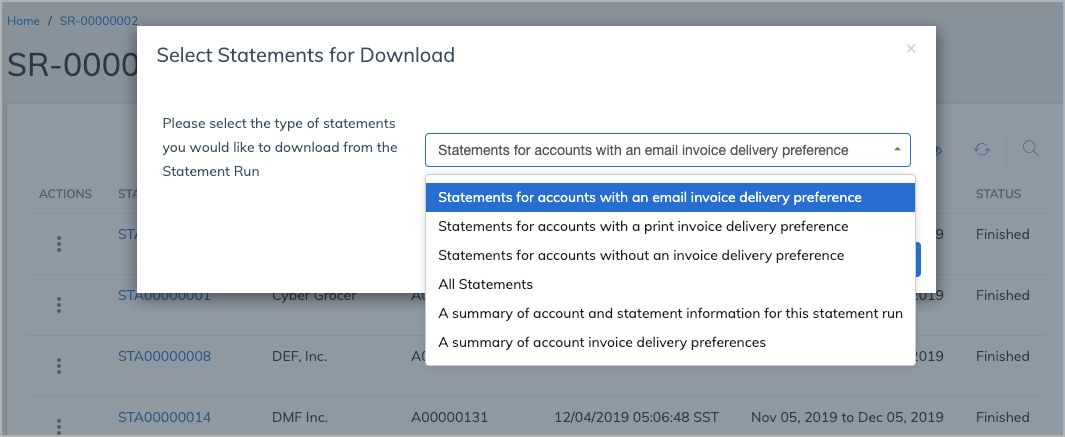
- Statements for accounts with an email invoice delivery preference: Download a file of all statements from accounts that have an invoice preference of email.
- Statements for accounts with a print invoice delivery preference: Download a file of all statements from accounts that have an invoice preference of print.
- Statements for accounts without an invoice delivery preference: Download a file of all statements from accounts that do not have an invoice preference.
- All Statements - Download a file of all statements created from the statement run.
- A summary of account and statement information for this statement run: Download a summary CSV file of account and statement information.
- A summary of account invoice delivery preferences: Download a summary CSV file of account invoice delivery preference as indicated in your Zuora environment.
Manage statement templates
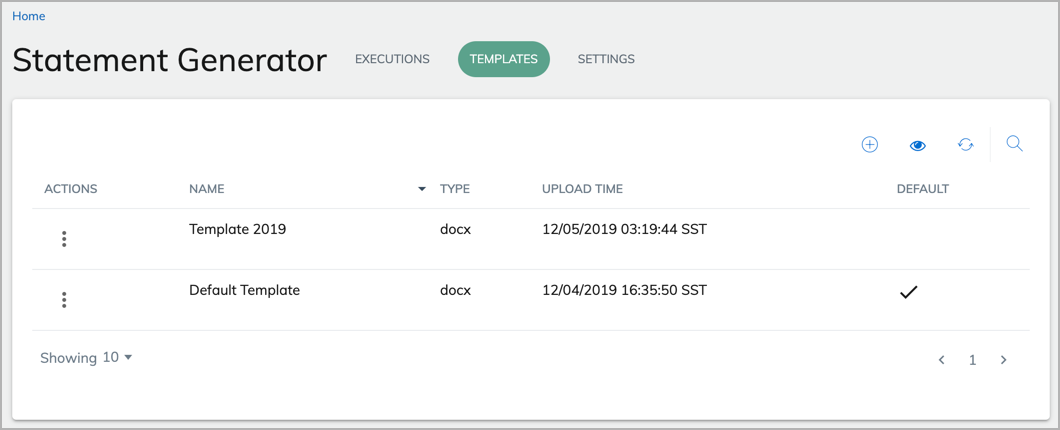
In the Templates tab, you can upload or delete statement templates, or set a statement template as the default template.
When you install the Statement Generator feature, a template called "Default Template" is provided in the Zuora UI. To customize it, download, edit, and then upload it to the Statement Generator.
You must customize all the statement templates before using them to generate any statements.
Upload a new statement template
-
Click
 in the toolbar.
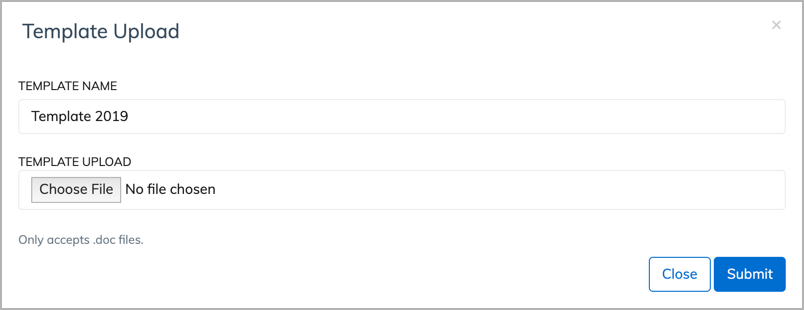
A new page for uploading a new template displays.
-
Enter a name to identify the template for later use.
-
Click Choose File and select the template file (.doc) to upload.
-
Click Submit.
The new template is now displayed in the list of templates in the Templates tab.
Delete a template
The default template cannot be deleted. You need to set a new default template before you can delete this template.
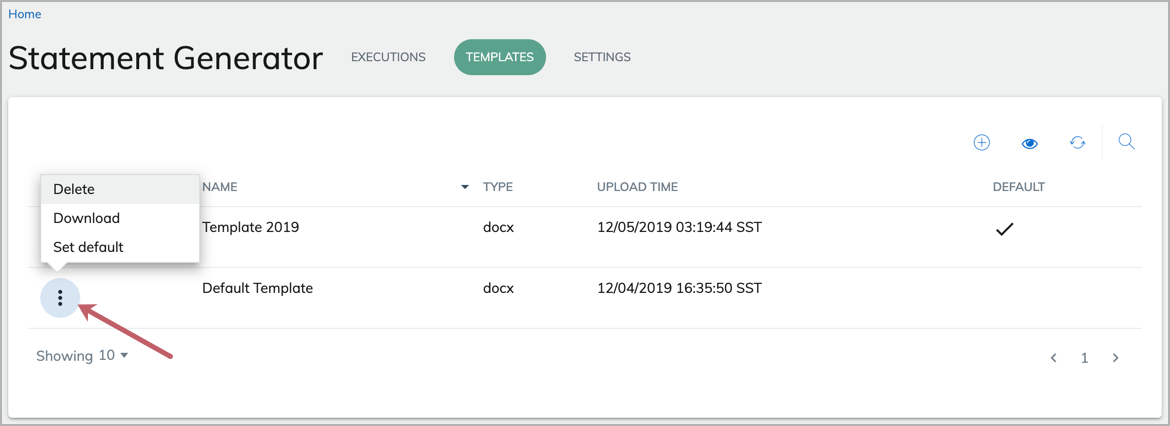
To delete a template, click the menu icon for the template and select Delete.
For the default template, the only option on the menu is Download.
Set a template as default
The default template will be used for all accounts unless otherwise specified via the account custom field for the Statement Generator feature. You can download a template and use it as the base for further customization. Specific invoice items will not be visible on a generated statement.
To set a template as the default template, click the menu icon for the template (see the screenshot above) and select Set default.
About creating a custom statement template
Creating a custom statement template is similar to creating an invoice template. However, there are two features that are supported in invoice templates but not supported in statement templates.
-
Transaction tables
-
Changing the sort order on a table
You can follow the instructions in Creating a Custom Invoice Template, but you need to skip the steps related to transaction tables and table sort orders.
See Merge Fields Supported by Statement Generator for a list of merge fields supported in Statement Generator.
Configure an account to use a custom template in Zuora
This task is performed in Zuora. After a custom statement template is added in the Statement Generator feature, you can configure selected accounts to use this statement template in Zuora.
To configure an account to use a custom statement template in Zuora:
-
In Statement Generator, upload the custom template. Copy the template name (not file name) and save it it in a separate place.
-
In Zuora, navigate to Customer > Customer Accounts and edit the profile of the account.
-
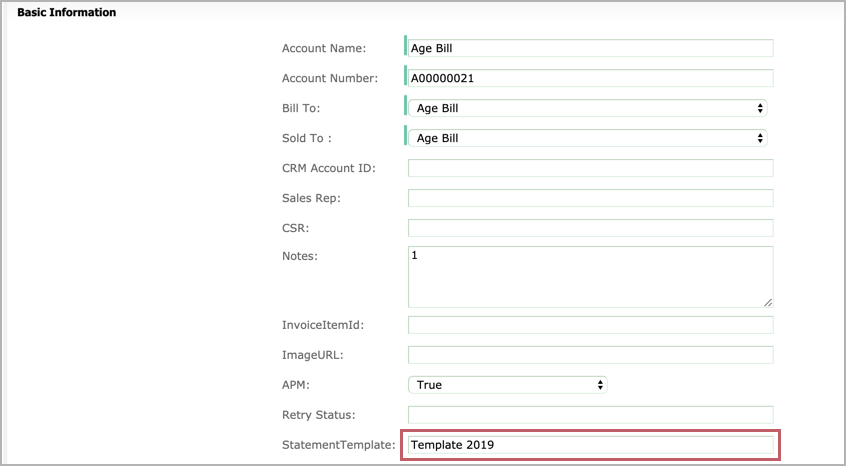
Enter the custom template name that you have copied as the value for the StatementTemplate custom field of the account.
-
Click save to save the settings.
If you want multiple customer accounts to use the custom statement template, you can use the Workflow feature to automate the custom field configuration for each customer account.
