Snowflake as a source and target
You can create meters for Snowflake in the following methods:
Meter with Snowflake as a source
To create a meter with Snowflake as the source, follow the instructions below:
- Create a Custom Meter. For more information, see Create a new meter using custom method.
- Select the Snowflake as the source.
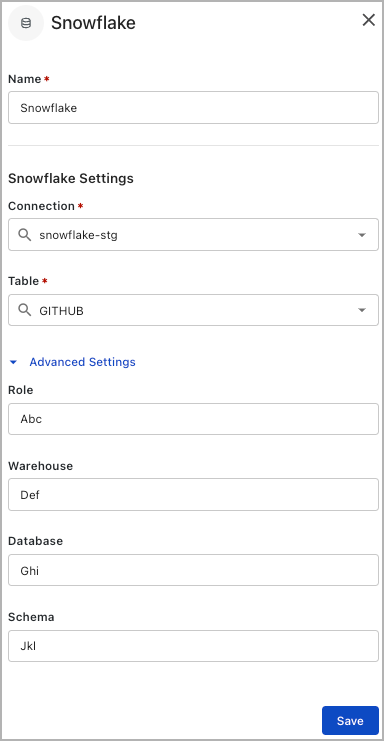
The Snowflake settings page is displayed.
- Click Select to select an Event Definition on the Snowflake setting page.
You can create or select an existing Event Definition or import an Event Definition. For more information, see Event Definitions. - Under the Snowflake Settings section, perform the following:

|
Task |
Description |
|---|---|
|
Connection |
Select Snowflake from the Connection drop-down which includes the S3 bucket, credentials, and base path. To set up a connection, contact Zuora Support. |
|
Upload Data From |
Select a value from the following options:
|
|
Advanced Settings |
Select the values for excluded fields, rolling file size, and partition by fields.
|
- Click Save to save the Snowflake source settings.
Meter with Snowflake as a target
To create a meter with Snowflake as the target, follow the instructions below:
- Create a Custom Meter. For more information, see Create a new meter using custom method.
- Select the Snowflake as the target.
The Snowflake settings page is displayed.
- Under the Snowflake Settings section, perform the following:
|
Task |
Description |
|---|---|
|
Connection |
Select Snowflake from the Connection drop-down which includes the S3 bucket, credentials, and base path. To set up a connection, contact Zuora Support. |
|
Upload Data From |
Select a value from the following options:
|
|
Advanced Settings |
Select the values for excluded fields, rolling file size, and partition by fields.
|
-
Click Save to save the Snowflake target settings.