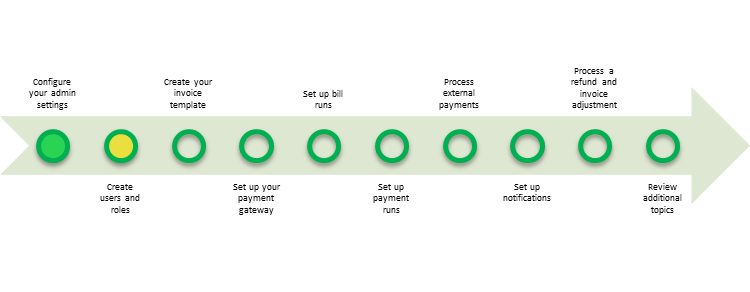
Part 2: Create Users and Roles
Overview
Zuora Internal Documentation. This article is intended for Zuora only. Do not share or distribute publicly.
In this section, you will create an API user role and an API user which you will use to access the Zuora Z-Commerce API.
Create User Roles
The Manage User Roles page is viewable by Administrators, who can create custom roles to control user permissions at a granular level. See Managing User Roles for more information, and Creating a Custom User Role for instructions on creating a custom role in Zuora.
Exercise
In this exercise, we will walk you through creating a custom user role for your API Integration, and then creating a user for that role.
Step 1: Create an API User Role
- Using the top right navigation bar, click the Settings > Administration Settings link.
- Click the Manage User Roles link. You should now see a detail page that looks like this:
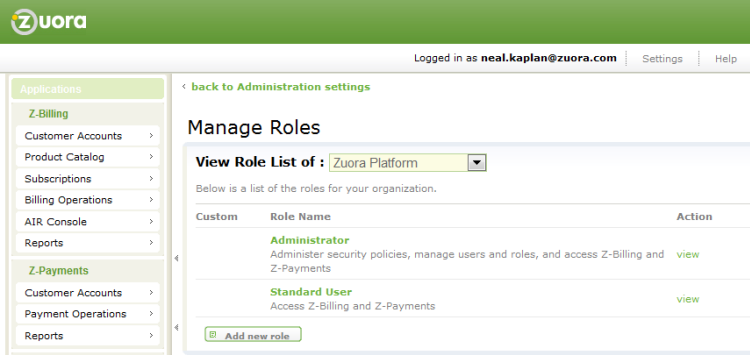
- On the detail page, make sure that
Zuora Platformis selected in the View Role List of list, then click the add new role button, located in the center of the page. - You should now see the following page:
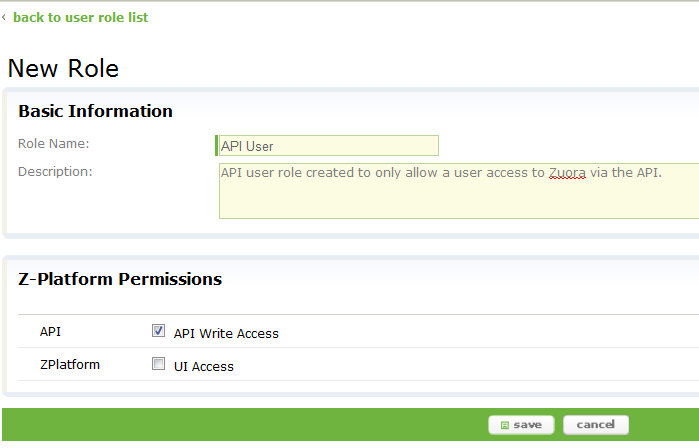
- Enter the following information:
- Role Name: Enter
API User. - Description: Enter a meaningful description for this role.
- Z-Platform Permissions: Select API Write Access.
- Role Name: Enter
- Click save.
Step 2: Create an API User
In this exercise, we will walk you through creating a user and giving it a custom role for your API User.
- Using the top right navigation bar, click on the Settings > Administration Settings link.
- Click the Manage Users link. You should now see a detail page that looks like this:

- On All Users page, click the Add Single User button, located in the upper-right.
- You should see the following page:
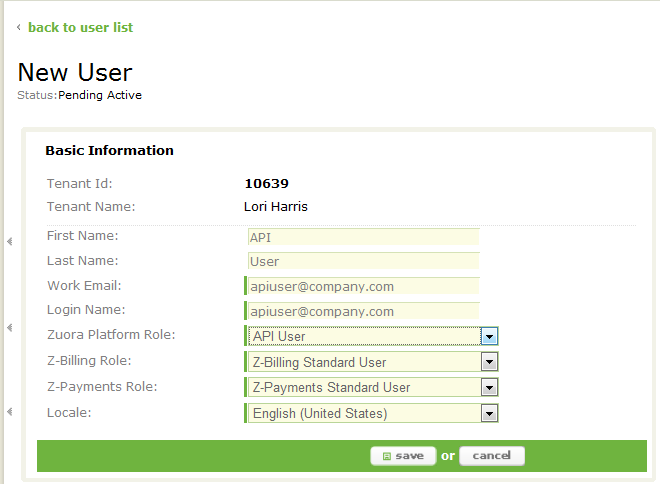
- Enter the following values:
- First Name: Enter a first name. This could be the name of the person who will be your API user, or a name for the role (such as
APIfor theAPI Useraccount). - Last Name: Enter a last name for the API user.
- Work Email: Enter an email address. Make sure that this is a valid email address.
- Login Name: Enter the name that the API user will use to log in to Zuora.
- Zuora Platform Role: Select
API User. - Z-Billing Role: Select
Z-Billing Standard User. - Z-Payments Role: Select
Z-Payments Standard User. - Locale: Select your locale (the language settings that you want to use and the country in which your company is located) from the list.
- First Name: Enter a first name. This could be the name of the person who will be your API user, or a name for the role (such as
- Click save.
What's Next
Congratulations! You have now created your first custom user role in Zuora, as well as a user for that role.
Next, proceed to Part 3: Create Your Invoice Template.