Passwordless Authentication
You can allow end-users to register and login to your site, through Zephr, without entering a password.
This process uses email verification to authenticate the end user, and is called Passwordless Authentication.
The passwordless authentication process is as follows:
- An end user logs into your site and enters their email address
- An email containing an access link is sent to the end user
- The end user selects the access link in the email
- The link redirects the end user to your website and logs them in
The tokens generated for this access link can only be used once. If an end user tries to use the link again, an error displays and Zephr does not log them in.
You can define the length of time for which a token is valid in the Authentication configuration. If an end user selects the link after this time, the token is invalid and they are not be logged in. In this case, the end user must complete the process again. For further information on setting the timeout period for the verification link sent to the end user, see the Authentication topic.
Configure Passwordless Authentication
To configure passwordless authentication, complete the following steps:
- Select Identity from the menu options
- Select Settings
The Settings screen displays.
- Select the Require Email Verification checkbox in the Authentication section
When selected, additional fields display, as illustrated below:
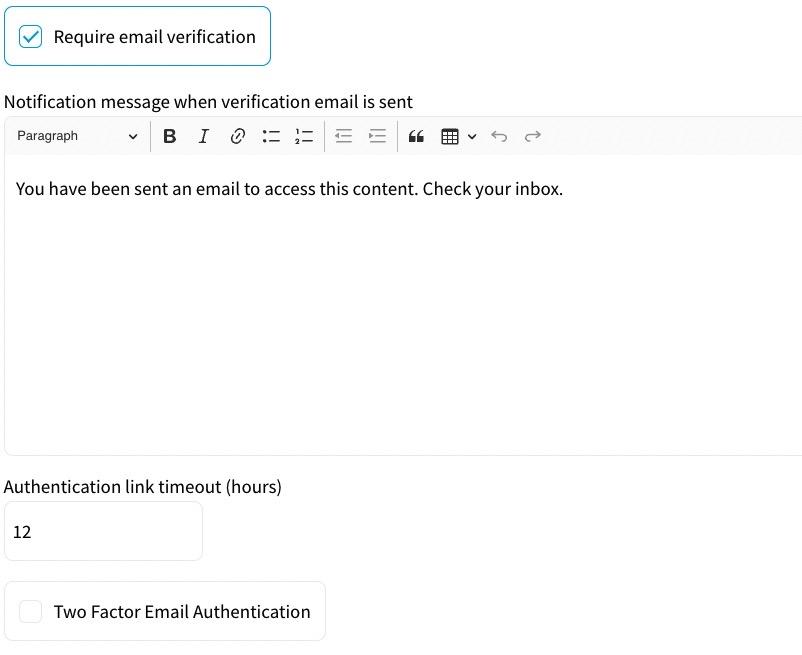
Enter the message you want to display in the text box.
Note: If you want to format the text, for example to use bold text, use the formatting bar at the top of the text box.
Enter the period in hours for which the link supplied in the verification email remains valid in the Authentication link timeout (hours) text box.
- Select the Save button
- Create a feature in which you want to use passwordless authentication, as described in the Add a Feature topic
Note: If you want to add passwordless authentication to an existing feature, you can edit the feature as described in the Edit a Version topic.
- Create a login or registration form as an outcome for the feature, as described in the Create a Login, Registration or Forgot Password Form topic
Ensure that the Use Passwordless Authentication checkbox is selected.
- Select the Save button to save the outcome
- Add the outcome to your rule as required
For further information on building rules, see the Rules Builder topic.
- Save and publish your rule
When passwordless authentication is configured, your end users can register and log in without setting a password.
Note: If you disable passwordless authentication, your end users must select the Reset Password link when they next log in and set a password to continue accessing your site.