Configure Shared Product Pages
To configure your shared product pages, complete the following steps:
- Select the Product Sharing button
The Product Sharing screen displays, as illustrated below:
- Enter the URL used for the invitation page in the Product sharing invite URL text box
- If required, add any meta data that you want to include in the invitation as follows:
- Select the Add User Attribute and Field Name button
The User Attribute Mapping dialog box displays, as illustrated below:
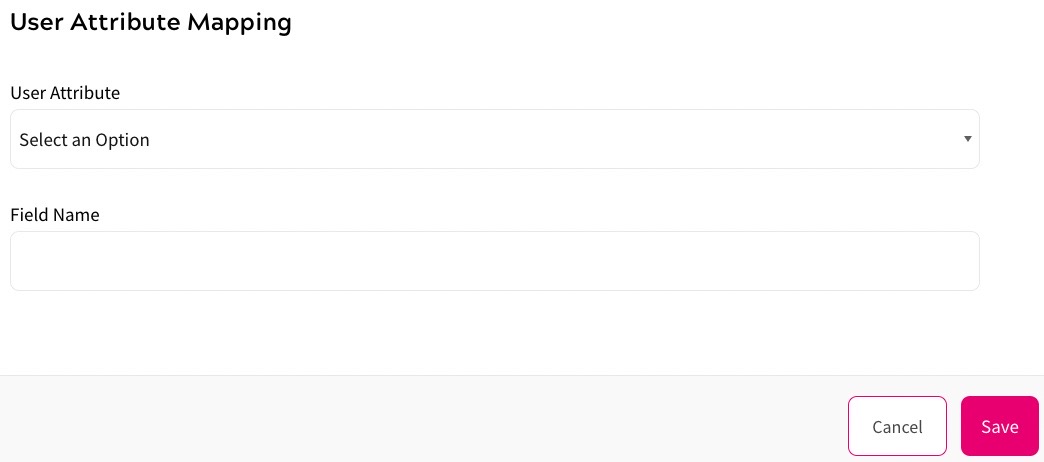
- Select the user attribute to associate with the invitation field from the User Attribute drop-down menu
For example, select the First Name user attribute to include the name of the person sending the invitation
Notes:
- You must create user attributes before you can map them to an invitation field. For further information on creating user attributes, see the Add a User Attribute topic
- The API provides a
GEToperation that allows you to retrieve data about a product sharing invitation by ID, which is passed to the invitation landing page as a query param using thesharing_idpath parameter. For further information on thesharing_idpath parameter, see the Create a Custom Email Template topic - The API also provides a
PUToperation that allows the invitee to accept the invitation. This is only relevant when the invitee is already registered. For further information on using the API to create shareable links in your component, refer to the API documentation
- Select the Save button to add the user attribute mapping and return to the Product Sharing screen. Selecting the Cancel button closes the dialog box without saving the user attribute mapping
- Select the Add User Attribute and Field Name button
- Select the Done button to save your changes and return to the Preference Centre screen. Selecting the Cancel button displays the Preference Centre screen without saving any changes