New user interface
To continuously improve the user experience, Zuora introduced the next generation of its user interface (UI) in early 2022. This new UI experience has been a default-on option in all environments now. The new UI has a more modern look and feel with additional enhancements and functionalities, such as reinvented list views and global search. This generation of the UI aims to bring a new user experience to all of Zuora's applications. Individual users can still disable the new UI experience with a user profile setting as necessary.
Functionalities
The following functionalities are introduced to provide you with a new user experience.
Global Search
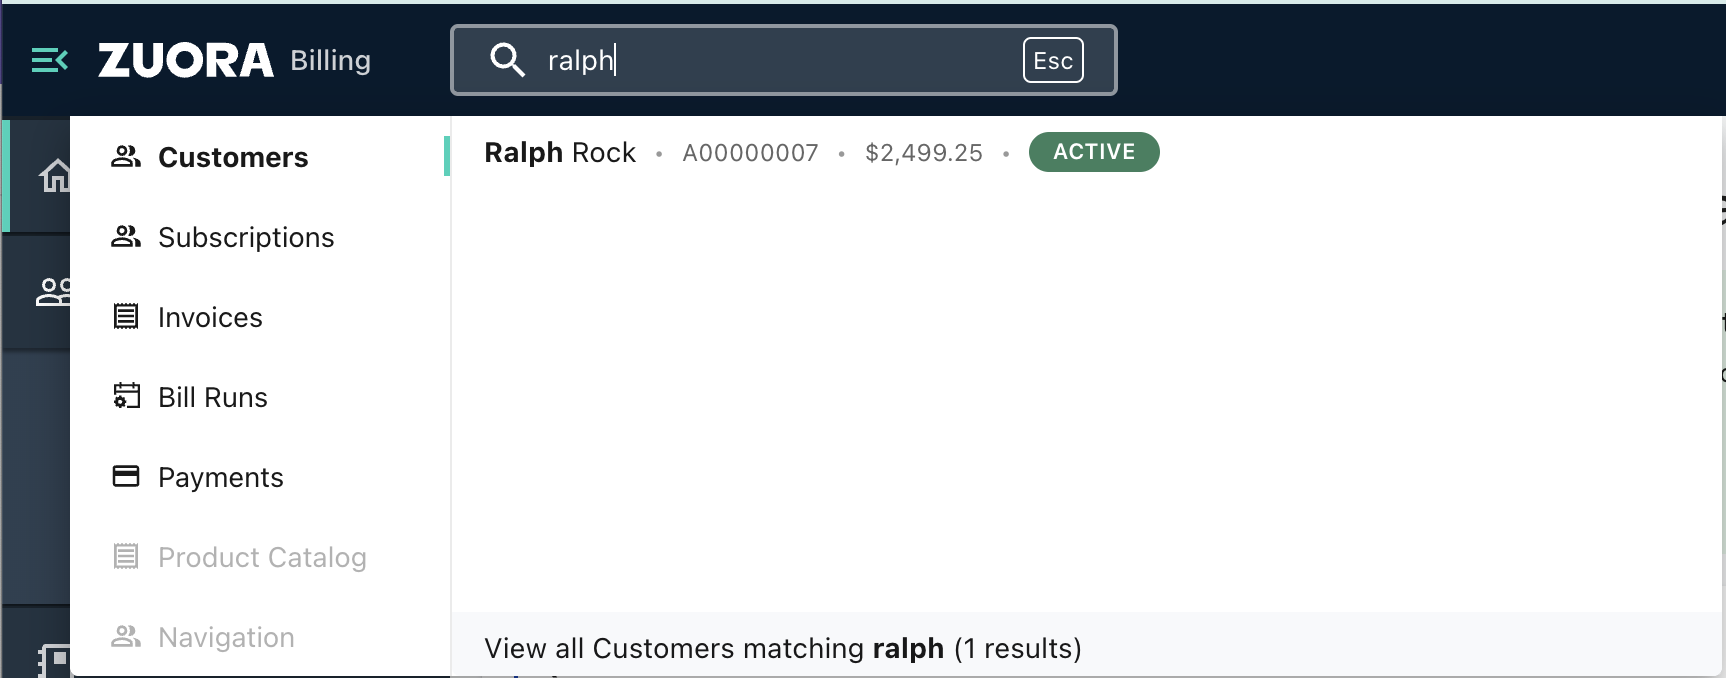
The Global Search feature is introduced to Zuora UI by adding a search bar to the UI header. You can use this search bar to help you quickly find what you are looking for.
-
The search bar in the UI header uses a simple lookup search and returns the results that contain or exactly match the search keywords in the searchable fields across all supported objects as well as the navigation items on the left pane. For example, if you are looking for a specific account by using the account ID, not only the account but also the related objects such as invoices, orders, subscriptions, and payments will be returned.
-
The typeahead functionality is used to display five recent searches and presents a preview of search results to top hits for easier access. You can directly open the individual UI page from the top hits, or you can open the search results page to get a comprehensive view of everything related to the search.
-
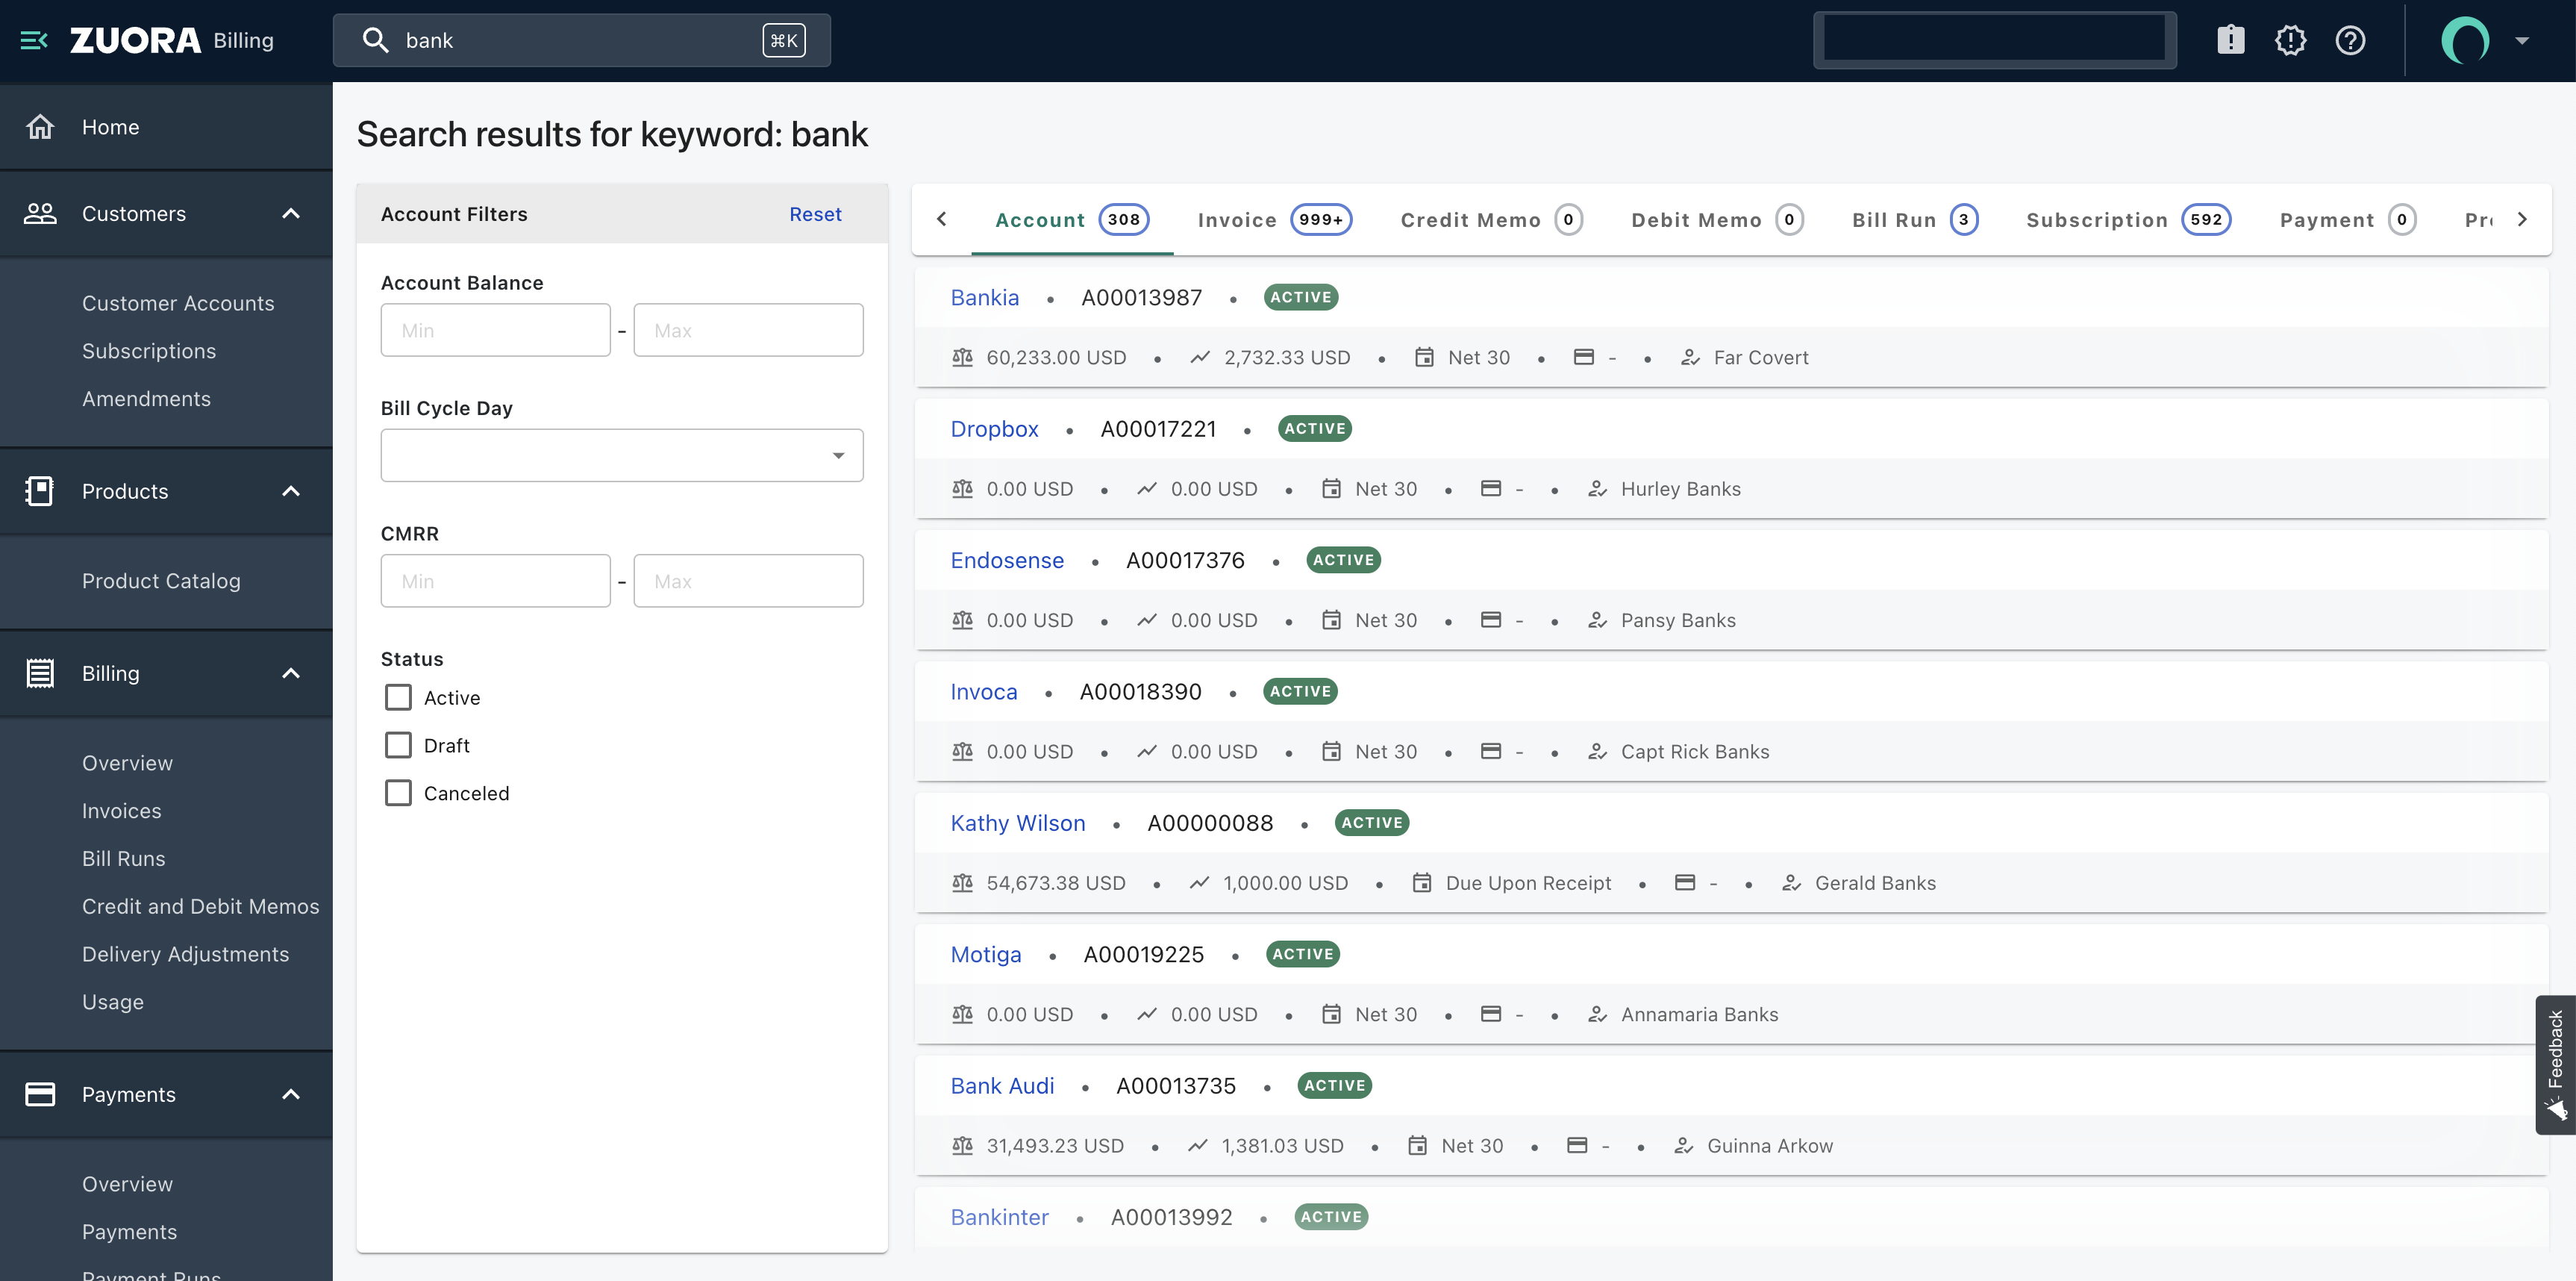
All results on the search results page (as shown in the following graphic) are categorized by object type. Each object has predefined filters on the left side, which can help you narrow down the search results for the object that is currently selected.
Usage notes
Be aware of the following usage when you use the Global Search feature:
- The word or phrase that you type in the search bar is case insensitive.
- To return any search results, the length of the word that you type must exceed two characters.
- You can put double quotation marks ("") around the whole word or phrase that you type to search for an exact match. However, incomplete double quotation marks will return no results. You also cannot use inline double quotation marks, which means the double quotation marks are put around only part of the phrase.
- This feature can support both prefix search and infix search. For a valid prefix search, the length of the search word or phrase must be in the range of 3 to 20 characters. For a valid infix search, the length of the search word or phrase must be in the range of 3 to 10 characters.
Searchable and filterable fields
The following table lists the lookup keys for each object and the available filters on the search result page.
| Object | Lookup keys | Available filters |
|---|---|---|
| Account |
|
|
| Bill Run |
|
|
| Credit Memo |
|
|
| Debit Memo |
|
|
| Invoice |
|
The Payment Applied filter is used to filter the invoiced with 100% of the payment applied. |
| Invoice Schedule |
|
|
| Order |
|
|
| Payment |
|
|
| Product |
|
|
| Product Rate Plan |
|
|
| Product Rate Plan Charge |
|
|
| Subscription |
|
|
Reinvented list views
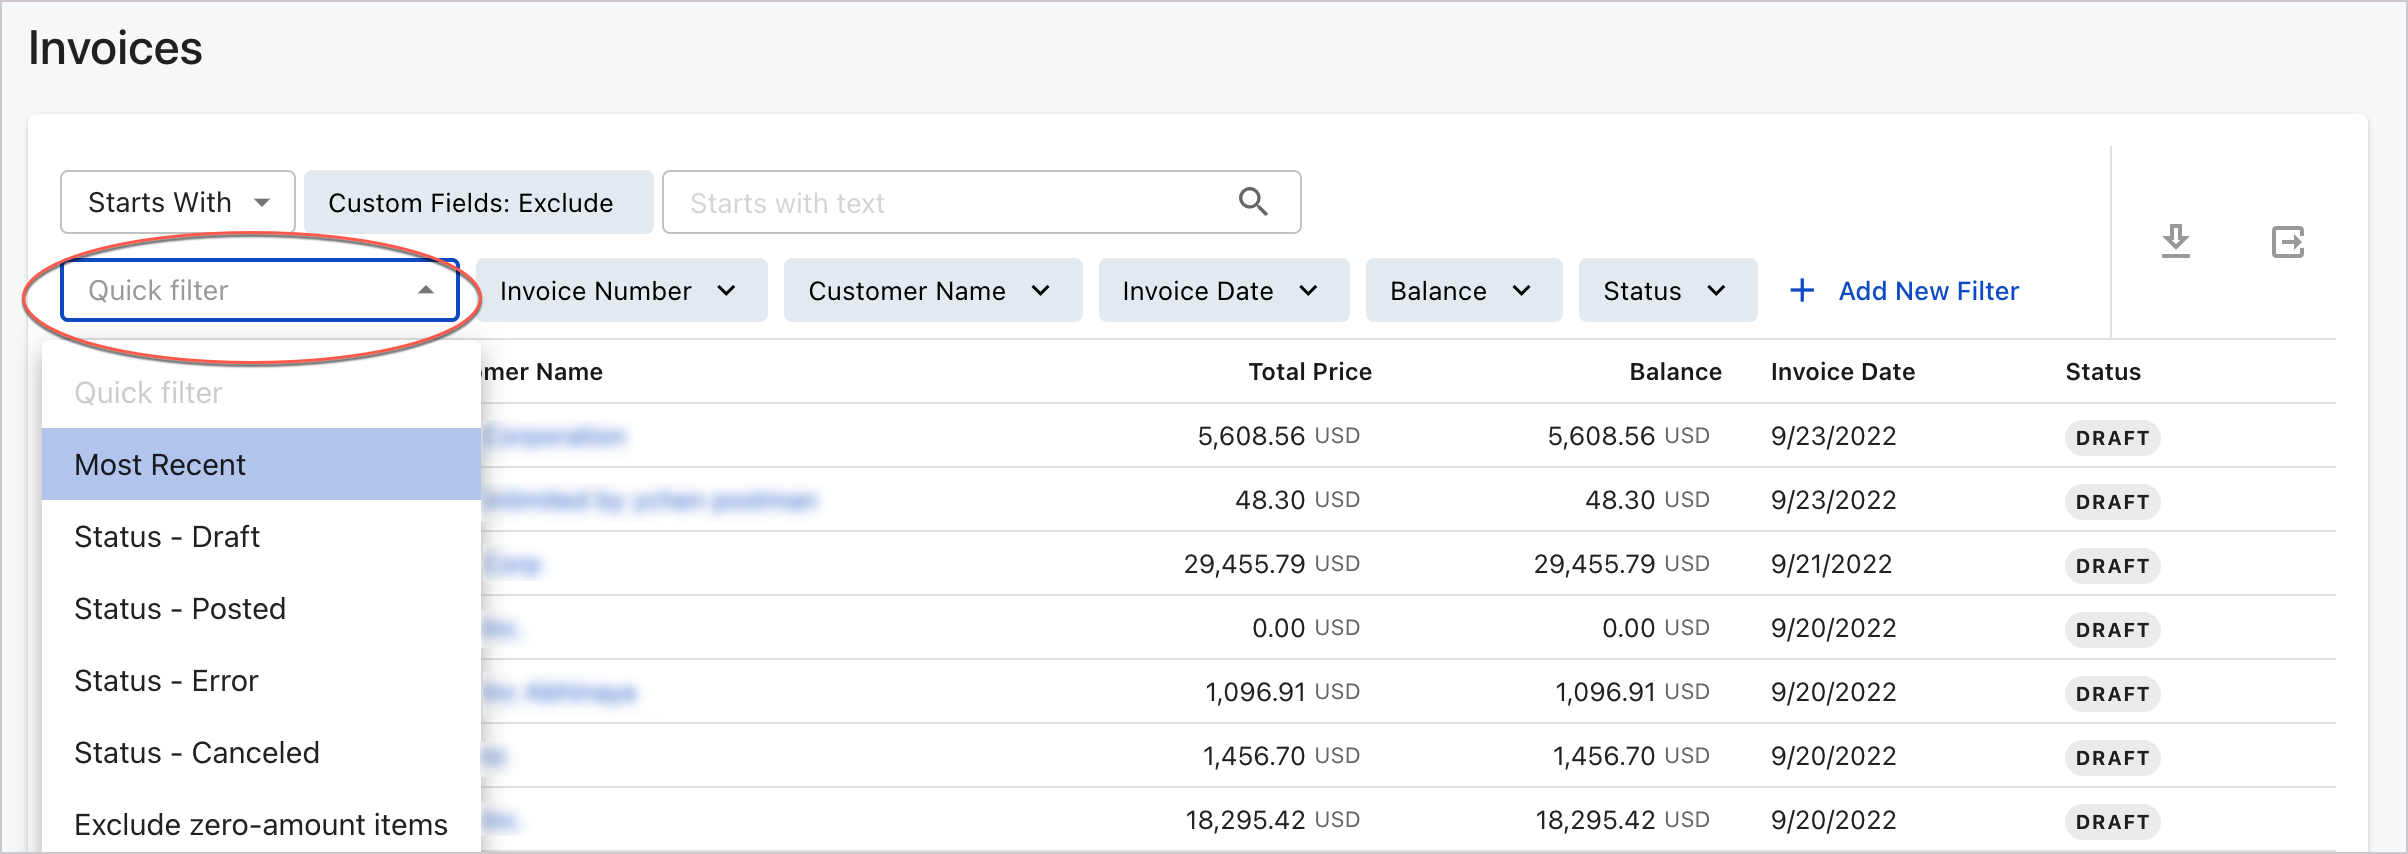
The reinvented list views as shown in the following graphic provide a comprehensive filter functionality to facilitate browsing data.
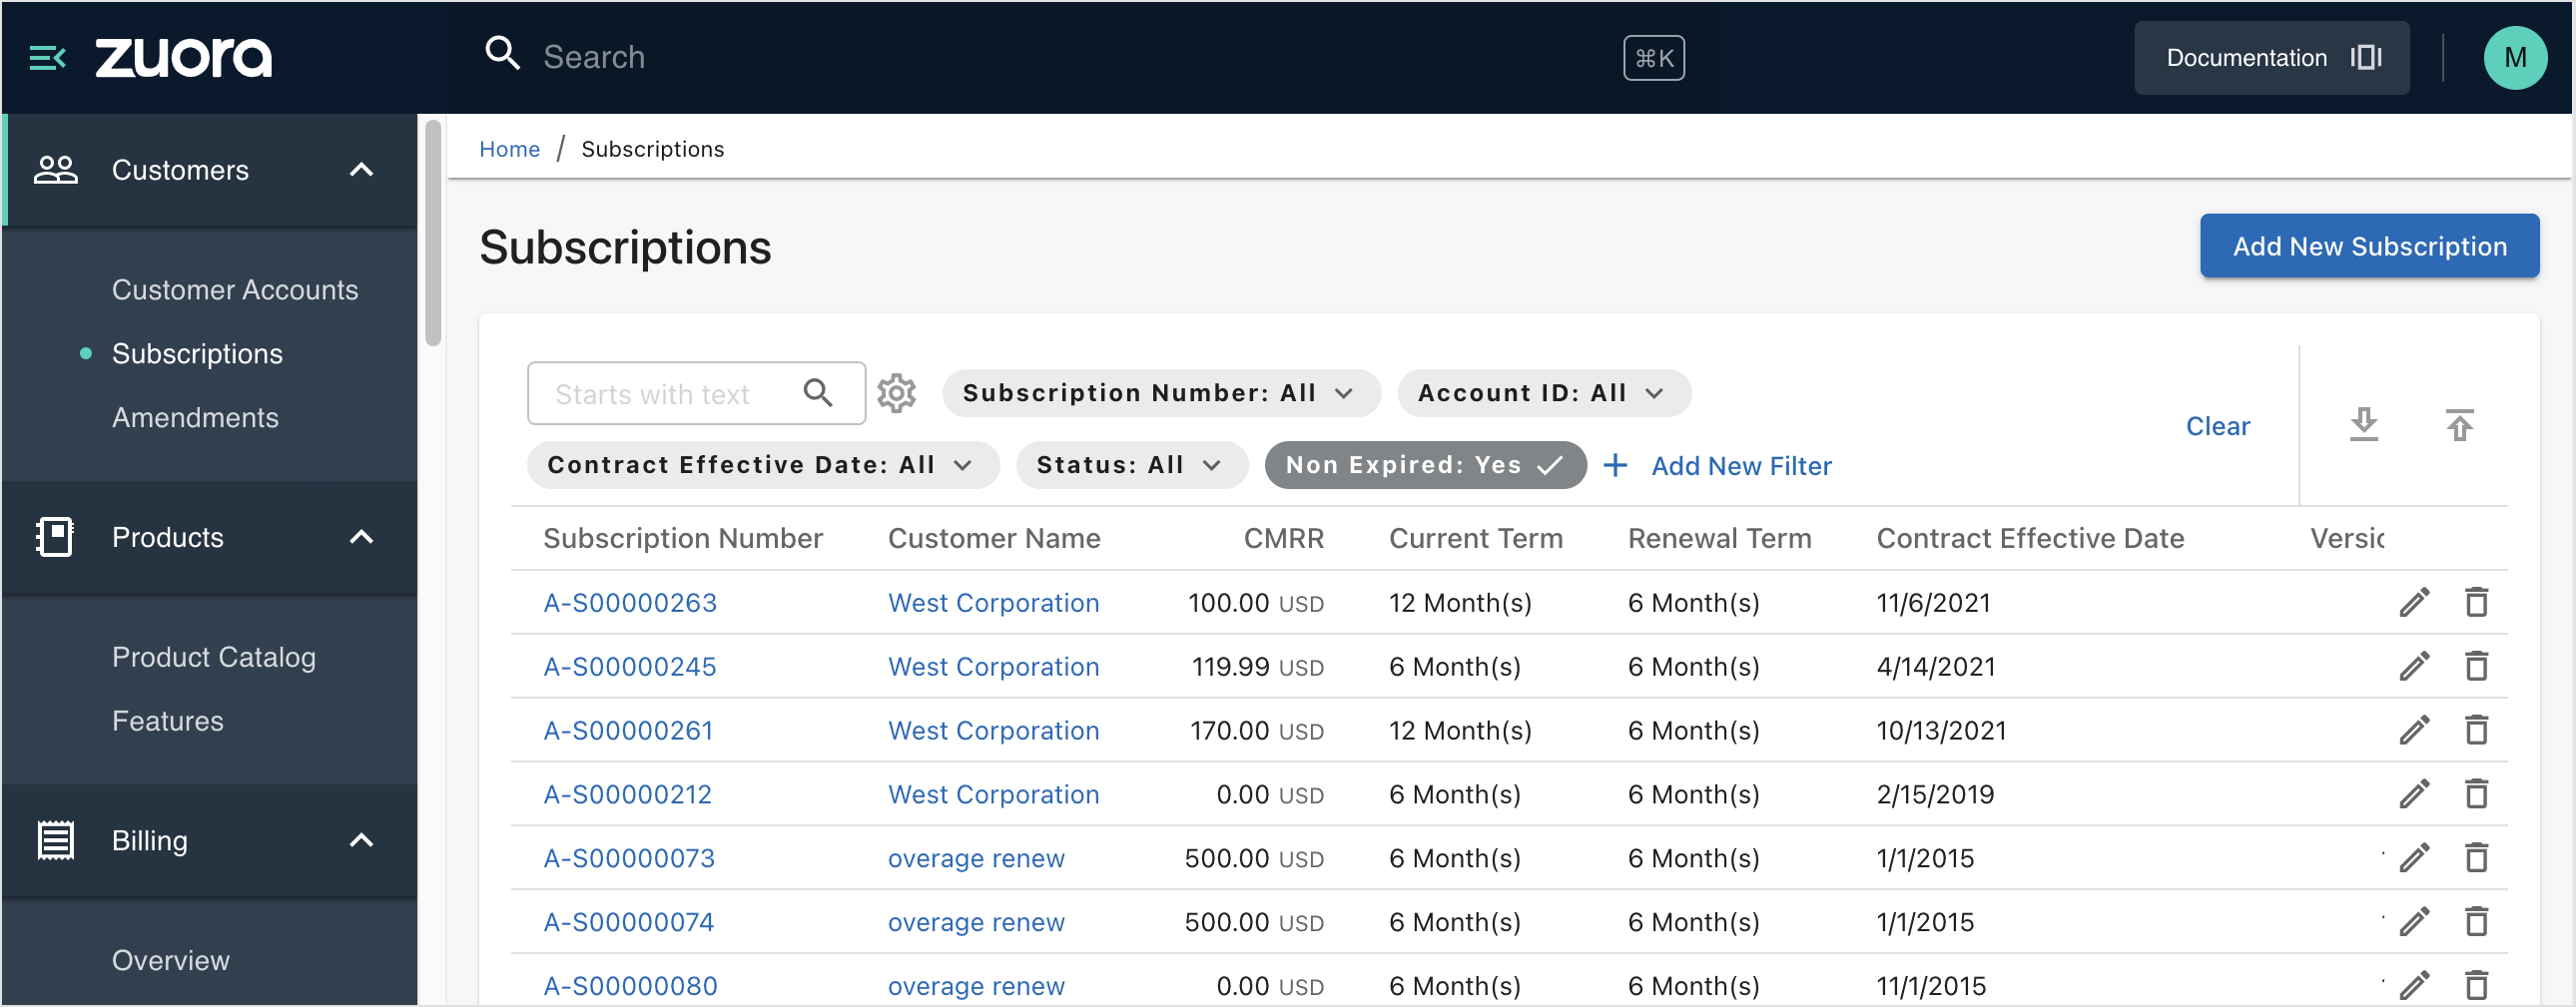
- You can filter the list items by the columns displayed in the list view as well as additional fields that are related to the current object.
- Each list view has a predefined set of filters, which include the most frequently used fields for filtering the current object. The predefined filters are displayed in the table header.
- You can add additional indexed fields to use as filters. Clicking Add New Filter on the list view page will display a drop-down list containing all indexed fields that are defined for the current object. You can choose any field from the list to apply a filter on the current list view. Click Clear to go back to the default list view. If multiple fields are specified for the filter, the binding filter criteria only support the AND logic.
-
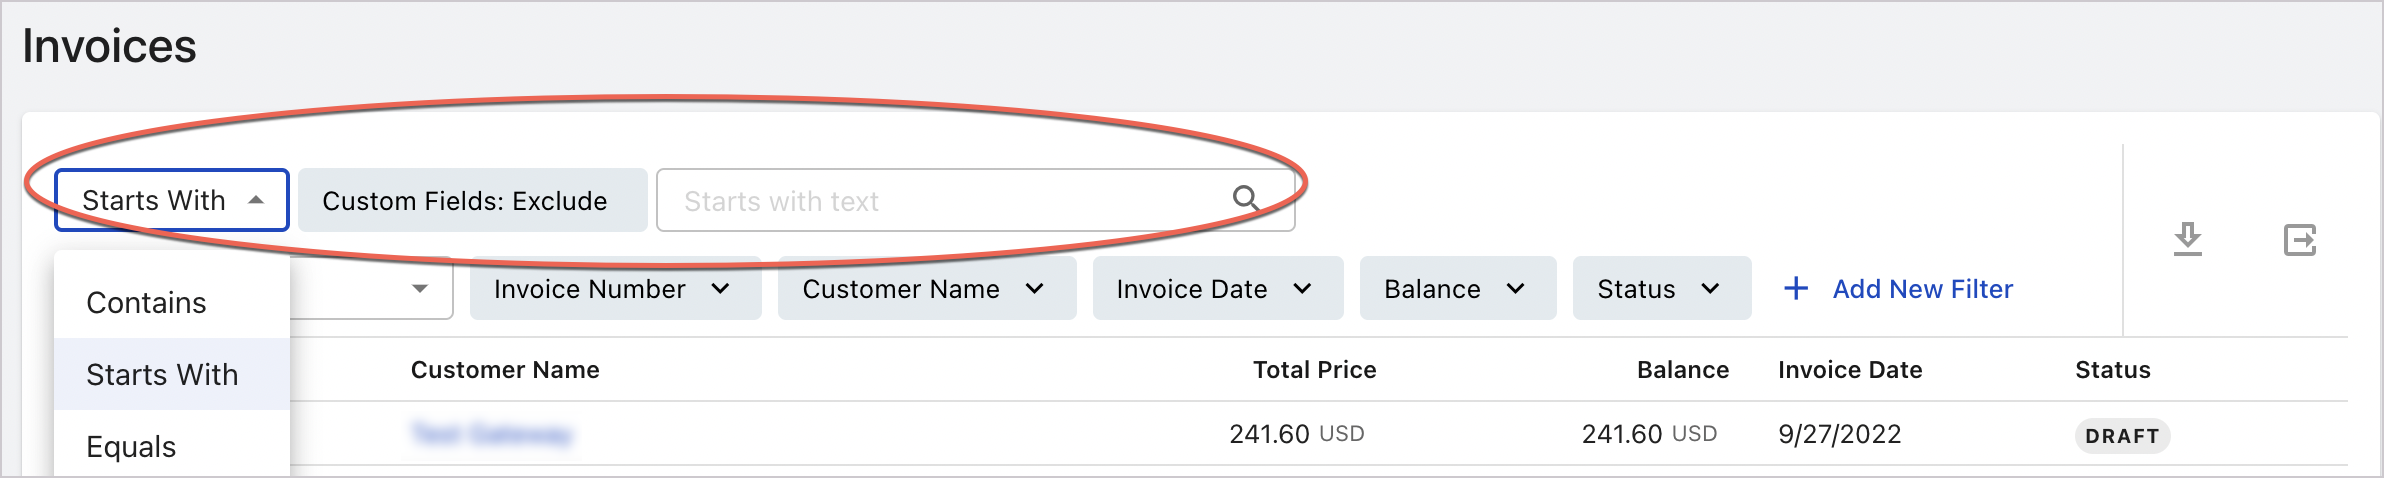
A search box is provided for list views to filter across the string fields. The default method applied to the search criteria is "Starts With". You can switch to other search methods by clicking the arrow in the box. By default, custom fields are excluded from the search scope. To include custom fields in the search, click Custom Fields: Exclude. Click the same button again to switch between excluding and including custom fields in the search.
- Based on analysis of the most commonly filtered data, a set of quick filters is predefined specifically for each list view. You can use the quick filters to quickly filter the data on the list view with one click. For example, on the Invoices list view as shown in the following graphic, clicking the quick filter called Status - Error can quickly filter the invoices in error status.
- The filters that you add to the list views will persist throughout the user's session. After you log out or close the browser, the filters will be reset to the default.
UI Builder
UI Builder is a tool that can be used by administrators to configure the layout of UI pages within Zuora applications. This tool enables configurabilities for the following pages, which include all reinvented list views and part of the object detail pages.
- All reinvented list views
- Invoice detail page
Overview
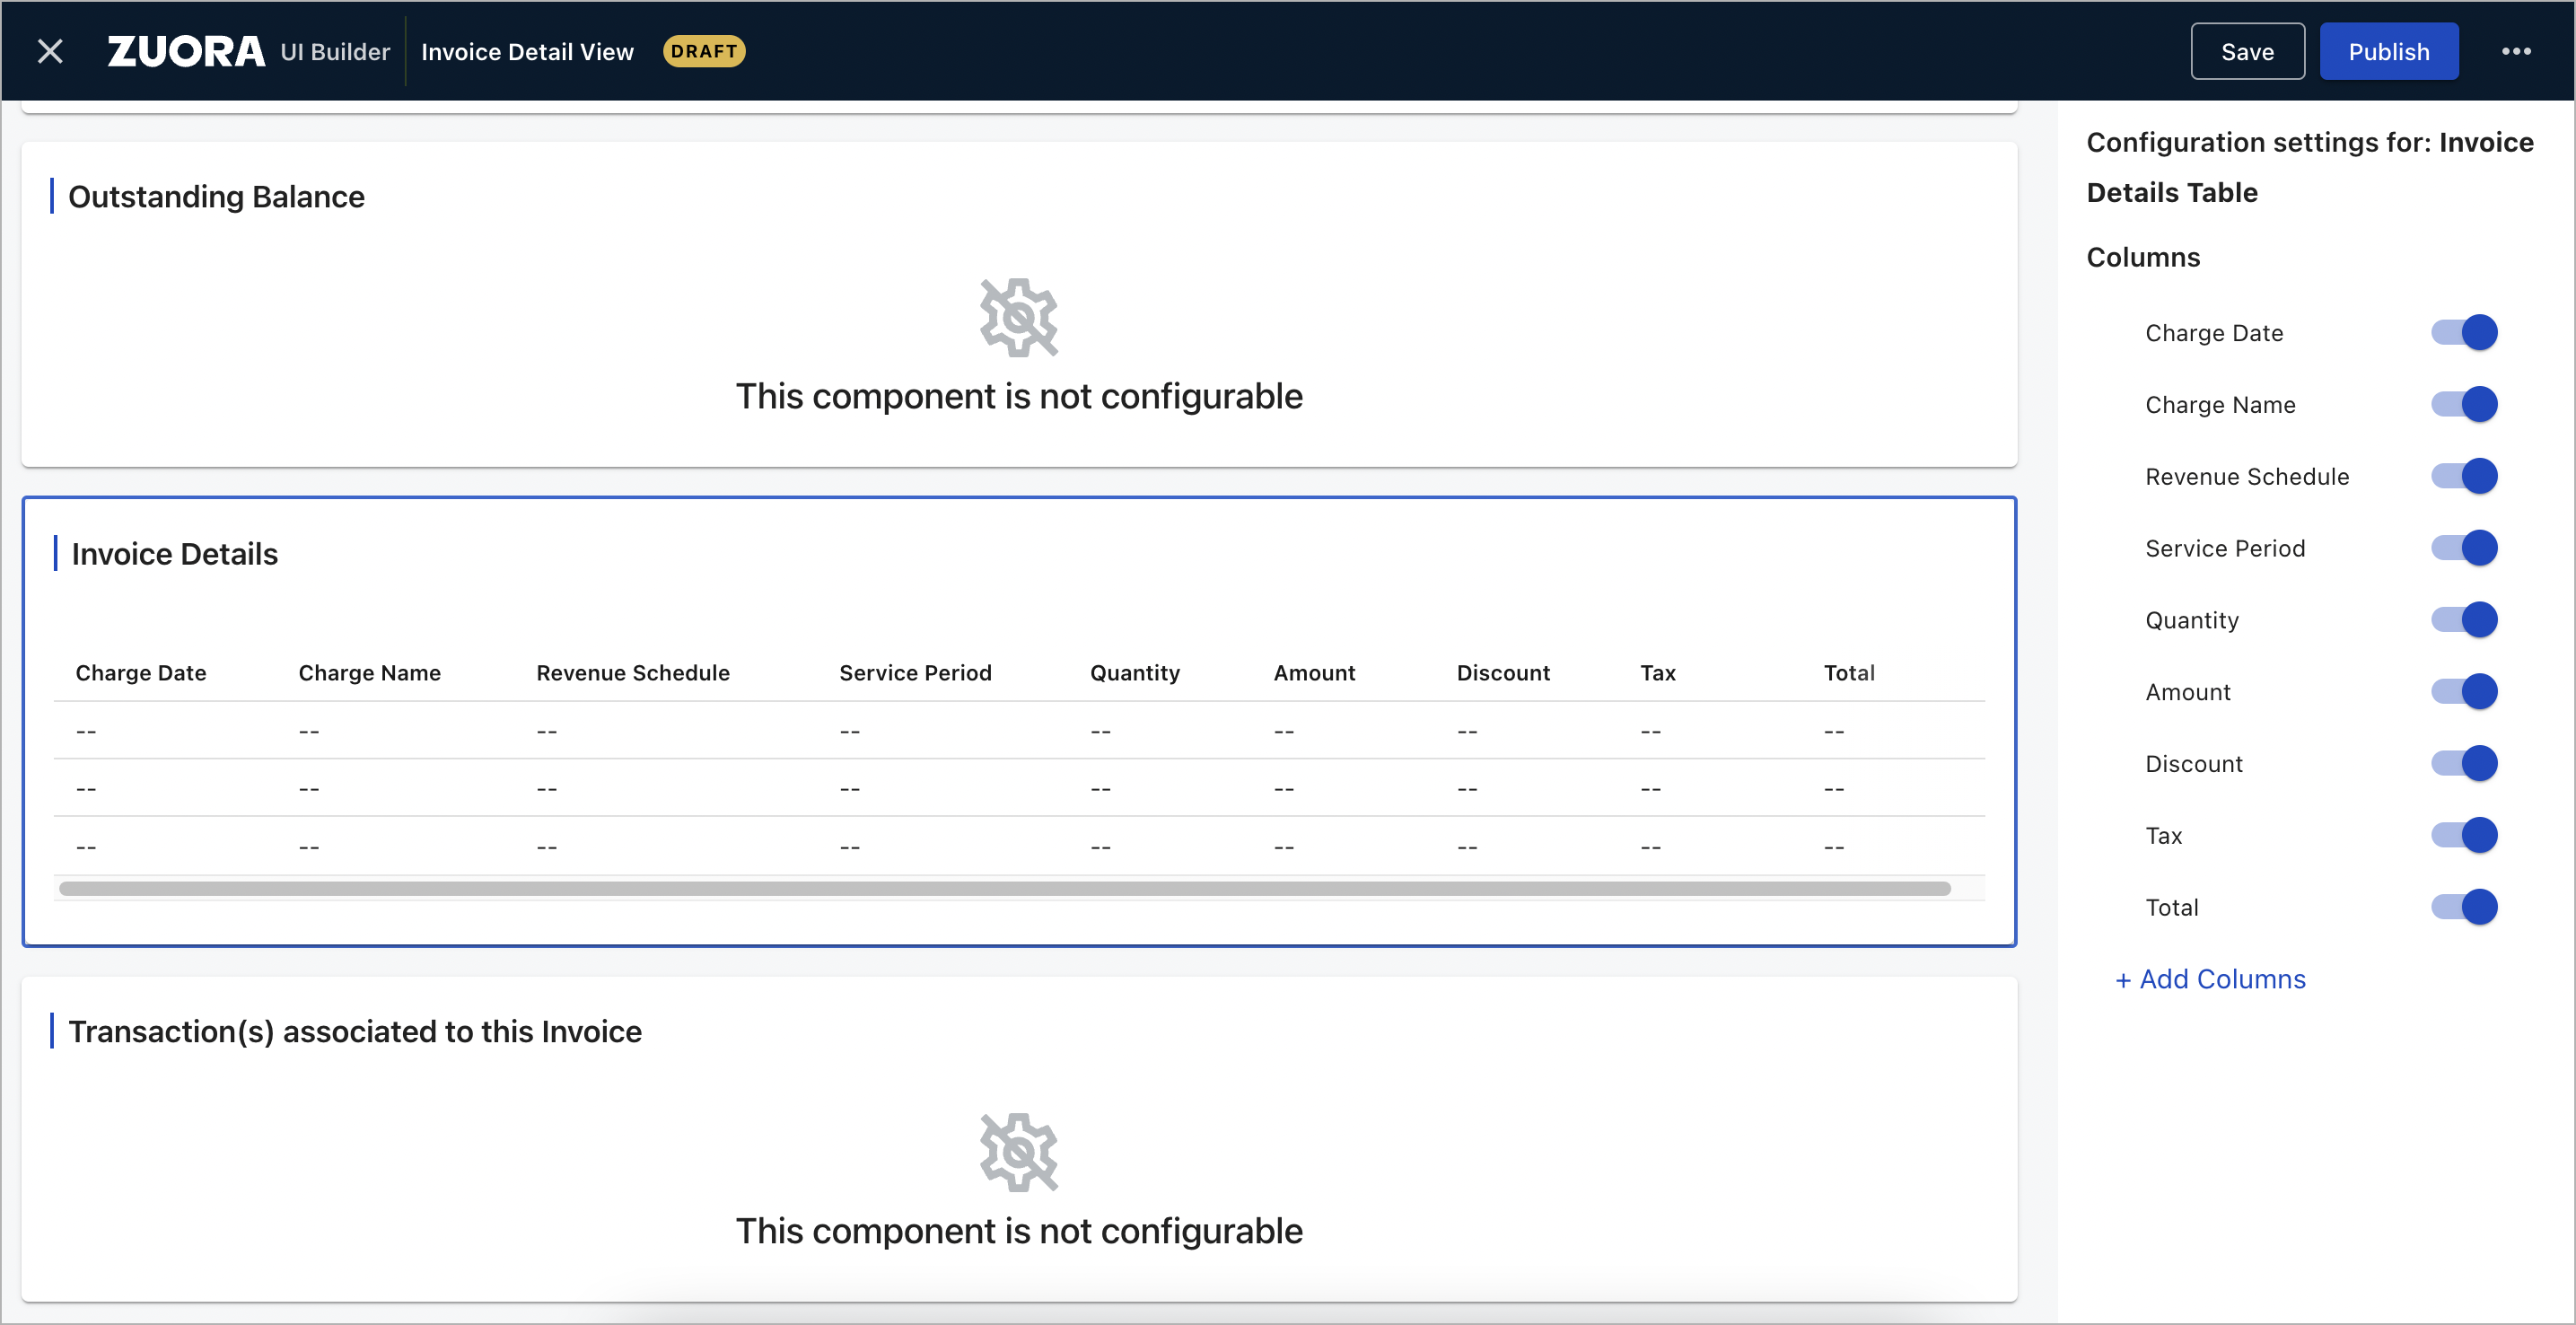
The following graphic shows an example of using UI Builder to configure the invoice detail page. Components of the invoice detail page are displayed on the left. The configuration settings panel of the selected component is displayed on the right. The configuration settings panel will dynamically change as you click a different configurable component on the left.
Not all components on a page are configurable. One configurable component is, by default, selected as indicated by a blue rectangle. For example, the Invoice Details table is selected as a configurable component in the following graphic.
Access UI Builder
Complete the following steps to open the UI Builder to configure the layout of a UI page:
- Log into the Zuora application as a system administrator.
- Navigate to the UI page to be configured.
- On the right side of the page, click the more action icon
 to display the applicable actions on the current page, and then click Configure This Page.

The UI Builder page opens and displays components of the target page. The page's components are displayed on the left, and the configuration settings panel is displayed on the right.
- Use the configuration settings panel on the right to change the layout for the selected component on the left. For more information, see the Usage notes section.
- To save your changes, click Save.
If you are configuring a published layout, your changes will be published upon saving.
- If the layout is not published yet, click Publish for your changes to take effect. Your layout is published as the custom view.
- To go back to the Zuora application UI, close the UI Builder page by clicking the close icon at the top left corner of the page.
After a custom layout is saved and published, UI users can switch between this custom view and Zuora's original system view by clicking the same more action button as shown in the following graphic.

Usage notes
When using the UI Builder to configure a page, you can do the following things on the configuration settings panel on the right:
- Hide or display a column by toggling the switch next to the column name.
- Add a field as a column to the current layout by clicking Add Columns. Then, you can search for the standard, custom, or related field to add.
- Change the sequence of the columns by dragging and dropping them within the configuration settings panel.
- To revert undesired changes, click the ellipsis icon
 in the top right corner and then click Discard Edits.
 - To set the published view back to Zuora's original system view, click the ellipsis icon in the top right corner and then click Revert.
When you use the UI Builder to add columns to an object list view, the columns to add can be the following:
- Zuora standard fields of the current object
- Custom fields of the current object
- Fields of other objects that are related to the current object according to the Zuora object model
Disable new UI experience
The new UI experience is by default enabled in all environments. Individual users can disable it using a user profile setting called Enable New Zuora Experience. This setting will disable or enable the following UI enhancements and functionalities for the current user:
- Reinvented list view with its subsequent enhancements
- Detail pages for supported objects such as invoices, credit memos, or payments.
To access this user profile setting, complete the following steps:
- Log in to the Zuora application.
- On the upper-right corner, click your avatar and then click Profile from the list.
- On the Personal Settings page, click Manage Your Profile. The Enable New Zuora Experience setting can be found at the bottom of the user profile page.
To disable or enable the new UI experience across all users within a tenant, contact Zuora Global Support.