Notifications: Email
Use this task to notify specific email addresses about changes in your Zuora tenant, or send invoices to customers via email.
Note that you cannot resend email notifications created by workflow.
Basic settings

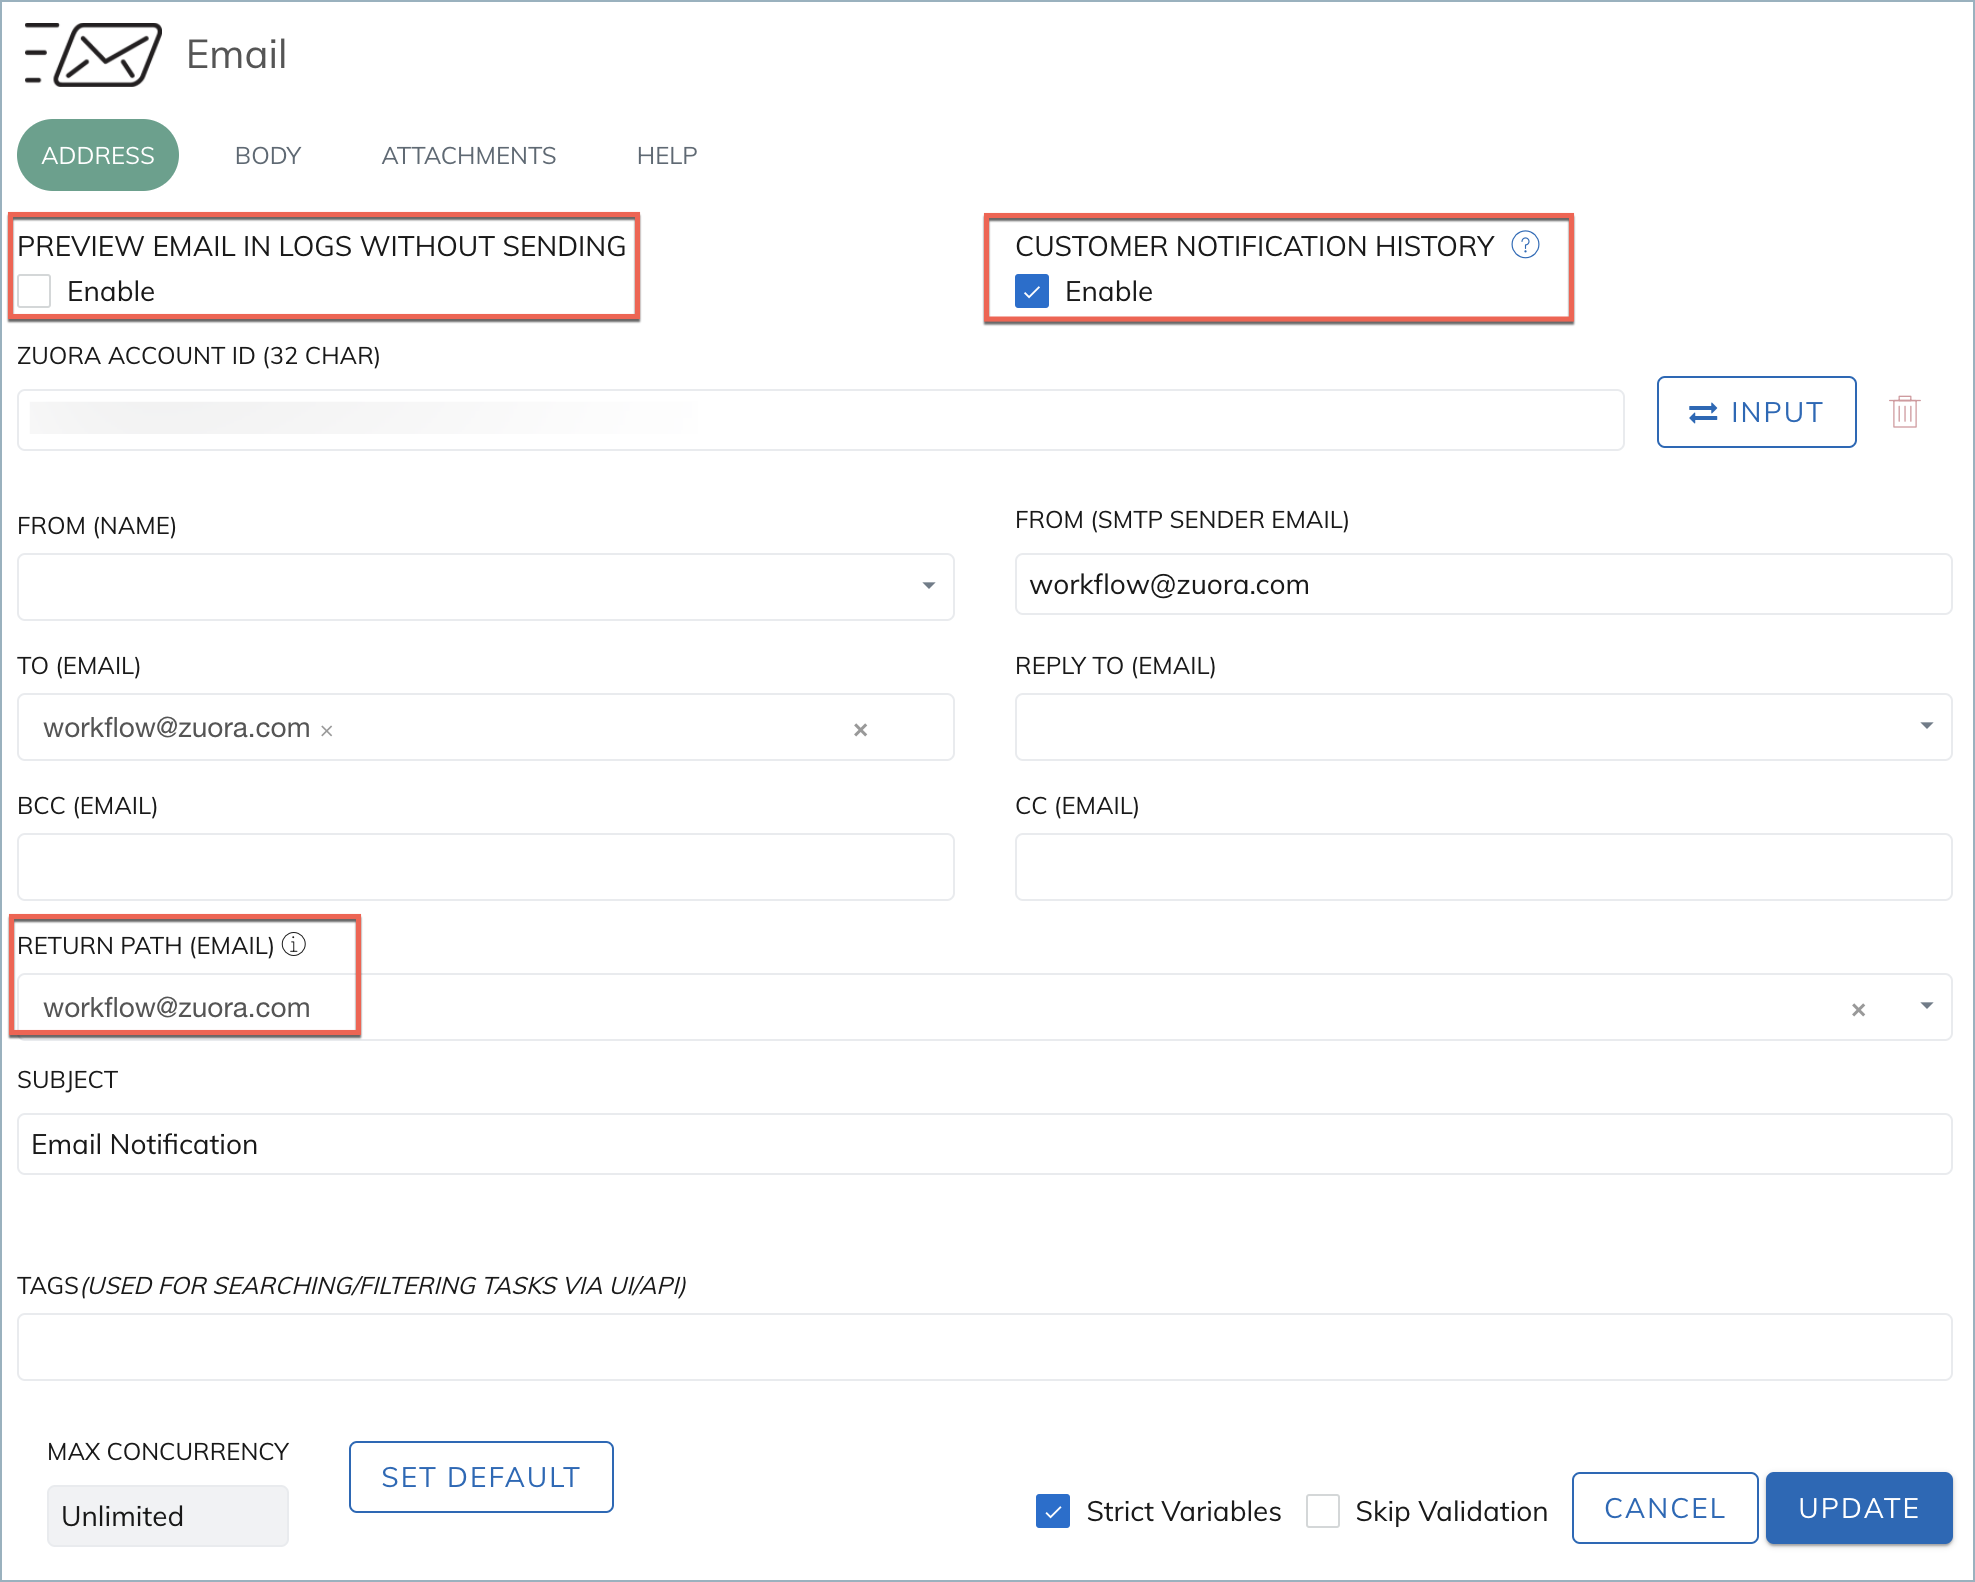
By default, the Preview Email in Logs Without Sending checkbox is checked in the Address tab. When your workflow is ready for use, disable this option. Otherwise, emails would not be sent out.
To allow the logs of emails sent via this task to be included in the Email History report, check the Customer Notification History checkbox. When this option is enabled, you must also specify the Zuora Account ID to which the history will be attached.
The default value of the 'From' email is workflow@zuora.com. If you want to add a custom email address, submit a request at Zuora Global Support.
Your emails may fail to deliver because of security mechanisms from your customers if you change your sending address without correctly authorizing Zuora to send on your behalf. This is done by creating entries in your SPF records and validating your mail with DKIM.
To receive information about such failures or replies to your emails from customers for the current workflow, you can configure your return path in the Return Path (Email) field. To configure a global return path for all Email tasks in your tenant, see Additional information about return path.
If workflows in a tenant have issued more than 1,000 bounced emails in one day, Zuora may suspend the workflows in that tenant. If you find your workflow(s) are suspended due to this reason, fix the error causing the bounced emails.
Body
On the Body tab, you can use the merge field assistant above the text field to obtain the Liquid expression for a merge field.
For security reasons, some HTML tags and JavaScript events are not permitted in the email body, such as HTML, head, and so on. For more information, see Notes and limitations on email templates.
Zuora Workflow evaluates the input email template for potential risks and, if necessary, disables the HTML editor for safety.
Email attachments

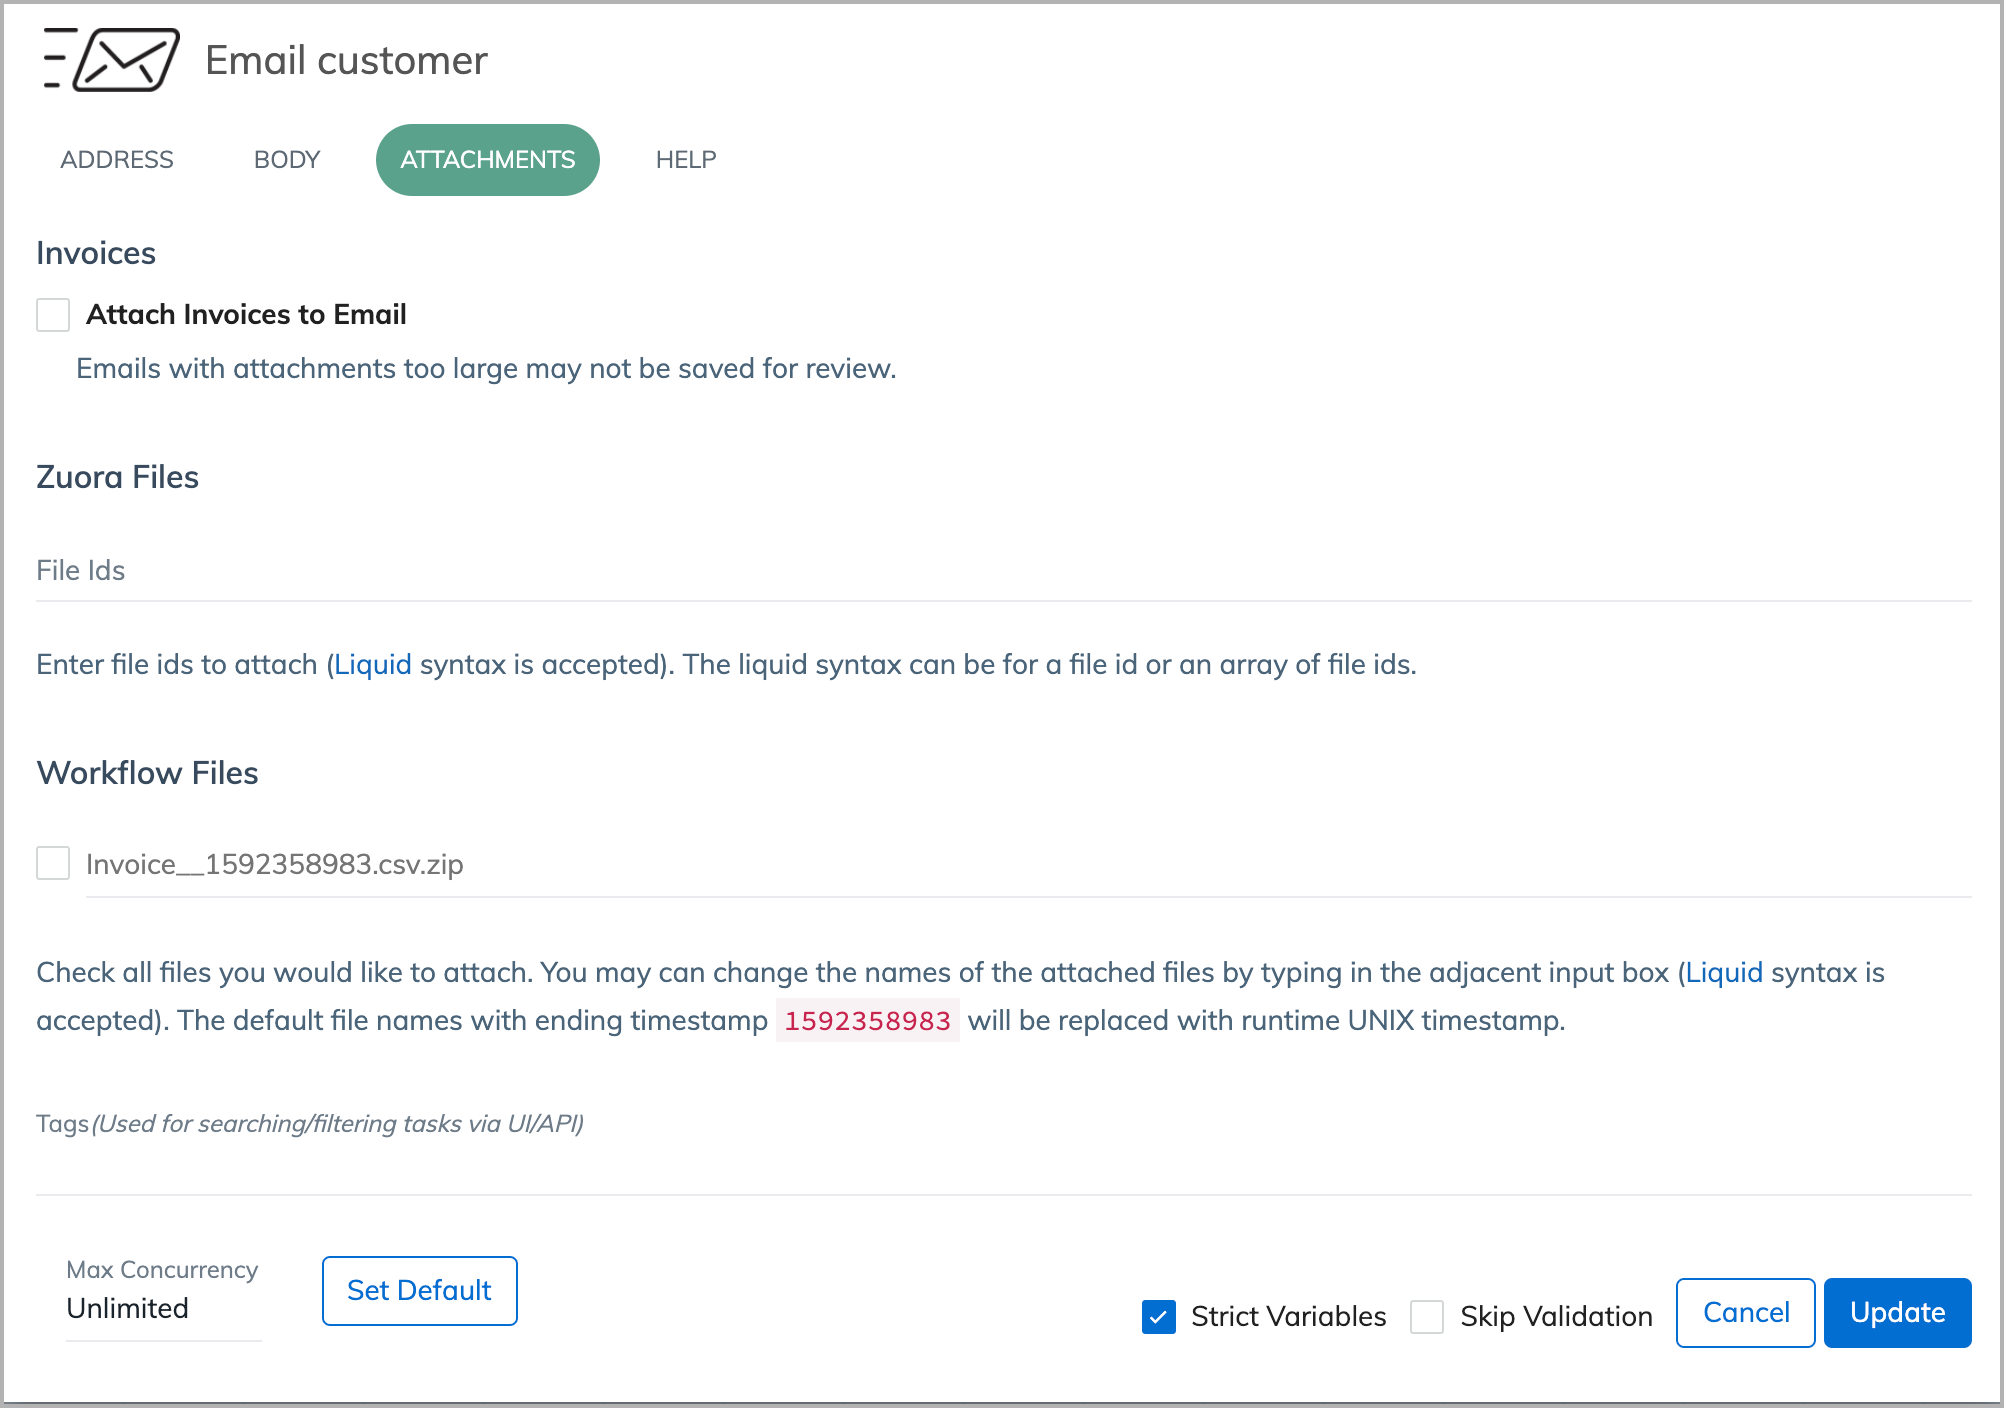
If invoice data is included in the data payload and invoice IDs are present, you can attach invoices to your email by selecting Attach Invoices to Email.
In the Attach Invoices to Email option, the file naming convention for the attachment is "invoice number.pdf," where the invoice number denotes the number of the invoice.
You can also attach other files in the payload in your email. All available files in the payload are displayed in the Workflow Files section. You can rename the listed files. Click a file name to edit it.
You can attach additional files if the file IDs are included in the payload. You can specify the file IDs using Liquid syntax. The Liquid syntax can be for a file ID or an array of file IDs in JSON format. All files in the array must be valid. Otherwise, the task will fail.
For example, you have the following data payload in your workflow.
"Data":{
"Liquid":{
"files": ["23123khj42342k3","4233234982934","24358349028dfsk"],
"file":"2c92c085783724872"
}
}
You can attach the "files" array and the "file" to the email task using the following Liquid syntax.
{{Data.Liquid.files | to_json}}
{{Data.Liquid.file}}
Note: The maximum data size for an email including attachments is 10 MB. If your email exceeds this limit, an error will occur.
Additional information about return path
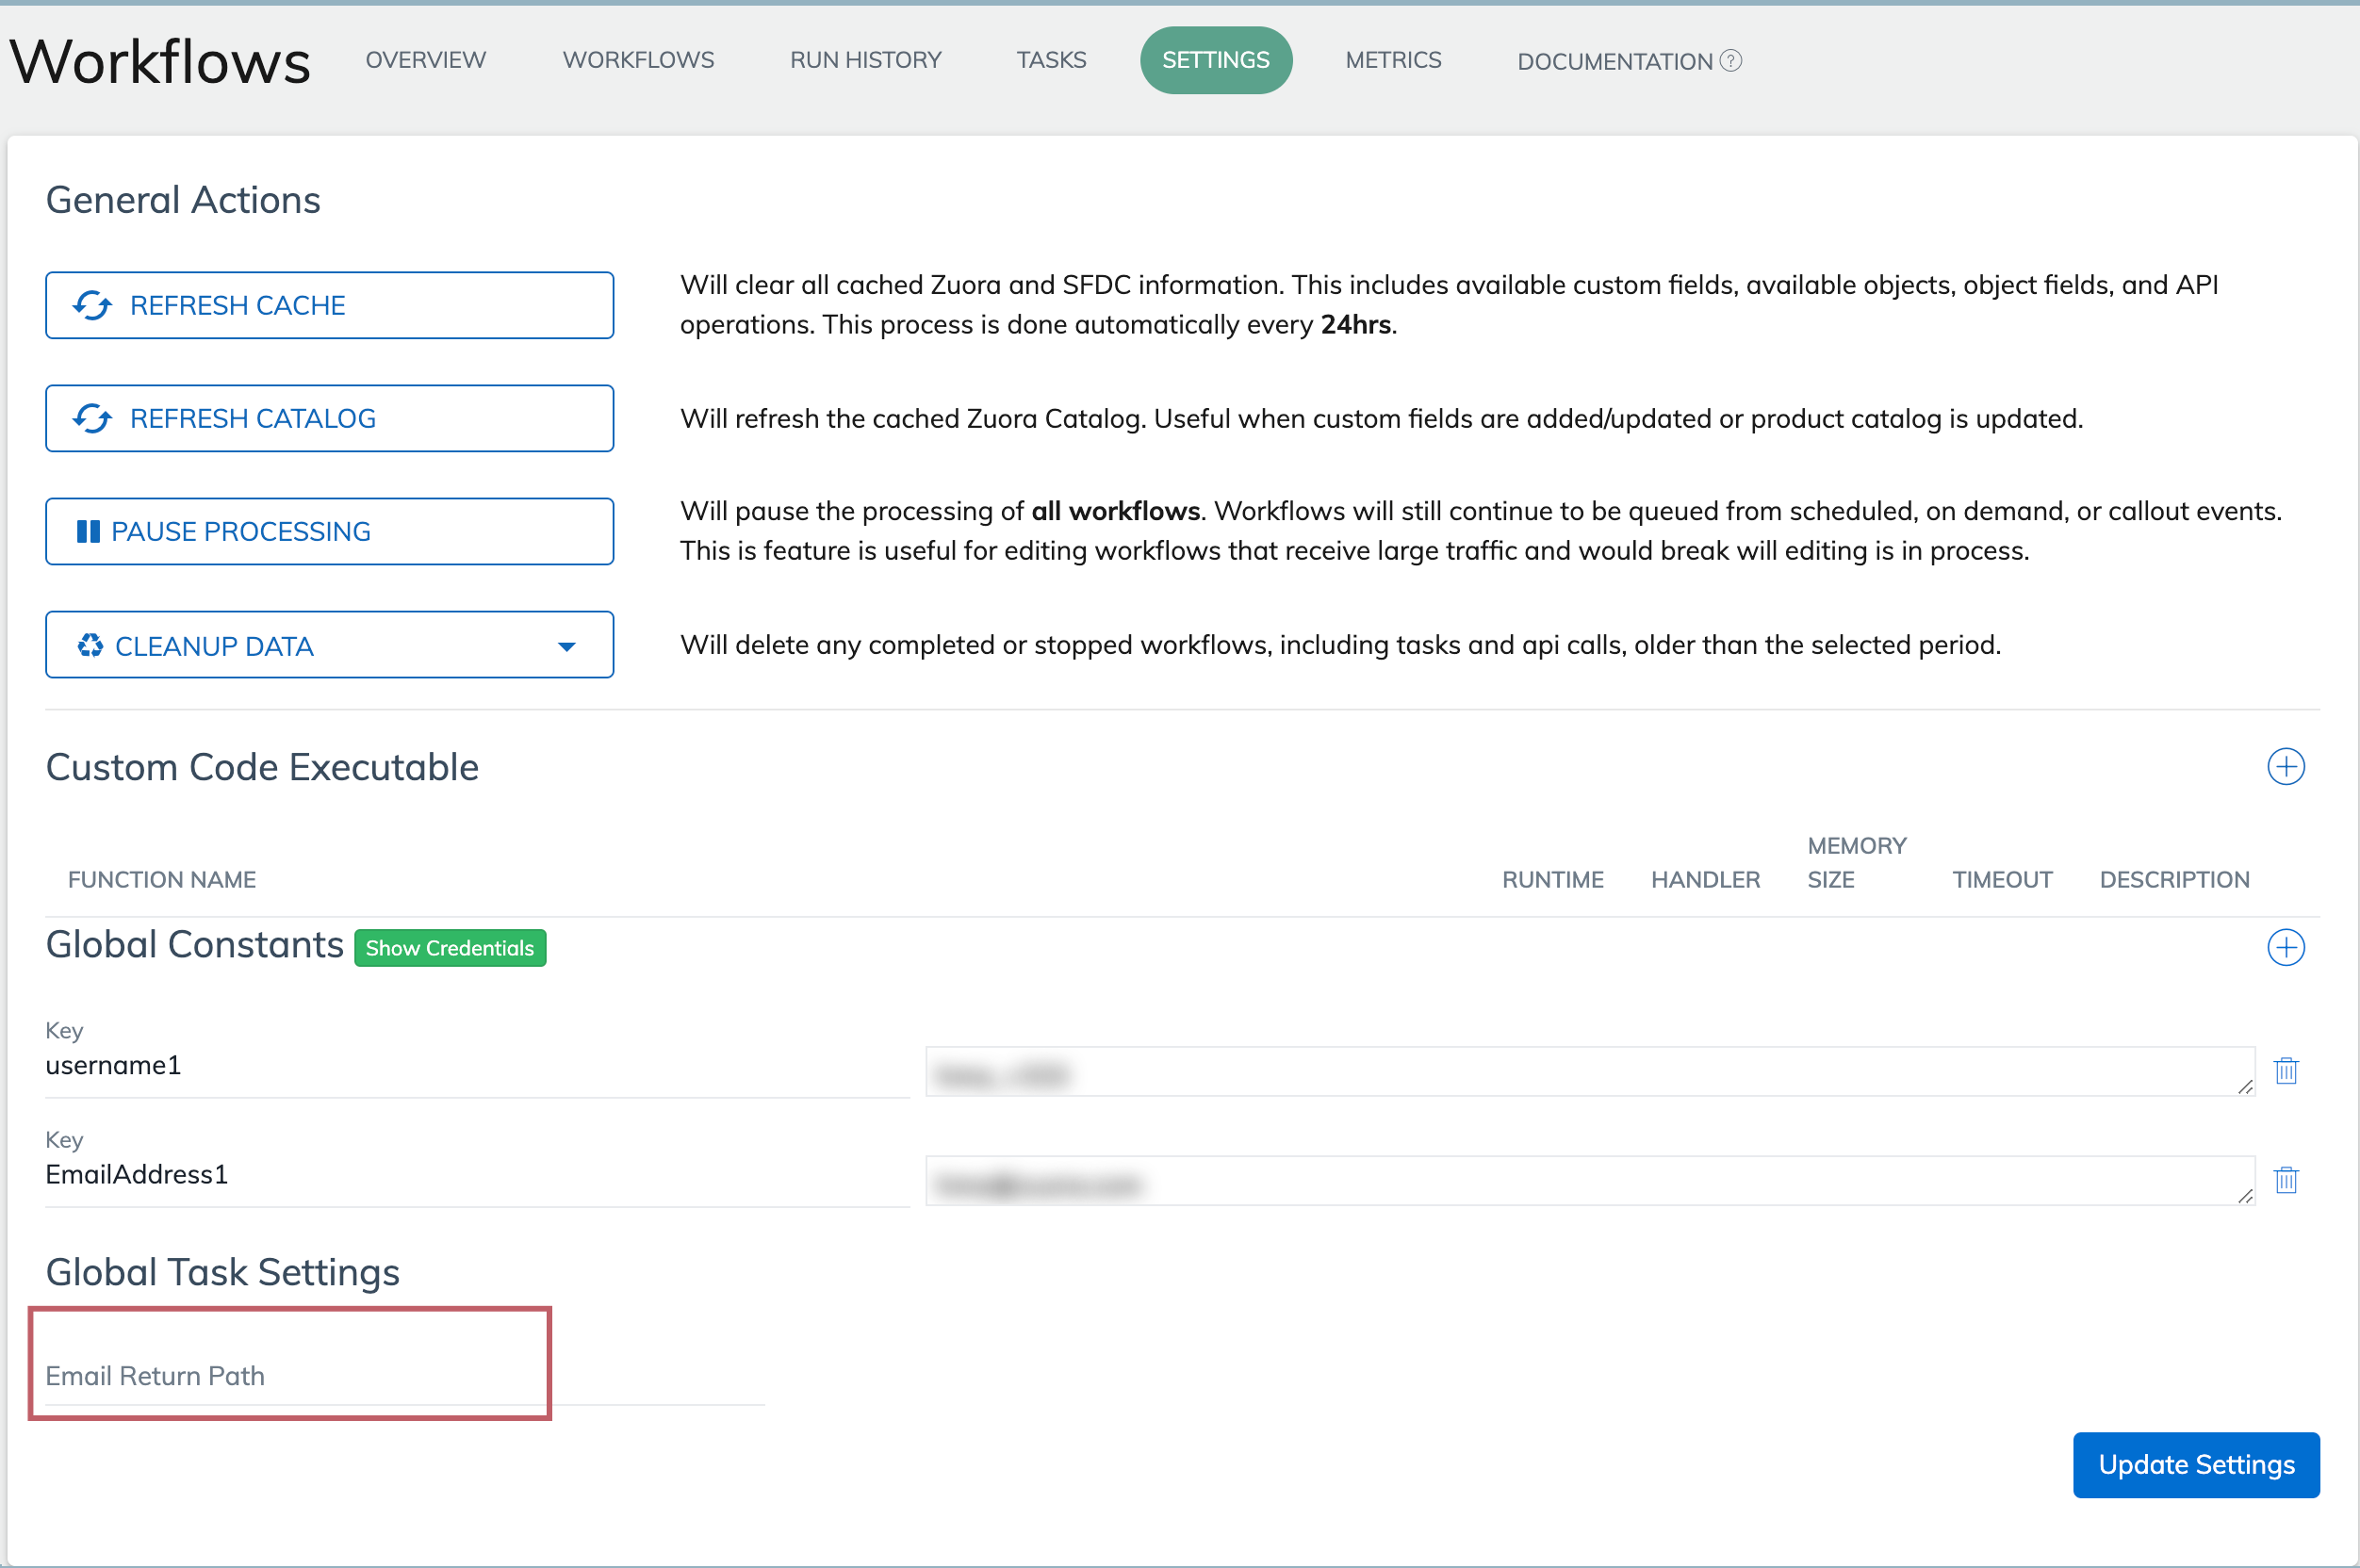
If you want to use one email address as the return path for all email tasks in your tenant, go to the global settings of Workflow, and enter the return path in the Global Task Settings field.

You can test how special scenarios like email bounces or complaints are handled. For details, refer to the following page.
https://aws.amazon.com/blogs/aws/mailbox-simulator-for-the-amazon-simple-email-service/
Zuora Workflow uses Amazon SES for sending emails. If you do not use your own SMTP server for sending emails, you must add the following statement to the SPF record in the DNS configuration for your domain.
include:amazonses.com
For details about adding an SPF record, see Authenticating Email with SPF in Amazon SES.
Additional Amazon DKIM and MAIL FROM settings
If you decide to use your own email address from your domain, submit a request for DNS CNAME records at Zuora Global Support. Then add three CNAME records you received to your domain’s DNS settings for DKIM verification. How you update the DNS settings depends on who provides your DNS service. If your DNS service is provided by a domain name registrar, contact that registrar to update your DNS records. The domain verification might take up to 72 hours.
After the domain verification is successful, you can use the email address in Workflow across different Zuora environments, such as Production, API Sandbox, Developer Sandbox, or Central Sandbox environment.
Note that the domain verification applies only to Workflow email notifications. If you want to use the same email address for other email notifications, such as an invoice due event, you must add an identity to the SMTP settings in your tenant. For more information, see Configure advanced SMTP server.
If Zuora Support cannot confirm DKIM, you need to verify the three CNAME records are present in the DNS configuration for your organization. You can follow the instructions on this troubleshooting page.
If the DKIM validation fails, an email will be sent from workflow@zuora.com to you with the subject "DKIM Verification Failed". The email includes CNAME records that you need to enter in your DNS settings. Here is an example of the DKIM validation failure email.

For details about CNAME records or DKIM settings, see Setting Up Easy DKIM for a Domain.
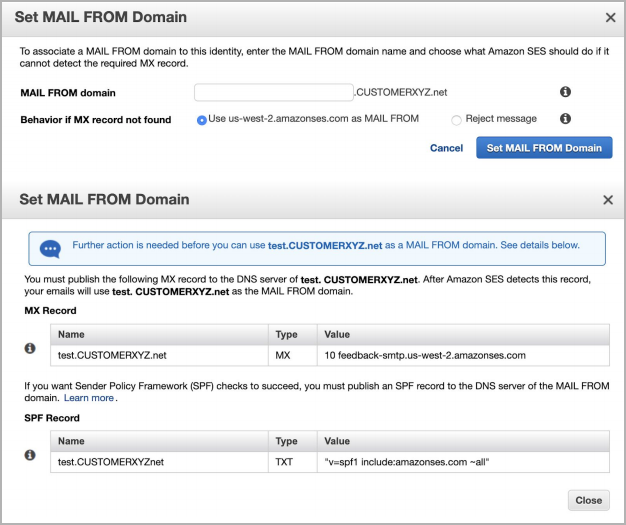
Additionally, you can set the MAIL FROM domain by adding MX and SPF recording to your DNS configuration. For details, see Setting Up a Custom MAIL FROM Domain.

Use external SMTP server
You can use an external SMTP server in Workflow. This server can be managed by yourself or an email service provider.
To use an external SMTP server in Workflow, perform the following steps:
- Click the Settings tab of Workflow, and then click Login & SMTP Credentials.
- Specify the information of the SMTP server in the External SMTP section.
The following table provides the description of each field:Field Required or optional Description SMTP Server Name Required Host name of the external SMTP server.
Note that Zuora enables the external SMTP server for Workflow only if this field is specified.SMTP Port Required The port that Zuora uses to connect to the external SMTP server. SMTP Username Required only if the SMTP Authentication checkbox is selected The username for the external SMTP server. SMTP Password Required only if the SMTP Authentication checkbox is selected The password for the external SMTP server. SMTP Authentication Optional Indicate whether to enable authentication when communicating with the external SMTP server. Enable StartTLS Optional Indicate whether to enable a secure connection with the external SMTP server by using TLS or SSL. - Click Update.
