Snowflake as a source and target
You can create meters for Snowflake in the following methods:
Meter with Snowflake as a source
To create a meter with Snowflake as the source, follow the instructions below:
- Create a Custom Meter. For more information, see Create a new meter using custom method.
- Select the Snowflake as the source.
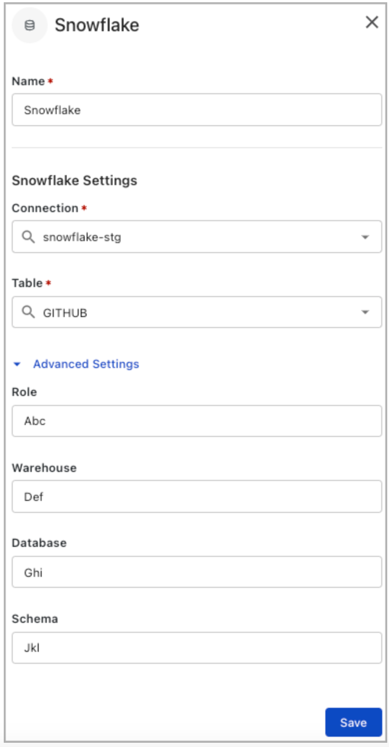
The Snowflake settings page is displayed.

- Click Select to select an Event Definition on the Snowflake setting page.
You can create or select an existing Event Definition or import an Event Definition. - Under the Snowflake Settings section, perform the following:
|
Task |
Description |
|---|---|
|
Connection |
Select Snowflake from the Connection drop-down which includes the S3 bucket, credentials, and base path. To set up a connection, contact Zuora Support. |
|
Upload Data From |
Select a value from the following options:
|
|
Advanced Settings |
Select the values for excluded fields, rolling file size, and partition by fields.
|
- Click Save to save the Snowflake source settings.
Meter with Snowflake as a target
To create a meter with Snowflake as the target, follow the instructions below:
- Create a Custom Meter. For more information, see Create a new meter using custom method.
- Select the Snowflake as the target.
The Snowflake settings page is displayed.
- Under the Snowflake Settings section, perform the following:
|
Task |
Description |
|---|---|
|
Connection |
Select Snowflake from the Connection drop-down which includes the S3 bucket, credentials, and base path. To set up a connection, contact Zuora Support. |
|
Upload Data From |
Select a value from the following options:
|
|
Advanced Settings |
Select the values for excluded fields, rolling file size, and partition by fields.
|
-
Click Save to save the Snowflake target settings.