Using Data Tables
This section provides information on using data tables efficiently. Once you have selected the template and navigated to the Summary Statement screen, perform the following steps:
- Drag and drop a Data Table block to your temple.
- Select the Data Table to view the Content side-pane.
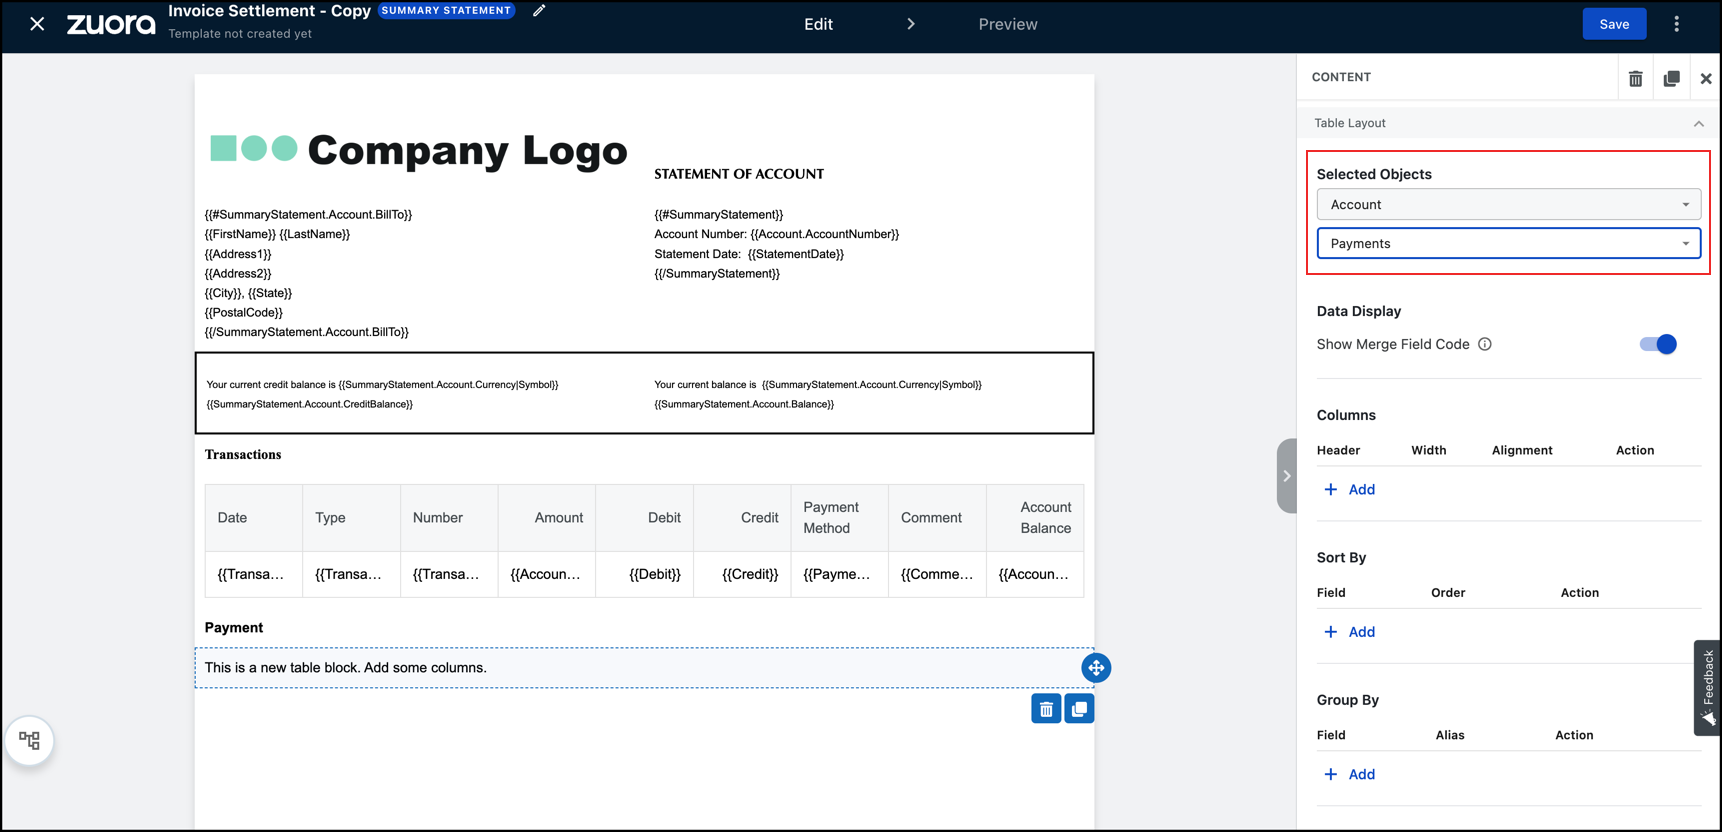
- Select the Payments option from the drop-down list under the Accounts option.
- Click Add in the Columns section and perform the following:
- Select EffectiveDate from the Field drop-down list.
- Click the Advanced Options toggle.
- Use the Localise function, for example, {{EffectiveDate|Localise}}.
- Configure the header as required, for example, Effective Date.
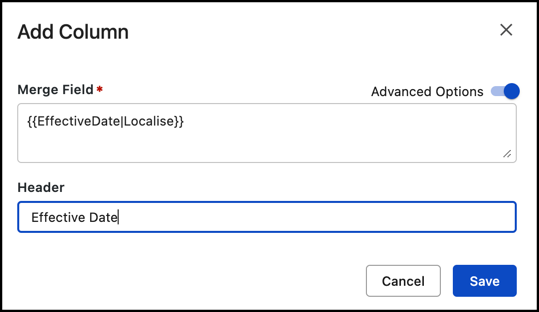
- Click Save.
- Click Add in the Sort By section and perform the following:
- Select EffectiveDate from the Field drop-down list.
- Select ASC in the Order drop-down list.
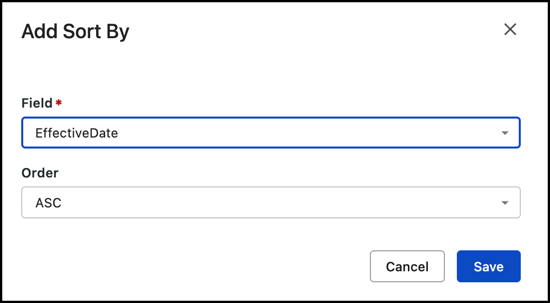
- Click Save.
- Click Add in the Sort By section.
- Select PaymentNumber from the Field drop-down list.
- Select ASC in the Order drop-down list.
- Click Save.
- Click Add in the Filter section and perform the following:
- Select Status from the Field drop-down list.
- Select > in the Operator drop-down list.
- Enter Processed in the Value field.
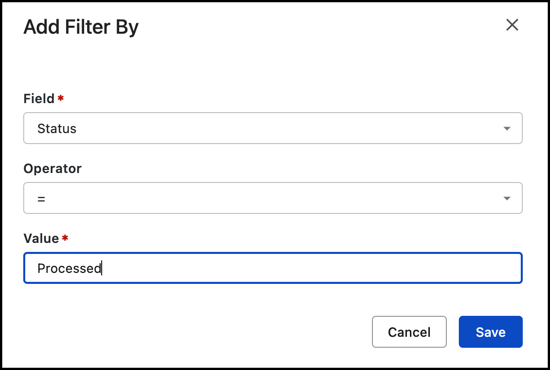
- Click Save.
- Select EffectiveDate from the Field drop-down list.
- Select >= in the Operator drop-down list.
- Enter _StartDate in the Value field.
: _StartDate is a system built-in variable and it displays the start date of the selected date range.

- Click Save.
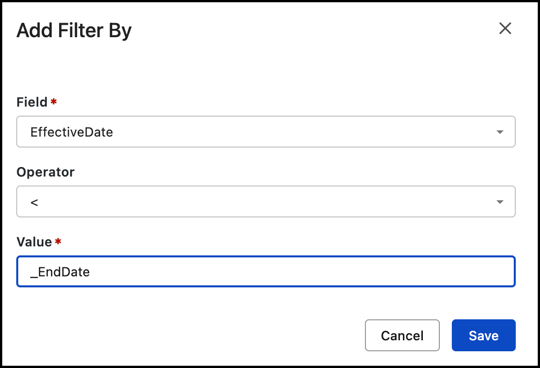
- Select EffectiveDate from the Field drop-down list.
- Select < in the Operator drop-down list.
- Enter _EndDate in the Value field.
_EndDate is a system built-in variable that automatically extends the end date of the chosen date range by one day. When you select a date range in the UI, such as from 2024-01-01 to 2024-03-31, the built-in variable _EndDate is automatically set to 2024-04-01.
- Click Save.