Use the Collections Window feature
Before you use Collections Window, you need to complete the initial settings and familiarize yourself with the main user interface. For details about the settings, see Configure the settings of Collections Window.
The main user interface of the Collections Window consists of these tabs.
- Dashboard: This is the default tab when you start the Collections Window. It includes the overview of accounts by status, the scatter plot of accounts by age and balance, and the list of collection agents.
- Accounts: The list of accounts that are in collections based on the system condition (account balance > 0) and the conditions you define.
- Invoices: The list of critical invoices based on the conditions you define. The conditions for critical invoices and the conditions for in-collection accounts are independent. Critical invoices may belong to accounts that are not in collections.
- Tasks: Displays the list of collection tasks assigned via a predefined workflow.
- Settings: You can configure schedules, system integration, collection statuses, and account custom fields in this tab. For more details, see Configure the settings of Collections Window.
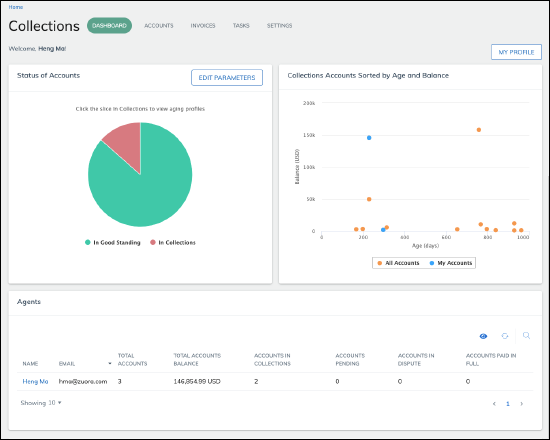
Dashboard
The Dashboard tab contains three sections.
- Status of Accounts
- Collection Accounts Sorted by Age and Balance
- Agents
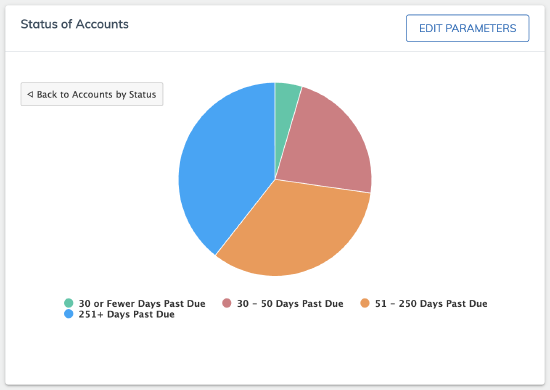
The Status of Accounts section contains a pie chart that shows the distribution of accounts in different statuses (in good standing vs. in collections).
You can drill down the data in the pie chart. Clicking the part for In Collections will display a new pie chart that shows the distribution of accounts in collections by age.
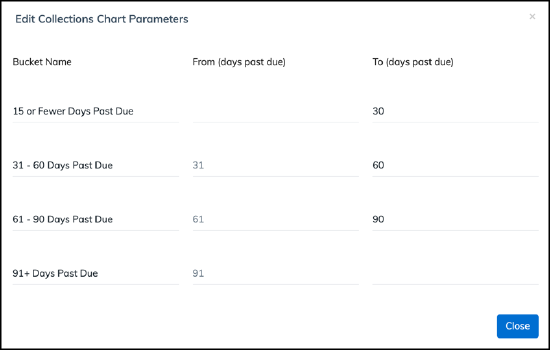
You can customize the time periods that are used in the pie chart by clicking Edit Parameters on the top right. Both the time period names (Bucket Name) and the numbers of days are customizable. After modifying the parameters, you need to refresh the page to see the changes in the pie charts.
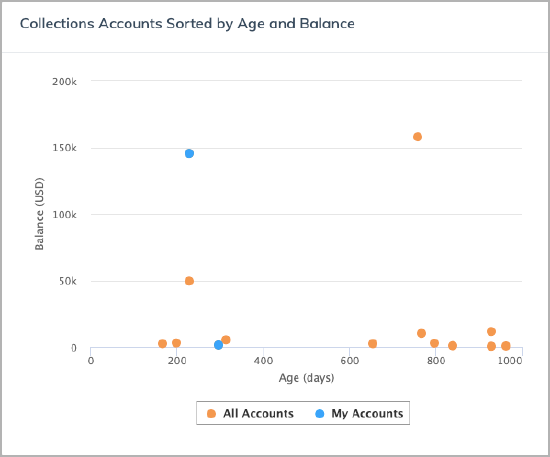
The Collection Accounts Sorted by Age and Balance section contains a scatter plot that shows the age and balance distribution of accounts. A dot in the plot represents an account. Blue dots represent accounts that are assigned to the current user. All dots are clickable. When you hover over a dot, details including the account name, total invoice balance, and assigned agent will be displayed.
Clicking a dot opens the details page of the corresponding account.
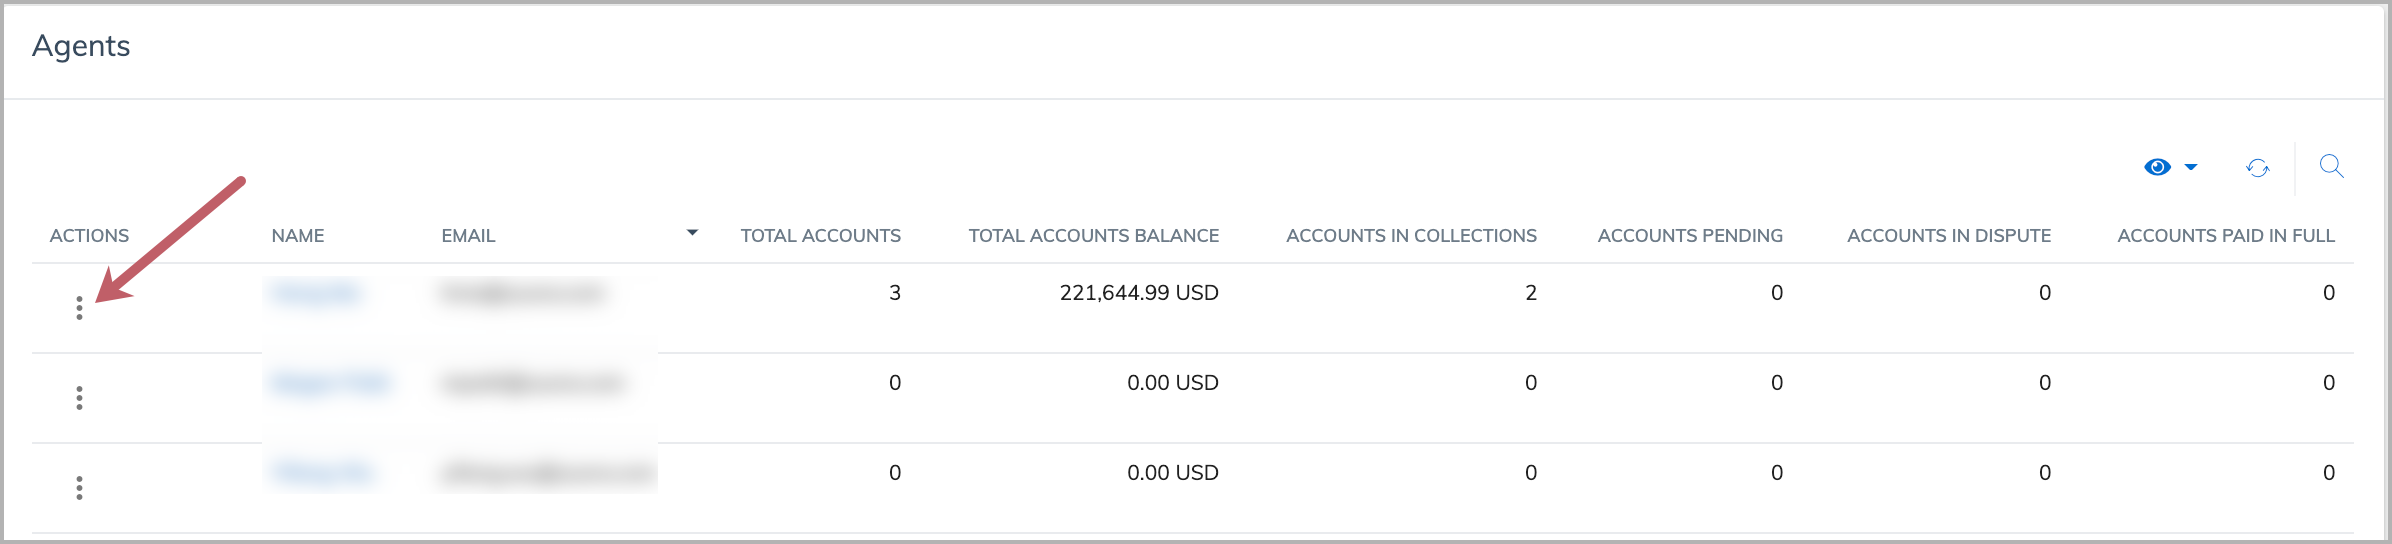
The Agents section displays all agents and the details about the accounts they are responsible for, including the total number of accounts, total accounts balance, and numbers of accounts in different statuses.
If an agent is not in the collections team anymore, you can delete the agent. Click the menu icon in the Actions column and select Delete to delete an agent. Deleting a user does not prohibit them from accessing Collection Window. It just removes them from the agent list for the current user. If an agent is currently assigned to an account, it cannot be deleted. All users have permission to delete an agent.
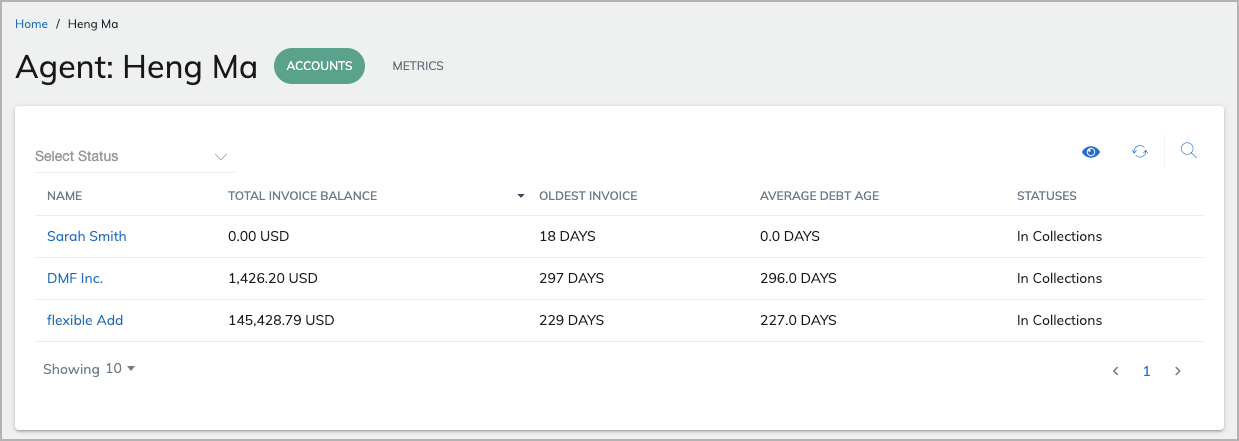
Clicking the name of an agent opens a new page. The Accounts tab of the new page displays the list of accounts that this agent is assigned to.
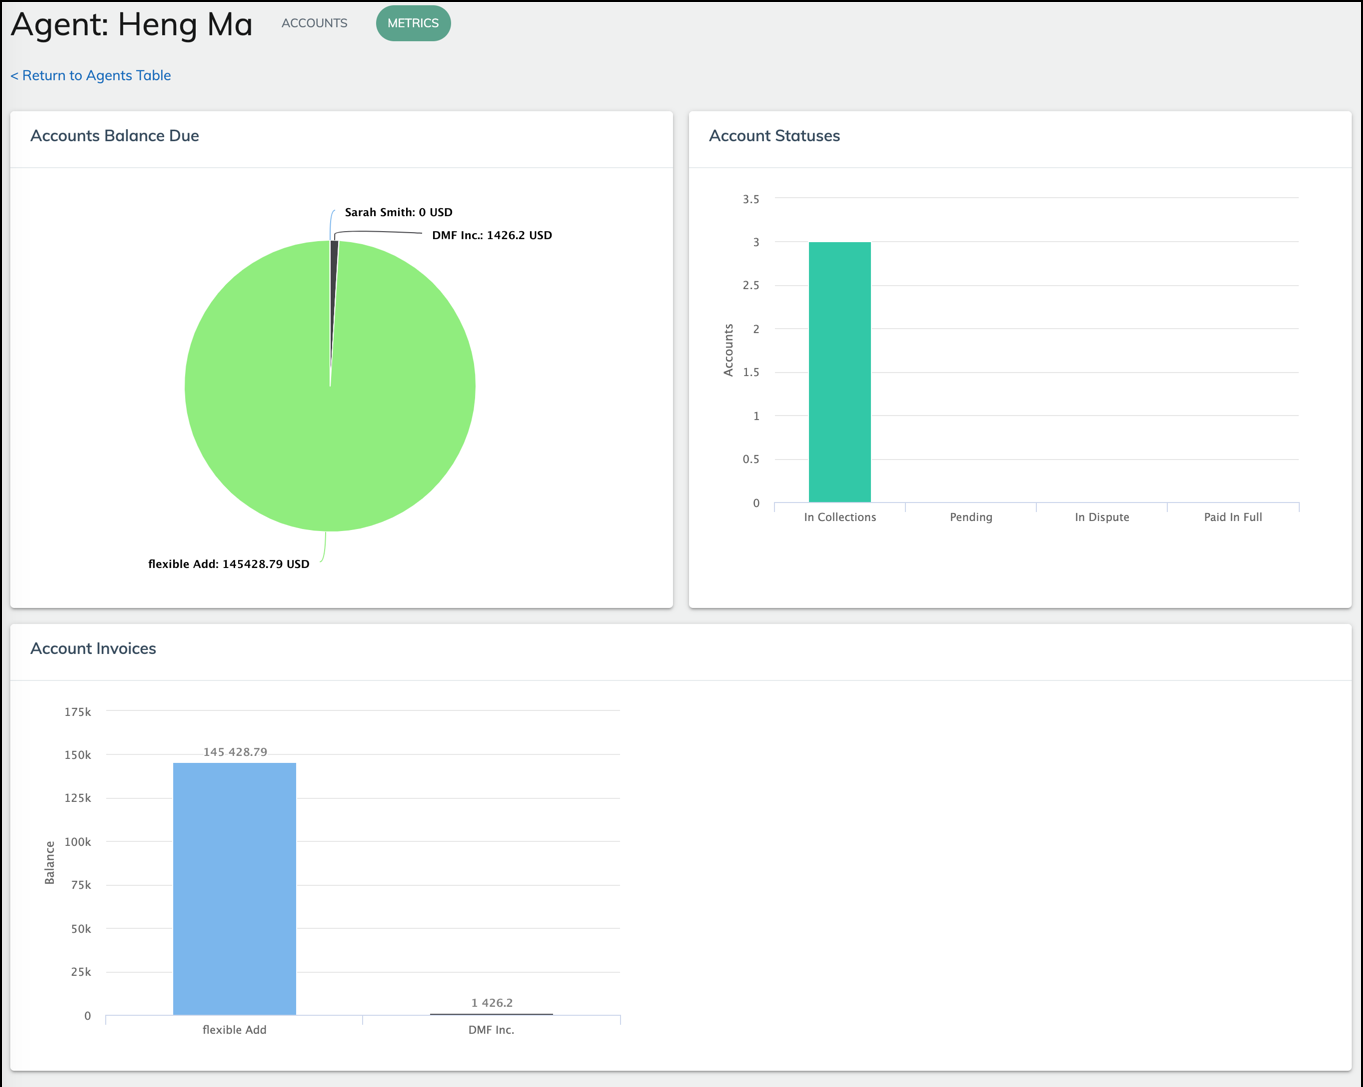
The Metrics tab of the new page includes a pie chart for account balance distribution, a bar chart for account statuses, and a bar chart for total balance by accounts.
Accounts
The Accounts tab displays the accounts in collections based on the system condition (account balance > 0) and the conditions you define. You can filter the accounts by predefined categories (All Accounts, My Accounts, or Unassigned Accounts), by assigned agents, or by account statuses.
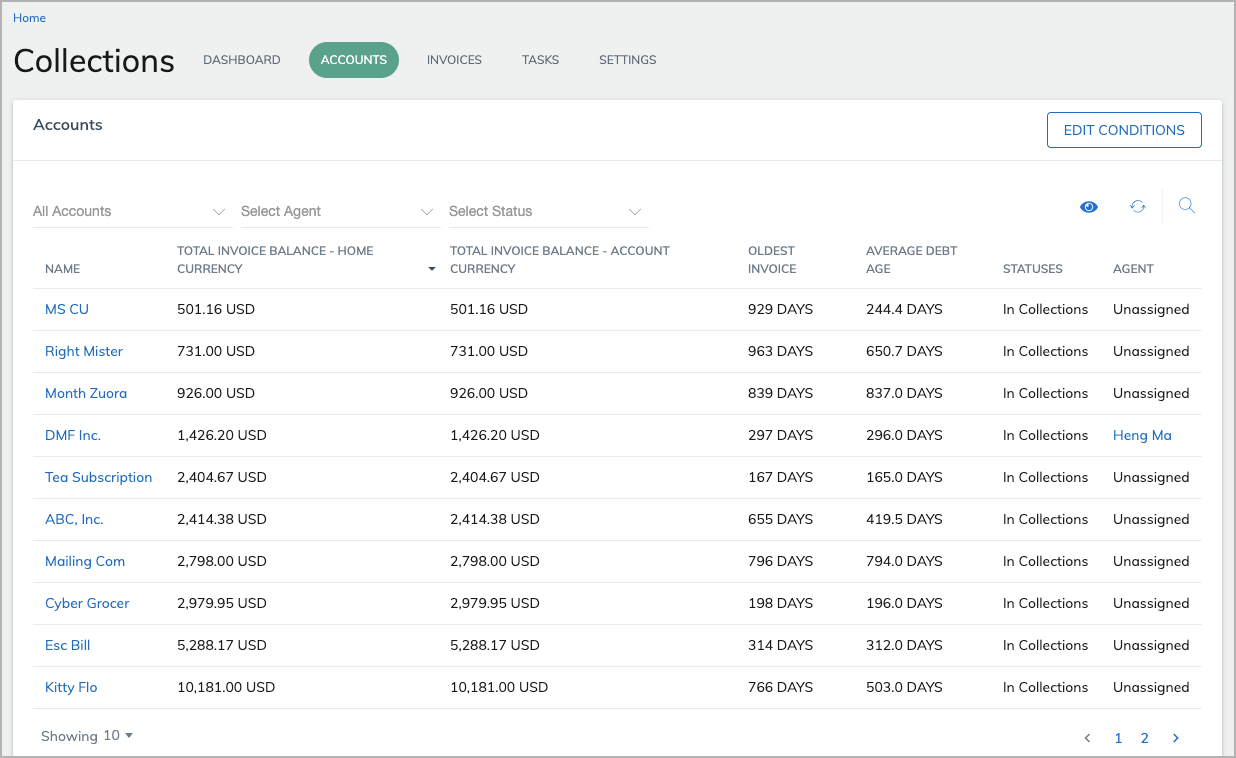
If multi-currency is enabled on your Zuora tenant, the total invoice balances will be shown in two columns, one in the home currency and the other in the account currency. The home currency is the currency you use to create financial reports. The account currency is the currency that is used by the account.
If multi-currency is enabled on your Zuora tenant but the balances are not shown in two currencies, you need to check whether the option Automatically include additional Currency Conversion information in data source exports is selected under Settings > Finance > Manage Currency Conversion in Zuora.
To learn about how to handle multi-currency in Zuora, see How do I handle multi-currency in Zuora?.
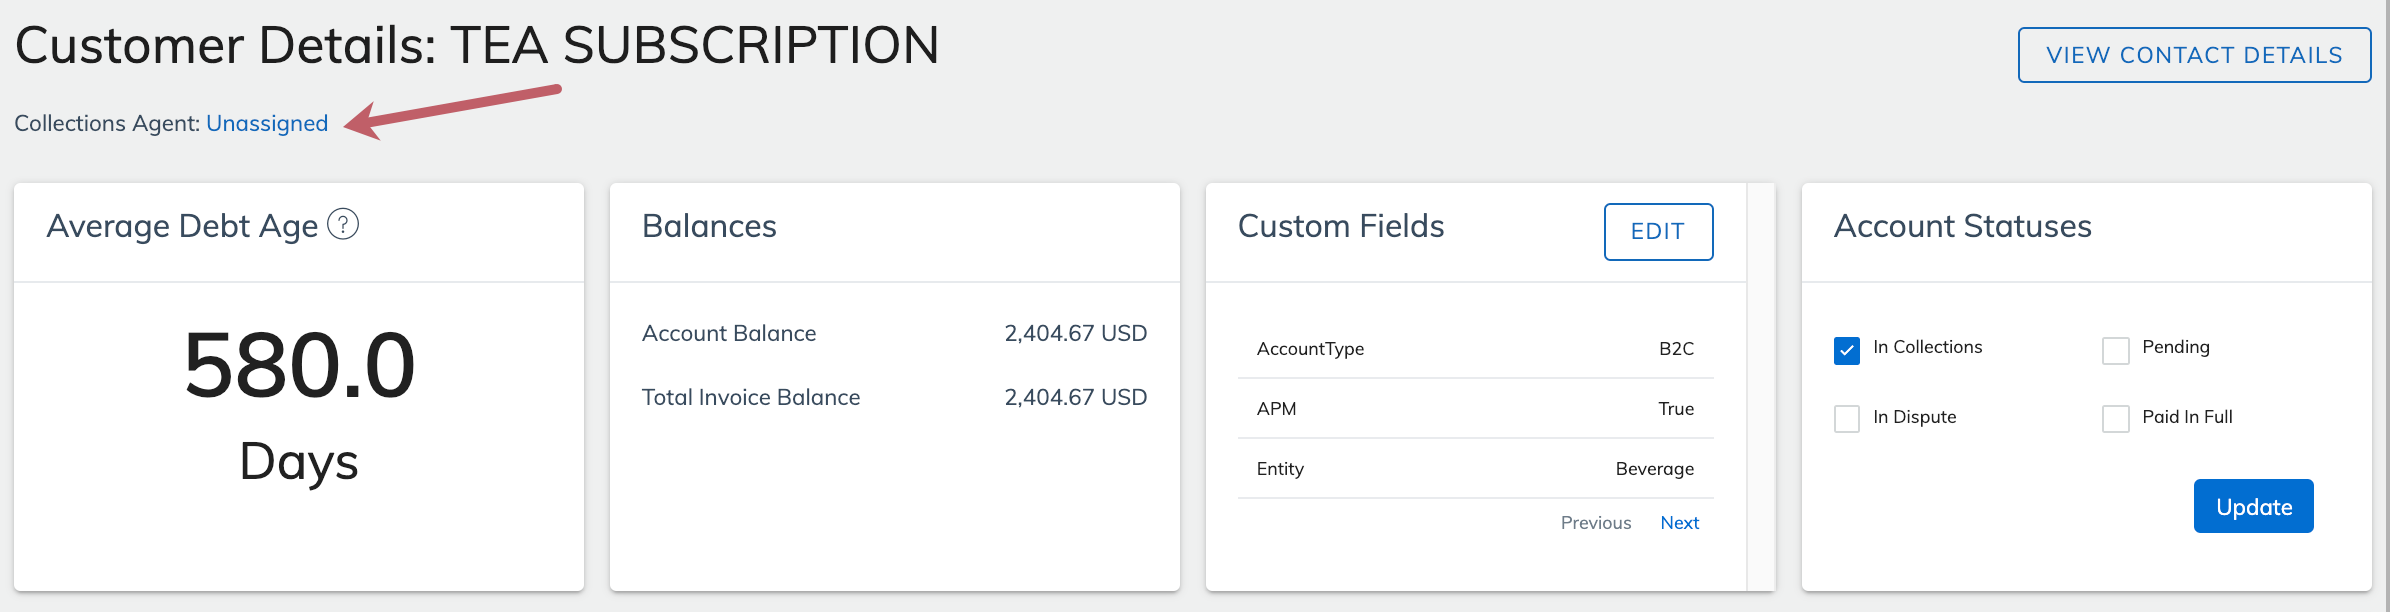
The Average Debt Age is a weighted average based on the days overdue and the amounts.
Modify conditions for accounts in collections
To modify the conditions for accounts being considered 'in collections', click EDIT CONDITIONS on the top right. In the windows that opens, modify the number of days overdue and the total invoice amount. The balance is in the home currency.
For an account to be considered "in Collections" and populated in the Accounts tab, the total invoice balance must be a positive value greater than the specified number, and the days overdue must be greater than the specified number. If either of the two conditions is not met, the account is not considered "In Collections".
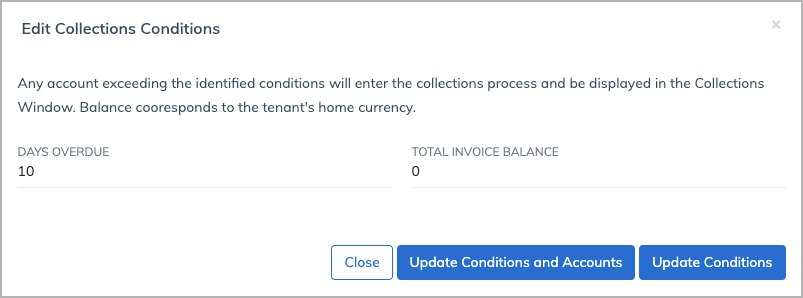
Click Update Conditions and Accounts to save the conditions and update the accounts. To fetch the latest list of accounts, you need to click![]() above the table of accounts.
above the table of accounts.
Click Update Conditions to save the conditions. The changes will take effect in the next scheduled update.
Manage accounts in collections
Click on an account name to view the details of the account. Account information is visible to all agents.

On this page, you can perform the following operations.
- Assign collections agents to accounts.
- View and edit contact details of the account, including the bill-to and sold-to contact information.
Click View Contact Details on the top right to view and edit bill-to and sold-to contact information. All users can edit contact details. - View the average debt age and balances for the account.
Account balance and total invoice balance are displayed in the Balances card. - View and edit the account-level custom fields.
Before you can view and edit the account-level custom fields, you need to select custom fields in the Settings tab first. Changes that are made here will be synced to Zuora. All users can edit the custom fields.
To learn about how to select custom fields that are shown on this page, see (here is the link to the configuration article). - Update the collection status of this account.
In the Account Statuses section, select a status that best represents the current status of the account. Click Update when you are done. - View invoice details, payments, or retry status of this account. If Invoice Settlement is enabled in the tenant, you can also view debit memos of this account.
For each invoice, you can click the action icon and select Show or Show in Billing to view the details of the invoice in Collections Window or in Zuora UI respectively. - Add comments or reply to comments about the account.
Enter comments regarding the particular account to keep other agents informed of account transactions.
You can add or reply to comments, or mention a particular user in comments. Comments cannot be edited or deleted by design. All comments or comments of a selected account can be exported in the Notes feature. See Using the Notes Feature for details.
Assign collection agents to accounts
The collections agent for the account is displayed on the top left of the account details page. If no agents have been assigned to this account, Unassigned will be shown.
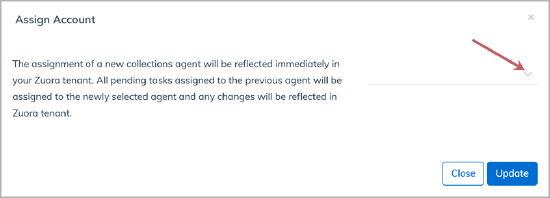
To assign a collections agent or change to another agent, complete the following steps.
- On the account details page, click the agent name or Unassigned.
- On the page that opens, click the arrow to display the list of agents.
- Select an agent and then click Update to save the settings.
The Collection Agent will not be updated immediately if the selected customer account does not have new invoices. Once a new invoice is generated then the Collection Agent will be updated.
View and edit account contact information
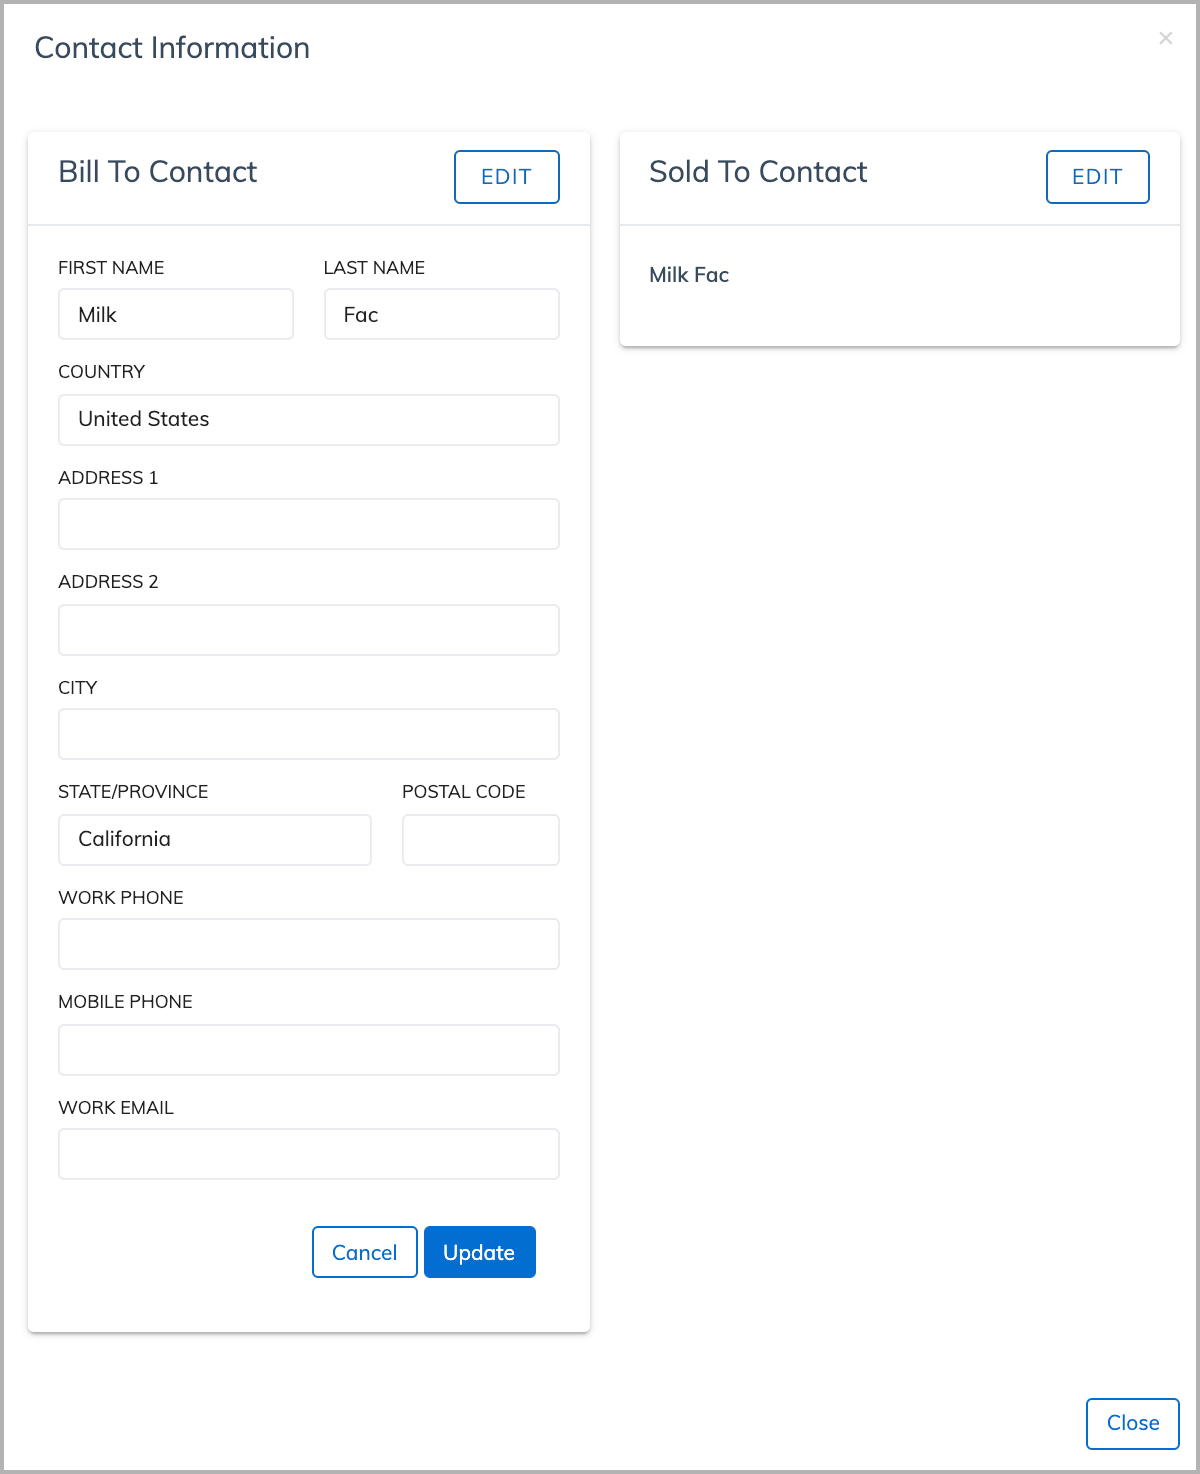
You can click View Contact Details on the top right to view and edit the bill-to and sold-to details for the account.
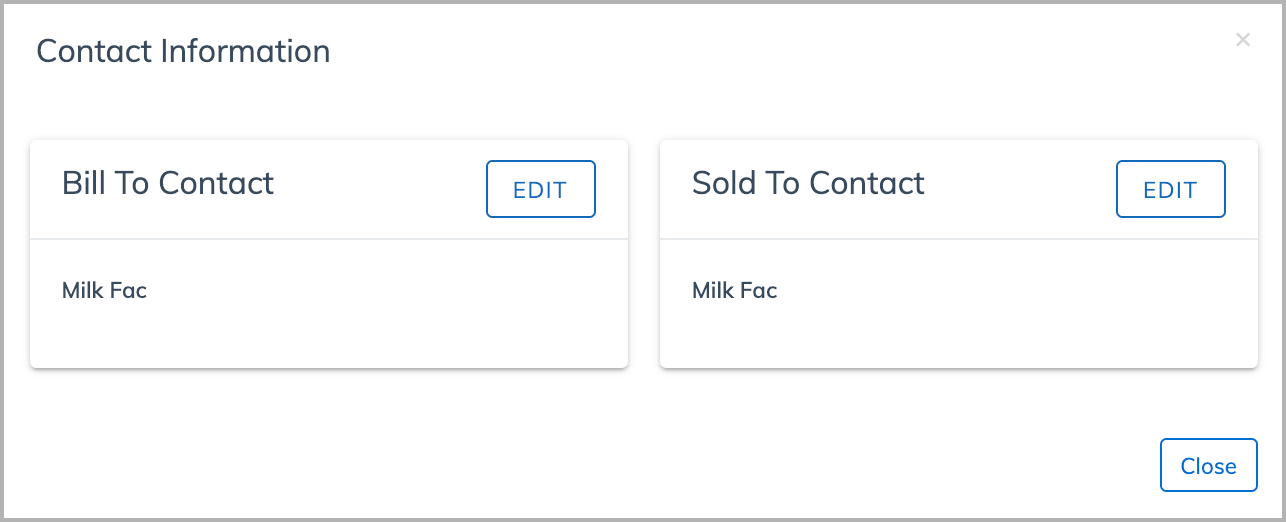
Click Edit in the Bill To Contact card or the Sold To Contact card to edit the details. Click Update to save the changes that you have made.
View and edit account-level custom fields
The Custom Fields card displays account-level custom fields for the account. If this card is not available in the UI, you need to enable and select custom fields in the Settings tab. You can use Next or Previous to switch pages. All users can edit these custom fields.
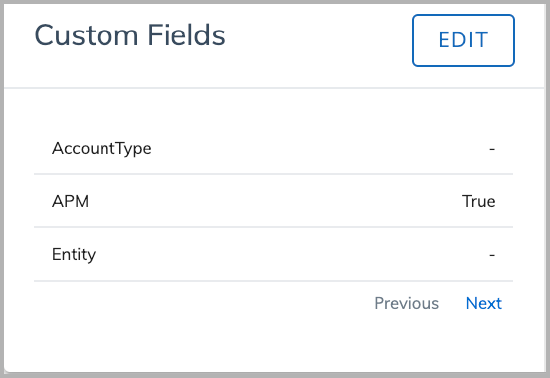
Click Edit to edit the values of custom fields.
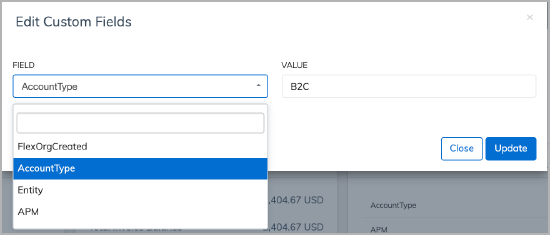
Click the drop-down list to select a field, and then enter the value in the Value field. Click Update to save the changes.
Invoices
The Invoice tab display critical invoices based on the conditions you define. The conditions for critical invoices and the conditions for in-collections accounts are independent of each other. A critical invoice may belong to an account that is not in collections.
For an invoice to be considered critical and populated in this tab, the invoice balance must be greater than the specified amount and the days overdue must be greater than the specified number. If either of the two conditions is not met, the invoice is not critical.
You can also view the critical invoices sorted by age and balance in the plot below the invoice list. A dot in the plot represents an invoice. Clicking a dot will open the details page of the corresponding invoice.
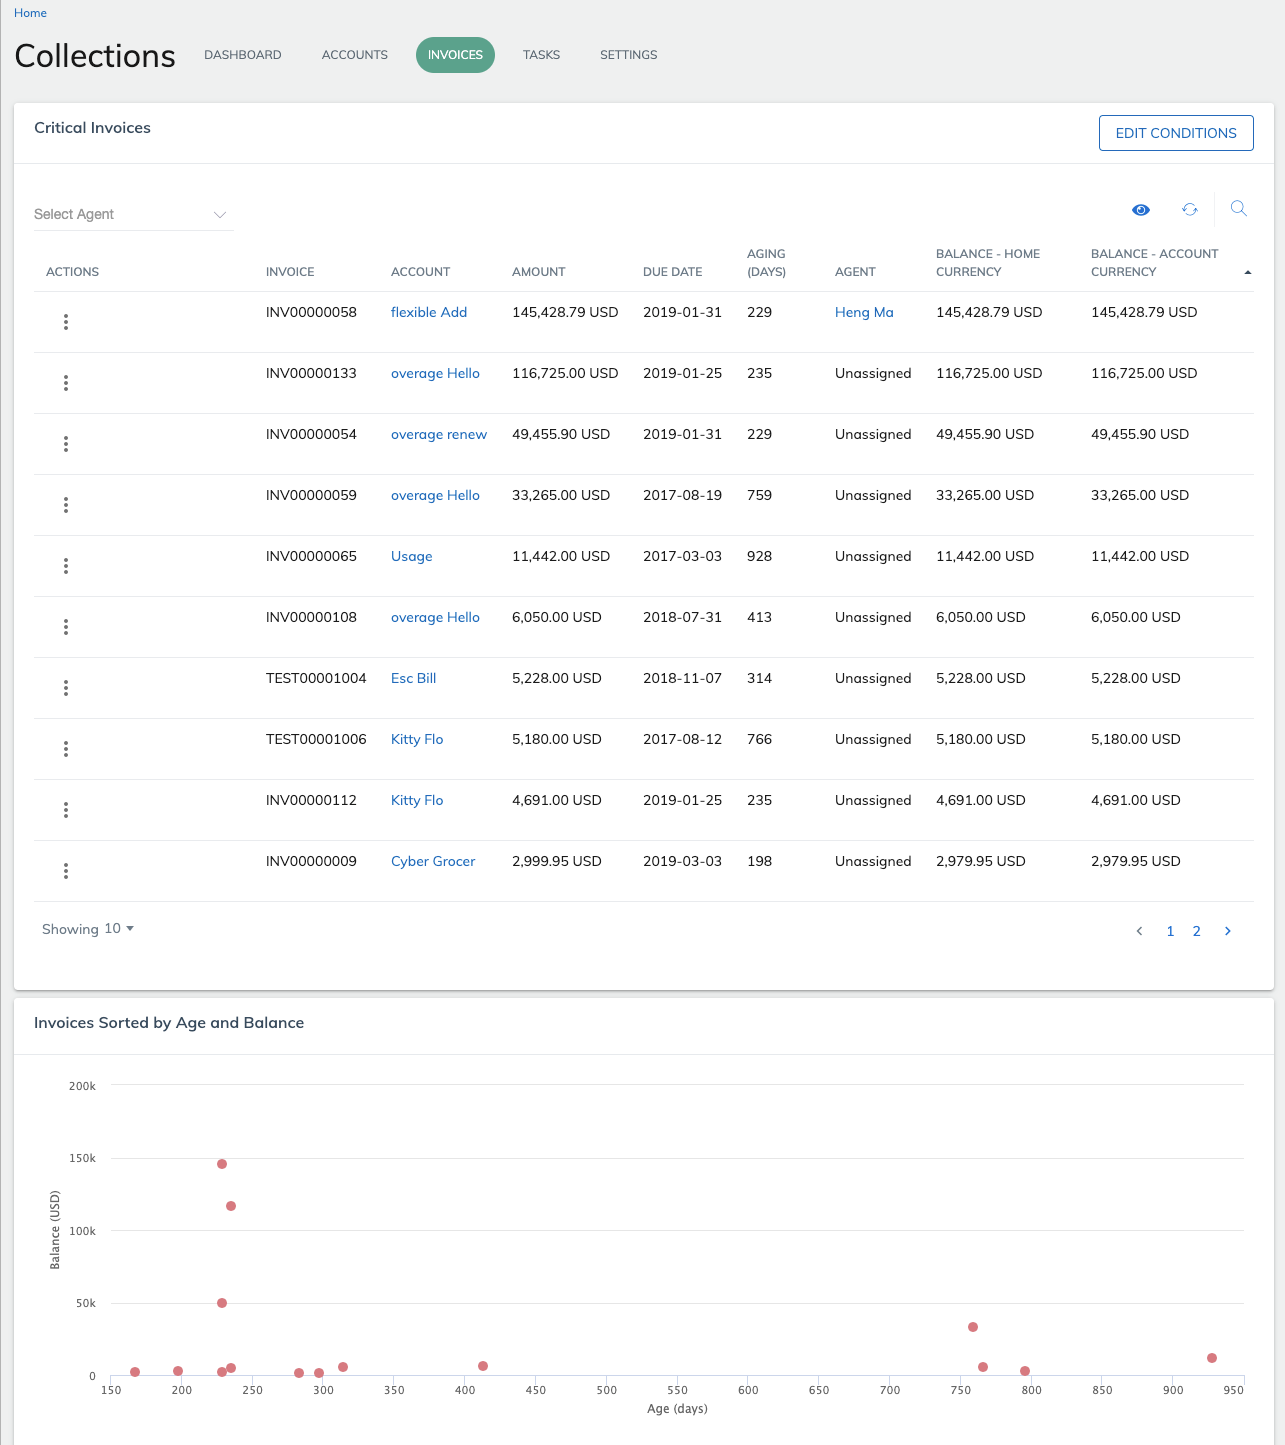
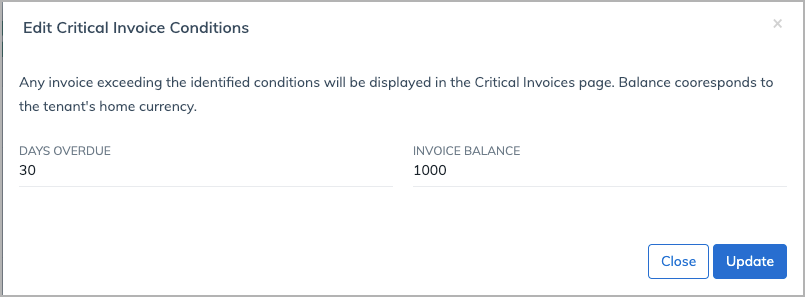
Click Edit Conditions on the top-right to edit the conditions for critical invoices. The number of days overdue and the invoice balance are the conditions you can edit.
When you complete revising the conditions, click Update to save the conditions. The table of critical invoices is not automatically updated. You need to click ![]() above the table to refresh the results.
above the table to refresh the results.
For each invoice, you can click the action icon and select Show or Show in Zuora to view the details of the invoice in Collections Window and Zuora UI respectively.
On the details page of the invoice, you can update the collection status of an invoice that meets the conditions for critical invoices. In the Invoice Statuses section, select a status that best represents the current status of the invoice and click Update. You can also update the statuses by editing the custom object records. See Custom object records for more information. All changes to the invoice statuses are made in real-time in Collections Window and Custom Objects.
In the Invoice Notes section, you can add or reply to comments, or mention someone by using '@' in the comments. Comments cannot be edited or deleted by design. All comments or comments of a selected account can be exported in the Notes feature. See Using the Notes Feature for details.
Tasks
Collection tasks are managed in the Tasks tab.
If you have created a workflow for assigning collection tasks to agents, the approval tasks in the workflow will be populated in this section.
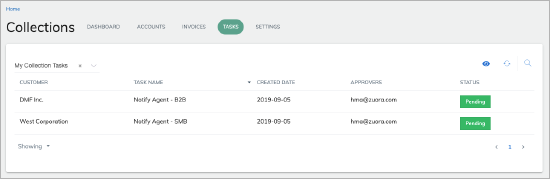
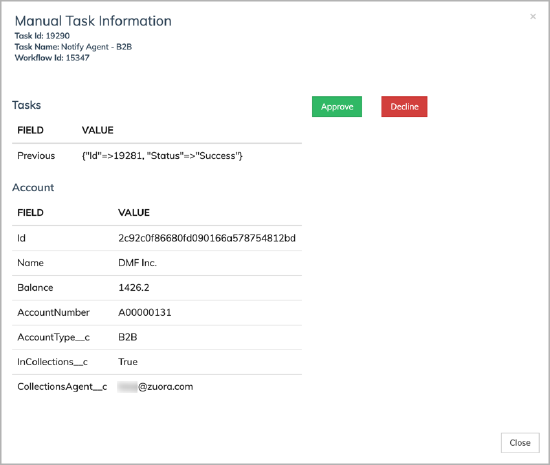
To process a collection task, click Pending. The task information page opens. Click Approve or Decline to approve or decline the approval request. The workflow will proceed to the next task based on the action you perform.
Create a follow-up task
You can manually create collections tasks in Collections Windows to follow up on a particular payment or account. Collection tasks of this type (referred to as follow-up tasks) are not tied to workflows.
To create a follow-up task:
- In the Tasks tab, click TASKS BETA in the top-right corner of the page.
- In the new task page, specify details for the task.
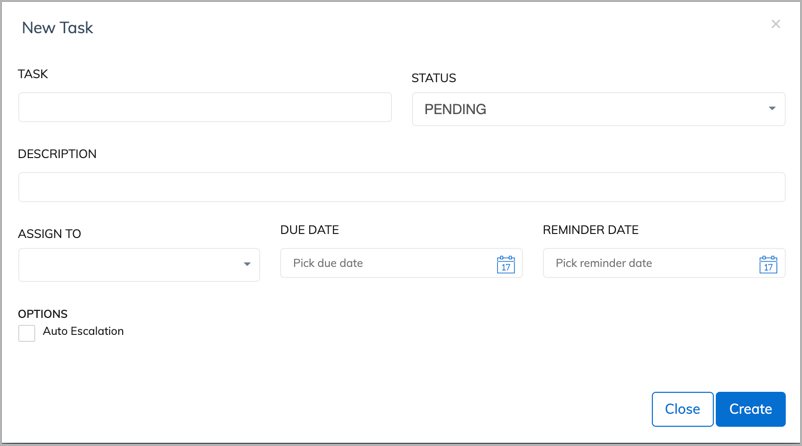
- Task name: Specify a name to identify the task.
- Status:
- Pending: The task is active and has not been completed.
- Completed: The task has been completed.
- Closed: The task has not been completed but is no longer relevant.
- Description: Specify a brief description of the task. It is recommended to include the account, invoice, or payment that’s related to the task.
- Assign To: Type at least two letters in a username or email address to trigger the automatic completion feature.
- Due date: The date when the task is due. On the due date, the owner and the assignee of this task will get a notification.
- Reminder date: The date when you want the assignee to get notification about the task.
- Auto Escalation: If this option is selected, on the due date of the task, the task will be reassigned to the escalation point of the agent. Escalation points are configured in Notes. For details about escalation points, see Set up the Notes feature.
-
Click Create. The task is created and displayed in the list of follow-up tasks.