Use the Configurable Lockbox feature
You can have multiple lockbox file formats in one instance of Configurable Lockbox. Each lockbox file format can have its own processing options, payment options, and processing schedules.
Understand the user interface
After completing the initial configuration, you are navigated to the homepage of the app.
The UI of the app consists of four tabs:
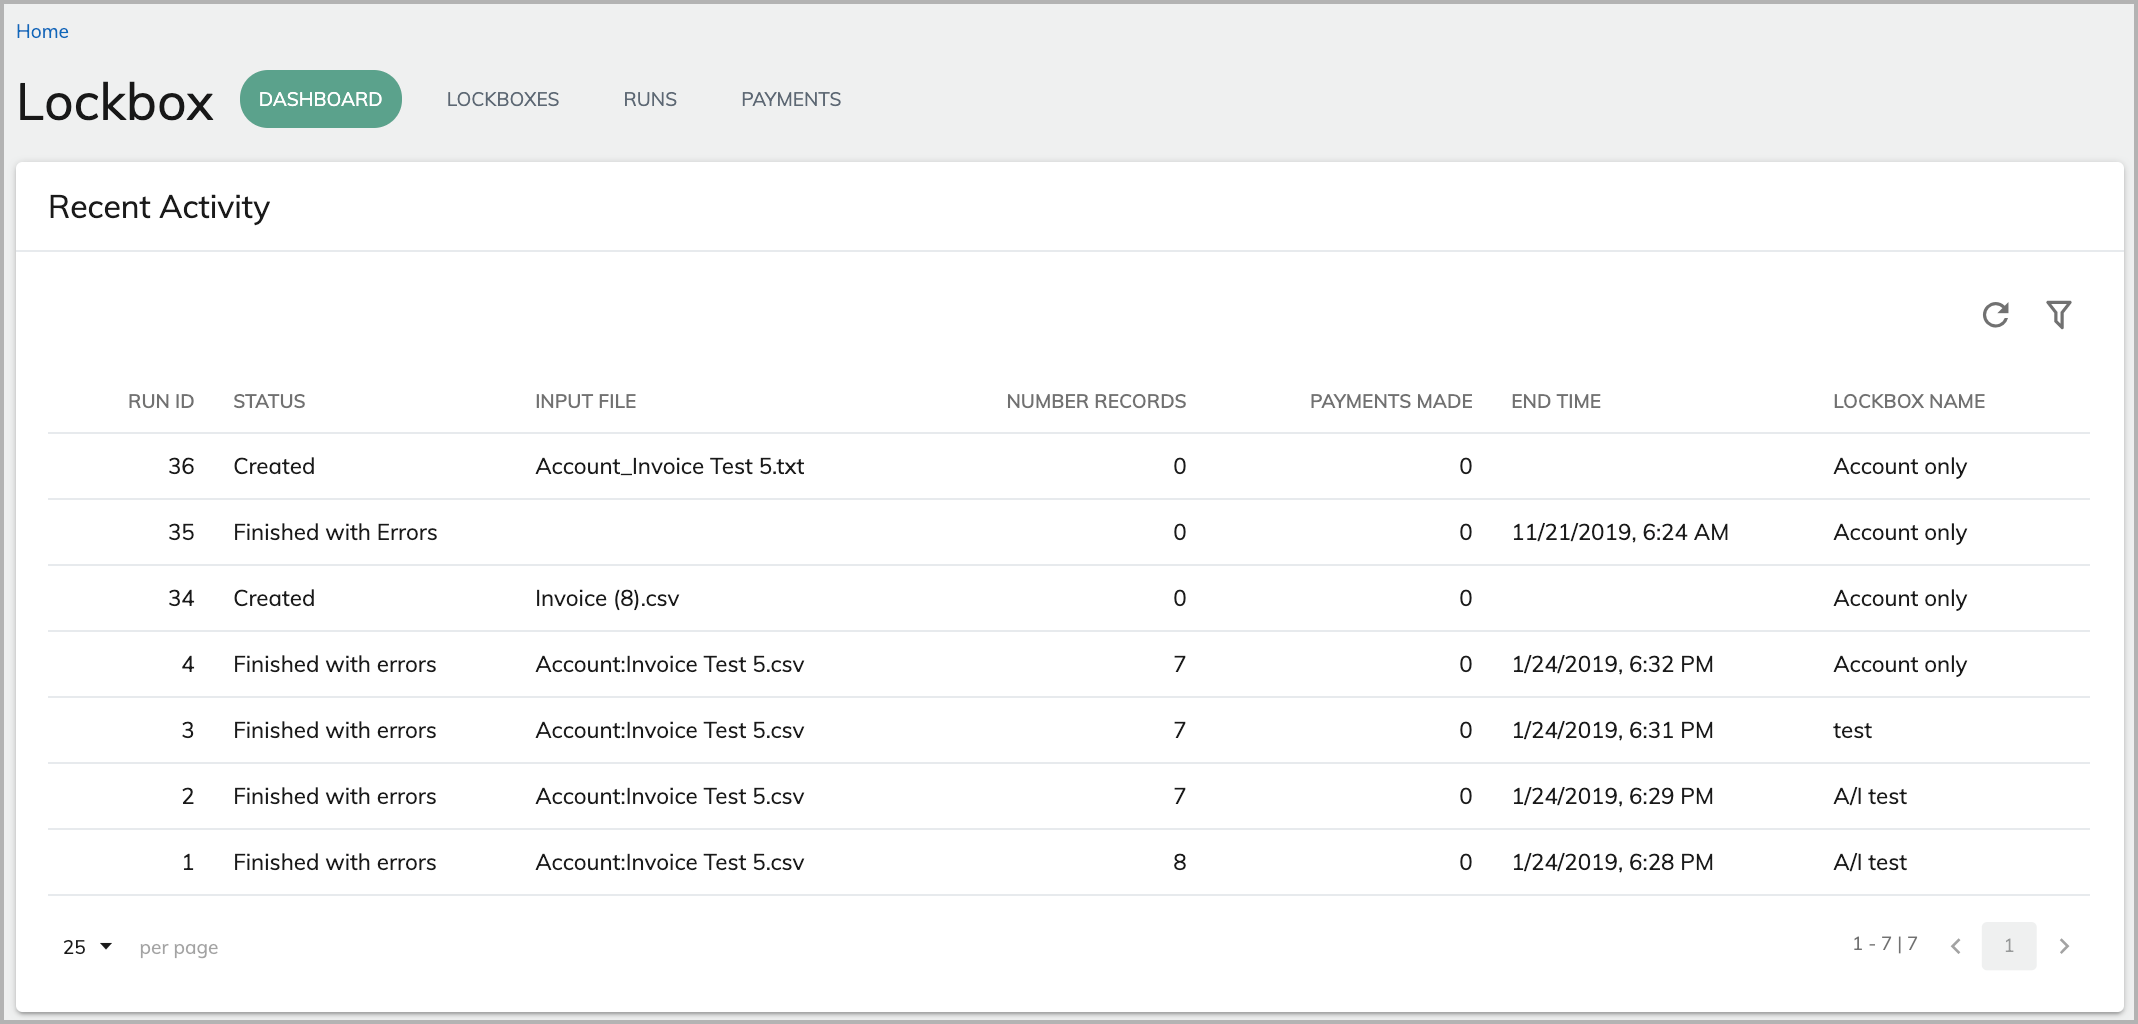
- Dashboard: This is the default tab. This tab displays the status and results of recent lockbox activities.
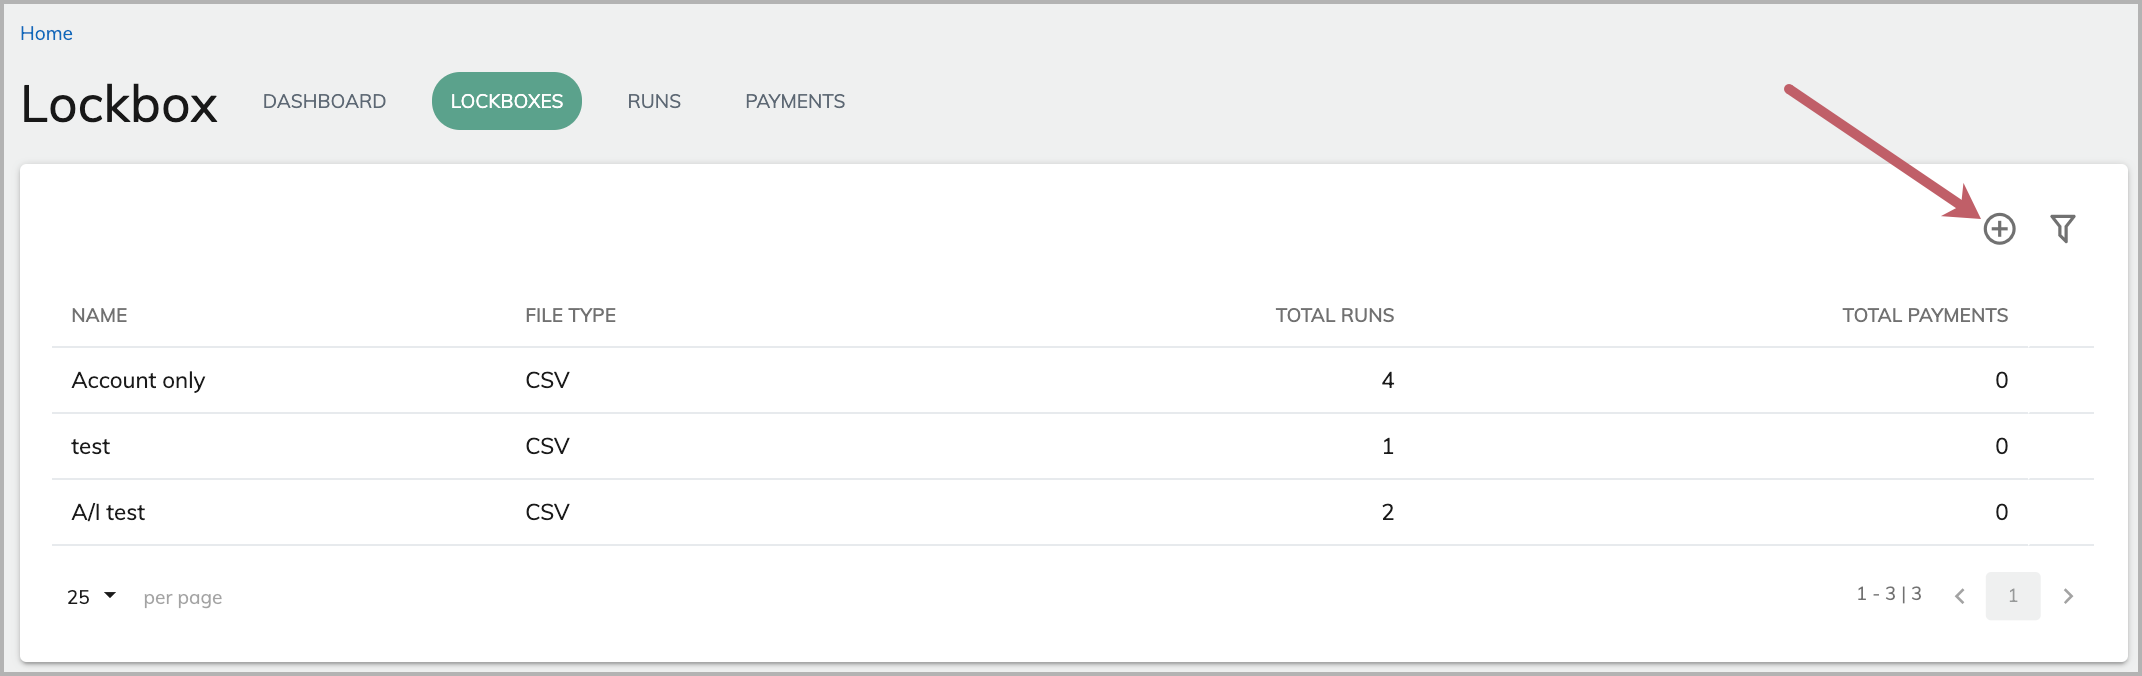
- Lockboxes: This tab displays all lockbox file formats that have been configured in Configurable Lockbox. You can add new lockbox file formats or configure existing file formats in this tab.
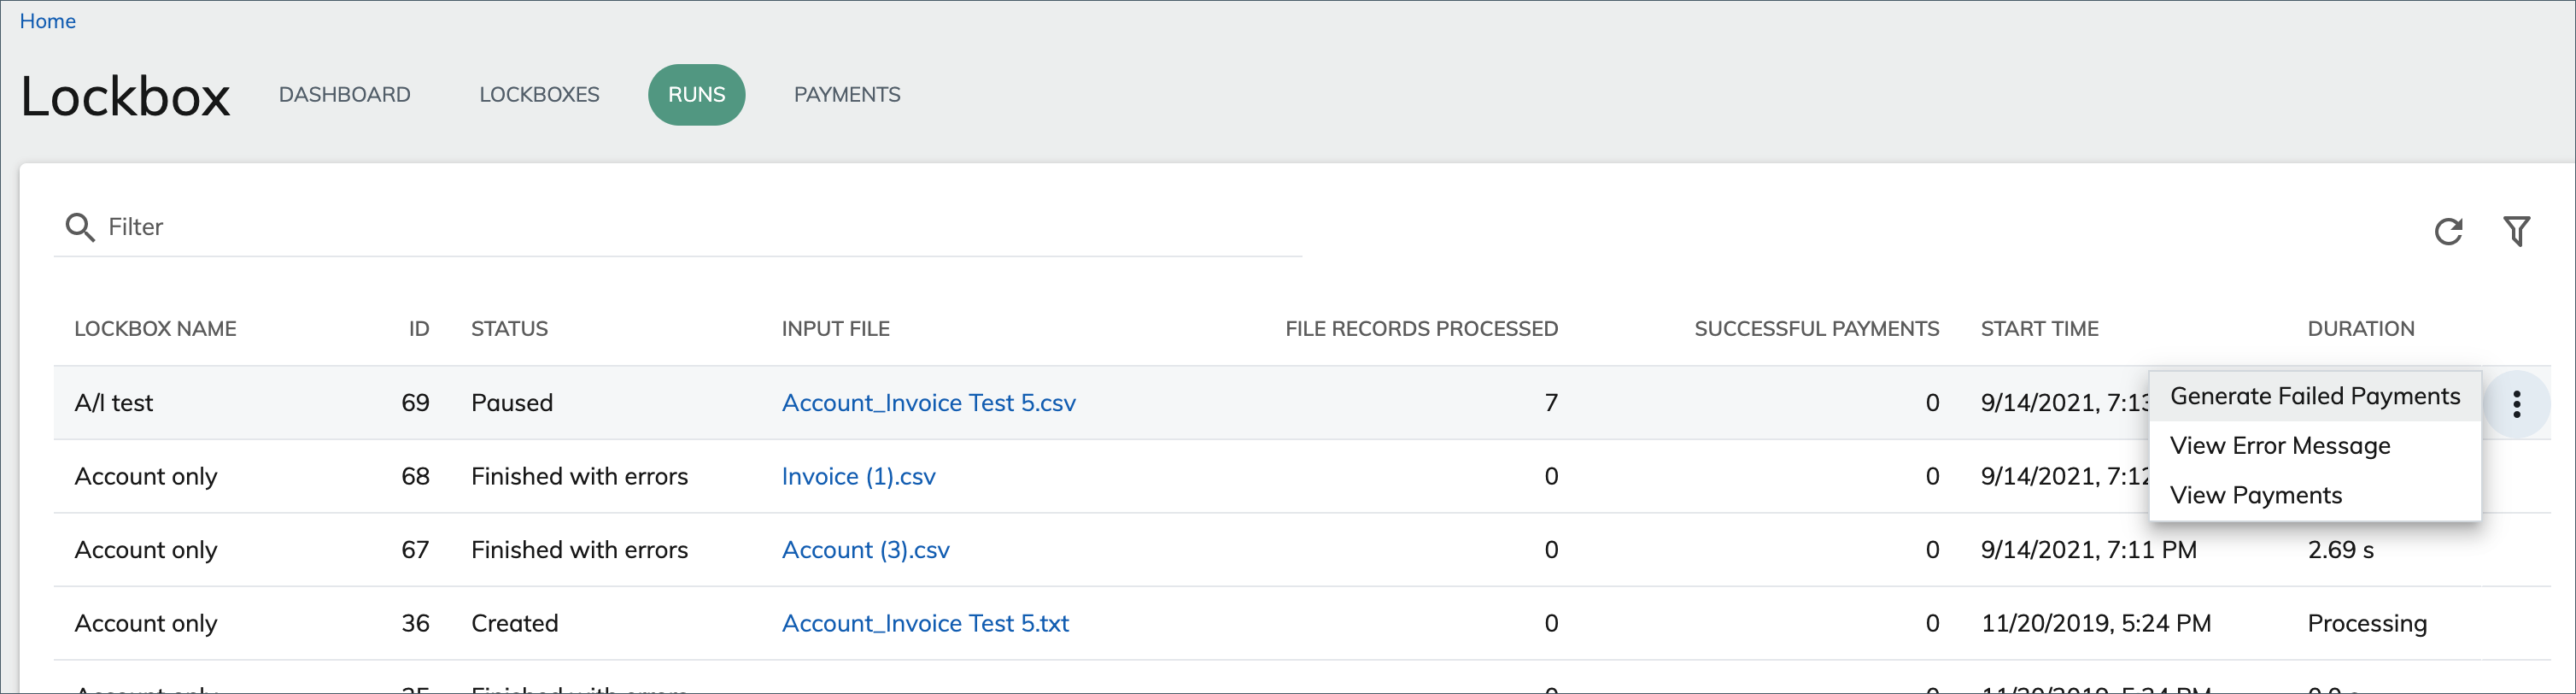
- Runs: This tab shows the processing histories of the configured lockbox file formats (hereafter referred to as lockbox run). You can view the input files used in the lockbox runs or generate failed payments in the lockbox runs.
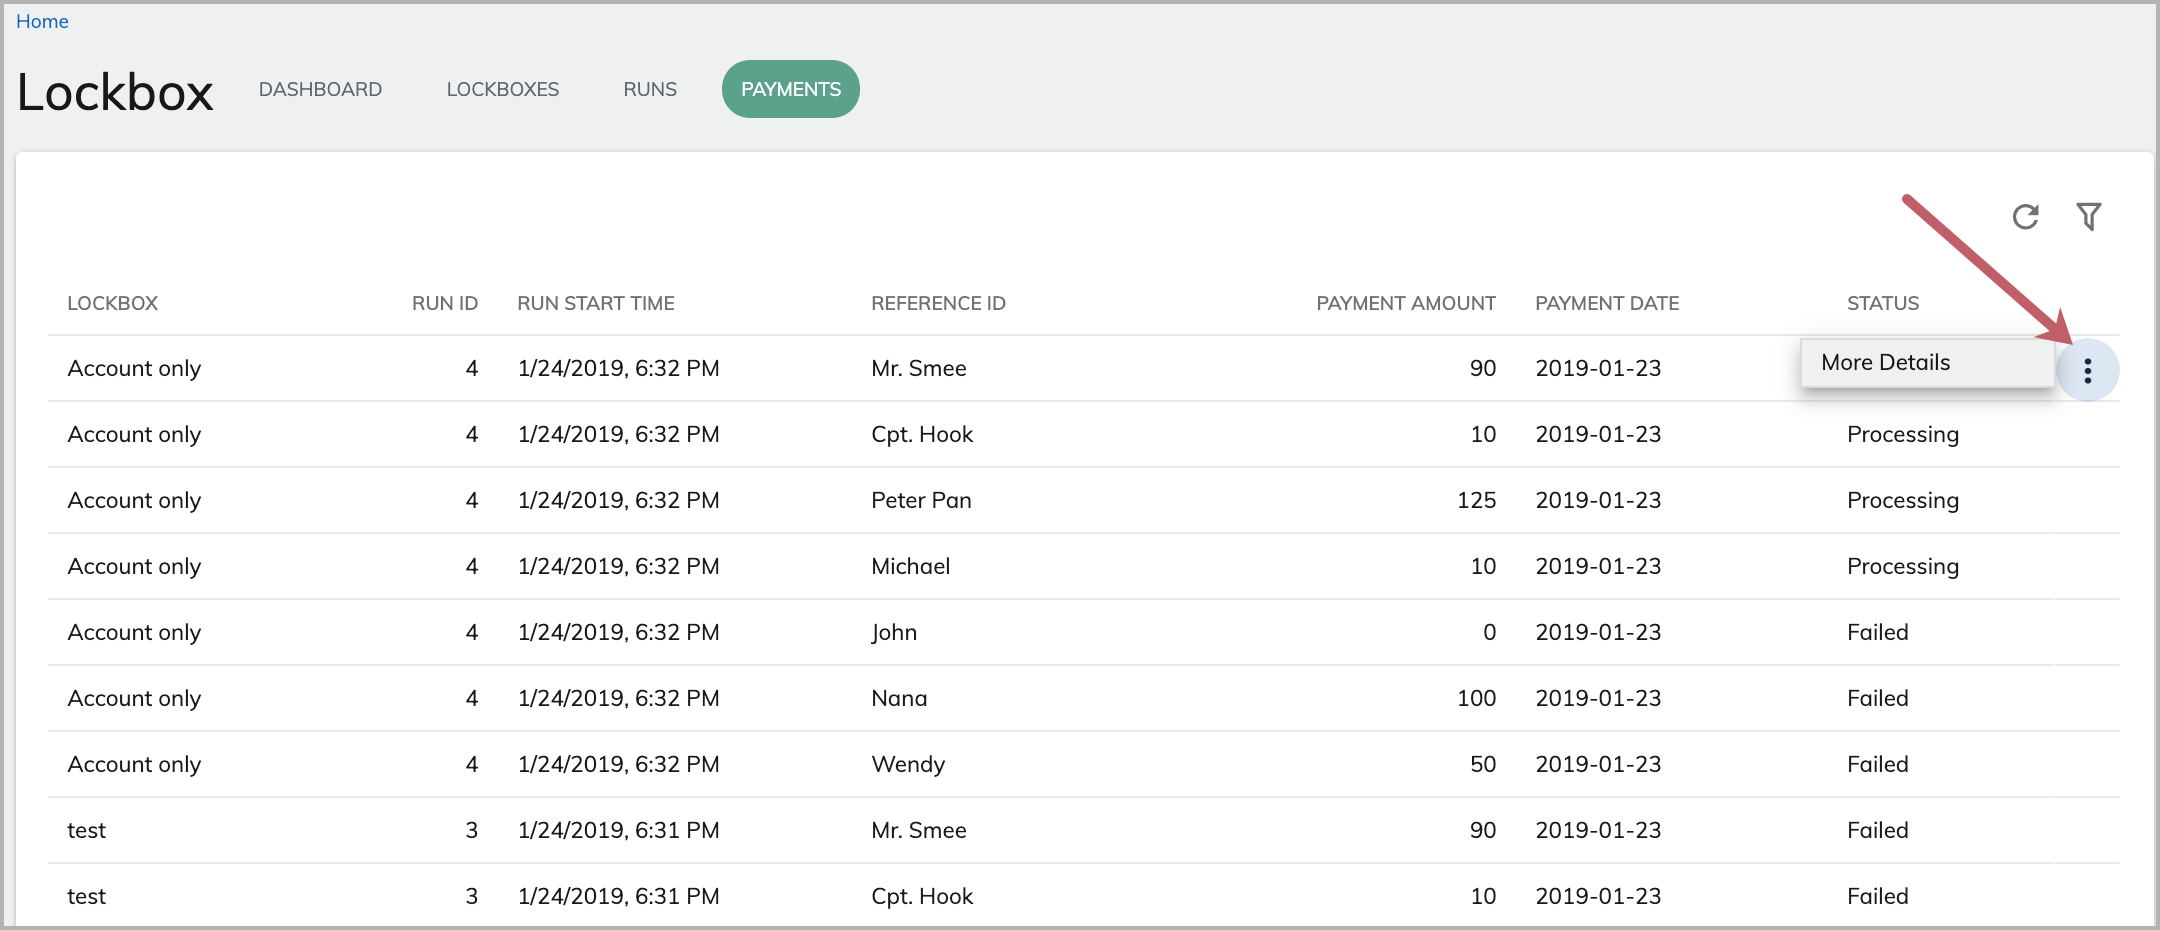
- Payments: This tab shows payments that have been completed or in progress. You can view the details of each payment record.
Add a new lockbox file format
If you need to add a new lockbox file format, click the add icon in the top right and follow the steps in Configure the Configurable Lockbox Feature.
View lockbox runs
On the Runs tab, you can view details of lockbox runs that have been completed, paused, or in progress. You can view input files used in the lockbox runs by clicking the input file name. You can also generate failed payments or view error messages in the lockbox runs.
If the File Processing Review setting is enabled, the file processing will be paused for review before payments are made. The files to be reviewed will remain in the Paused status until you take further review actions. To review the payment records, complete the following steps.
- Click View Payments from the action menu. The Payments page is displayed.
- On the Payments page, you can review and determine whether to proceed or reject the file completely.
- If you select to proceed, all matched payments will be processed.
- If you select to reject the file, payments will not be made and there will be no records for payments including failed payments.
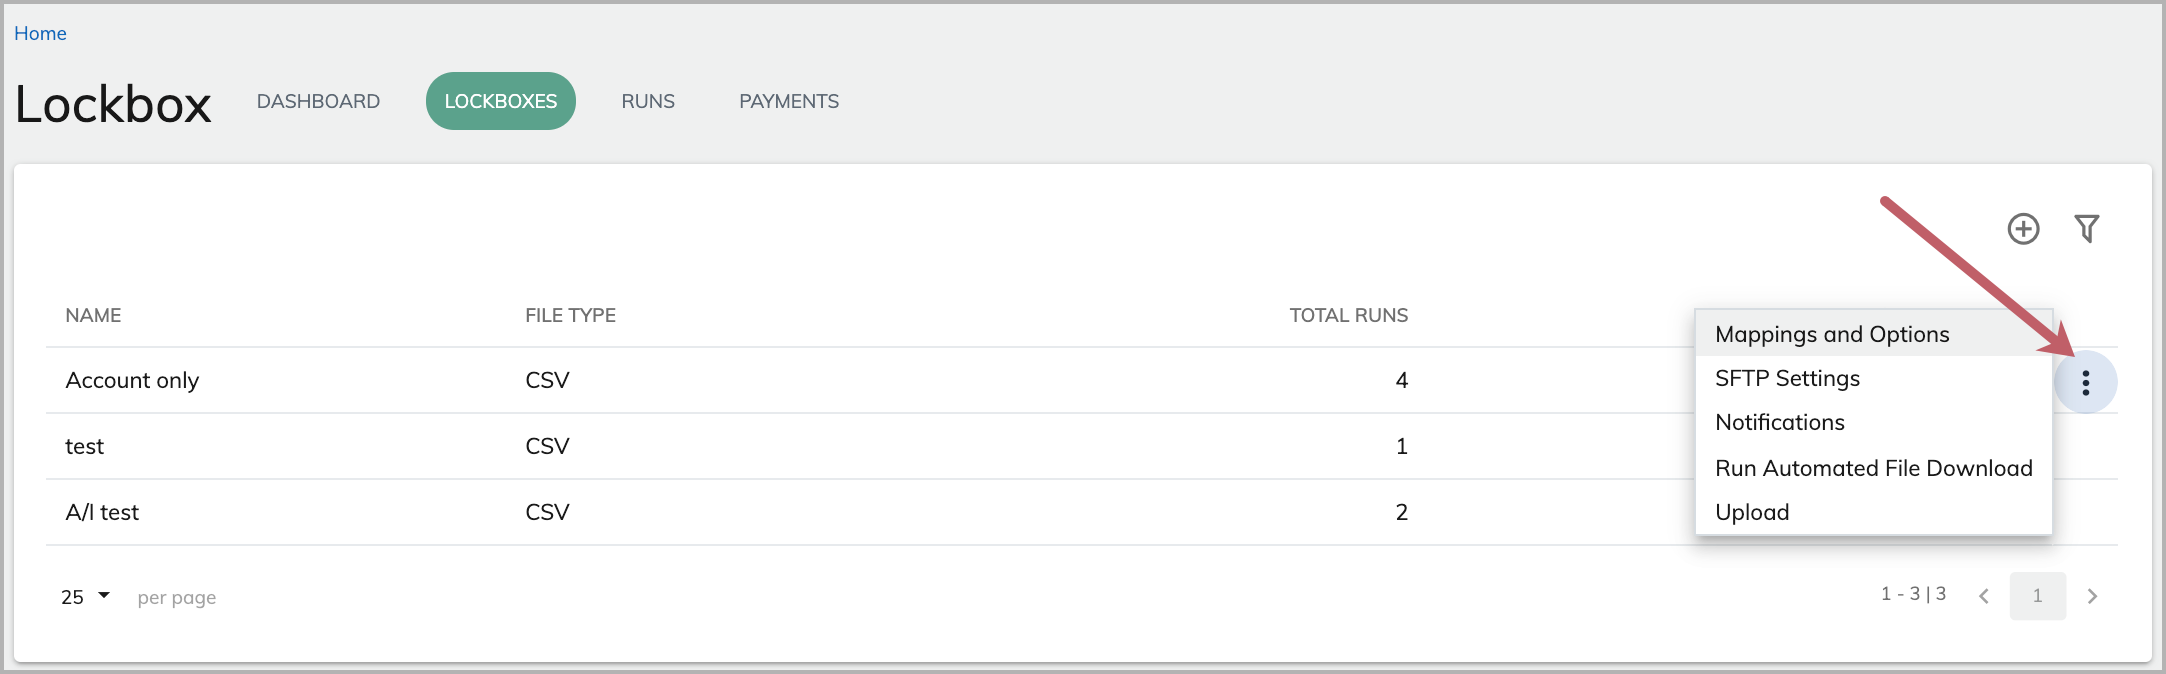
 Upload a lockbox file manually
In the Lockboxes tab, locate the file format that your lockbox file uses, click the menu icon, and select Upload.
In the window that opens, select the file, and click Upload.

View payment details
All payments that are being processed or have been completed are shown in the Payments tab. The Payment Date mentioned here is from the bank provided file on the customer’s SFTP server, which denote when the external payment took place. Whereas the creation date in Zuora Billing denotes when that payment record was created by API calls.
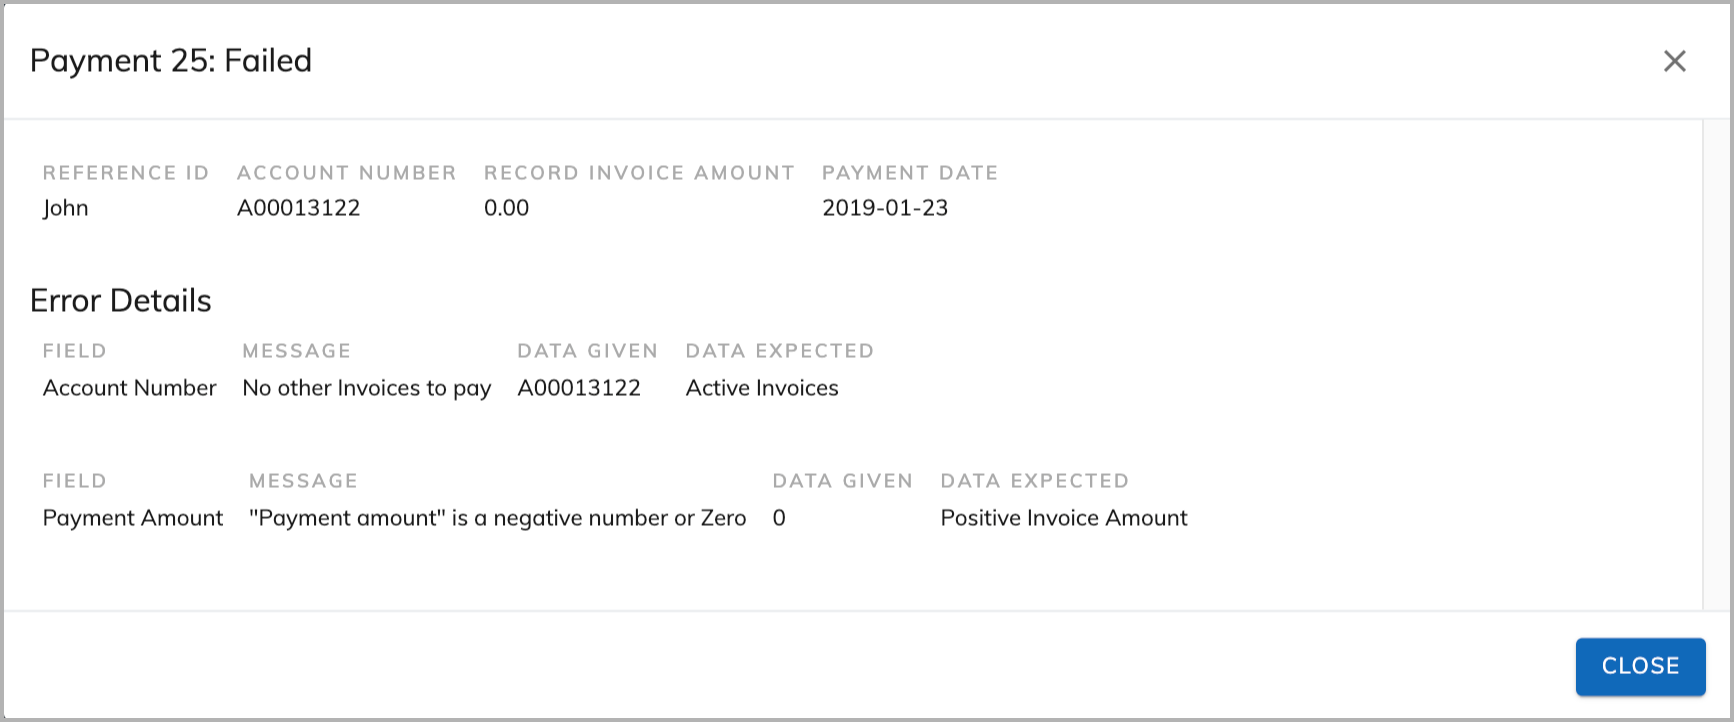
To view the details of a payment record, click the menu icon, and select More Details.
The details page will display.
Download lockbox files from a configured SFTP server
After an SFTP location is set for a lockbox, you can set a schedule for downloading lockbox files from it, or manually initiate downloads.
To manually initiate the downloads, click the menu for the lockbox, and select Run Automated File Download. This triggers a normal Lockbox run where Lockbox downloads files from your SFTP server and automatically processes the files.

Example lockbox scenarios
The following scenarios explain what happens when certain information matches or doesn't match. The scenarios column describes the data coming into the lockbox, and the result column explains what the lockbox application does with the payment.
| Scenarios | Account | Invoice | Date | Amount | Result |
|---|---|---|---|---|---|
| When the account and invoice number are correct. | A00003054 | Z-11472-INV-00000051 | 11/29/2022 | 10.00 | Payment is created on the correct invoice. |
| When the account number is blank. |
Z-11472-INV-00000051 |
11/29/2022 | 20.00 | Payment is created on the correct invoice. | |
| When the account number is bad. | BAD123 | Z-11472-INV-00000051 | 11/29/2022 | 30.00 | Payment is created on the correct invoice. |
| When the account number is wrong. | A00003070 | Z-11472-INV-00000051 | 11/29/2022 | 40.00 | Payment is created on the correct invoice. |
| When the invoice number is blank. | A00003054 | 11/29/2022 | 50.00 | Payment created as unapplied payment on account. | |
| When the invoice number is bad. | A00003054 | BAD456 | 11/29/2022 | 60.00 | Payment created as unapplied payment on account. |
| When the invoice number is wrong and already paid. | A00003054 | Z-11472-INV-00000050 | 11/29/2022 | 70.00 | Payment created as unapplied payment on account. |
| When the wrong invoice is for a different account. | A00003054 | Z-11472-INV-00000059 | 11/29/2022 | 80.00 | Payment is created on the wrong invoice on a different account. With Invoice Settlement Enabled When the process by invoice is first selected, this is expected result. If needed, the customer billing team can manually unapply payment from the wrong invoice and then reapply payment to the correct invoice on the correct account. Without Invoice Settlement External Refund and new external payment. |
| With a blank account and invoice number. | 11/29/2022 | 90.00 | The payment failed - expected. | ||
| With a bad account and bad invoice number. | BAD123 | BAD456 | 11/29/2022 | 100.00 | The payment failed - exp |