Configure the Statement Generator feature
Before Statement Generator is ready for use, you need to complete the initial settings. All the settings in Statement Generator can be modified later.
Prerequisites
-
You must have installed the Statement Generator feature. The Statement Generator feature uses OAuth to authenticate to your Zuora tenant.
For more information, see Install Zuora Collections features.
Procedure
When you launch Statement Generator for the first time, you'll be navigated to the Settings tab automatically. Before you complete the initial settings, you cannot generate statements in Statement Generator.
The Settings tab consists of four sub-tabs. Each sub-tab has a sequence number. You need to configure the settings in sequence.
- Configure the timezone.
- Configure the account settings.
- Configure the email settings.
- Configure the schedule for generating statements
Step 1: Configure the timezone
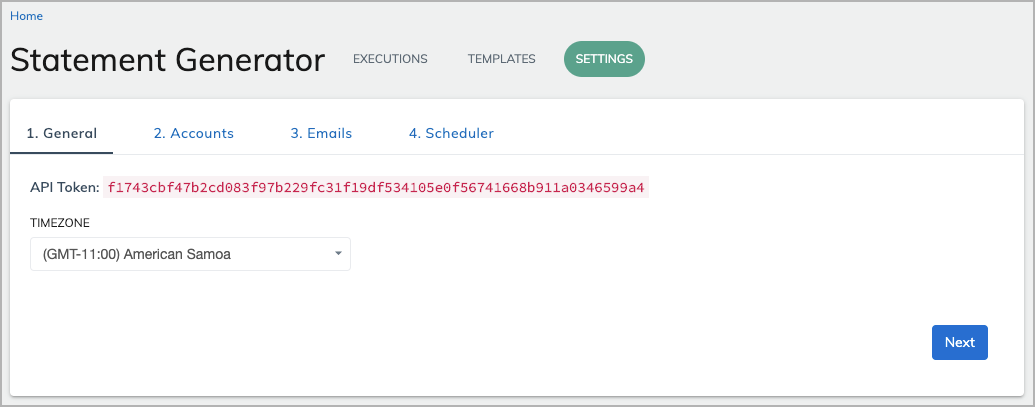
In the General sub-tab, select the same time zone as for your Zuora environment to avoid payment errors, and click Next.

Step 2: Configure the account settings
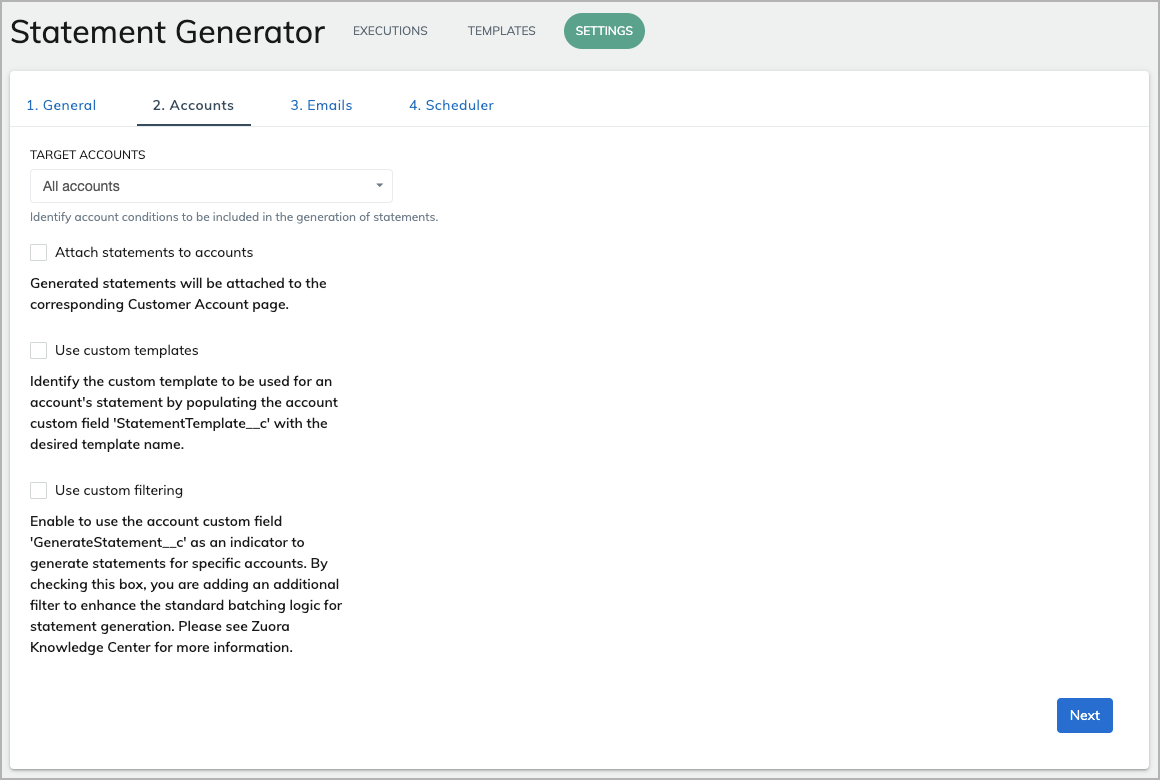
In the Accounts sub-tab, complete the settings related to accounts, and click Next.
-
In the Target Accounts field, select target accounts to have statement generated:
- All Accounts - Any account in your Zuora environment.
- Accounts with open invoices - Any account in your Zuora environment with unpaid invoices.
- Accounts with open balances - Any account in your Zuora environment with any outstanding balance. Balance can come from such things as debit memos.
- Accounts without invoice but with other transactions - Any account in your Zuora environment that does not have an unpaid invoice, but does have other outstanding transactions like credit and debit memos, refunds, and invoice item adjustments.
- Accounts without invoice but with open balance - Any account in your Zuora environment that does not have an unpaid invoice, but does have an outstanding balance from such things as a debit memo. This is similar to Accounts with open balances, but there is also an unpaid invoice associated to the account.
- Accounts with GenerateStatement__c set to TRUE - Any account in your Zuora environment with the custom field
GenerateStatement__cset toTRUEwill be selected to generate a statement.
- If you want statements to be attached to corresponding accounts, select Attach statement to accounts.
Zuora environments only allow for 2GB of storage for all attachments. On average, a single generated statements will require approximately 0.08MB of that storage. Statements not attached to an account will be visible in the Execution tab of Statement Generator. - If you want to use a custom statement template, select Use custom templates. If this option is not selected, the default template will be used.
If you install Statement Generator with OAuth credentials, a custom field (StatementTemplate__c) is automatically created. If you want to use a custom statement template, you must set the value of this custom field to the name of the custom template. If no custom template is specified in the custom field of the account, the default account template will be used. - If you want to use a customized filter for generating statements, select Use custom filtering. If this option is selected and the Target Accounts field is set to Accounts with GenerateStatement__c set to TRUE, accounts that use the same custom template will be considered a separate batch for generating statements.
Step 3: Configure the email settings
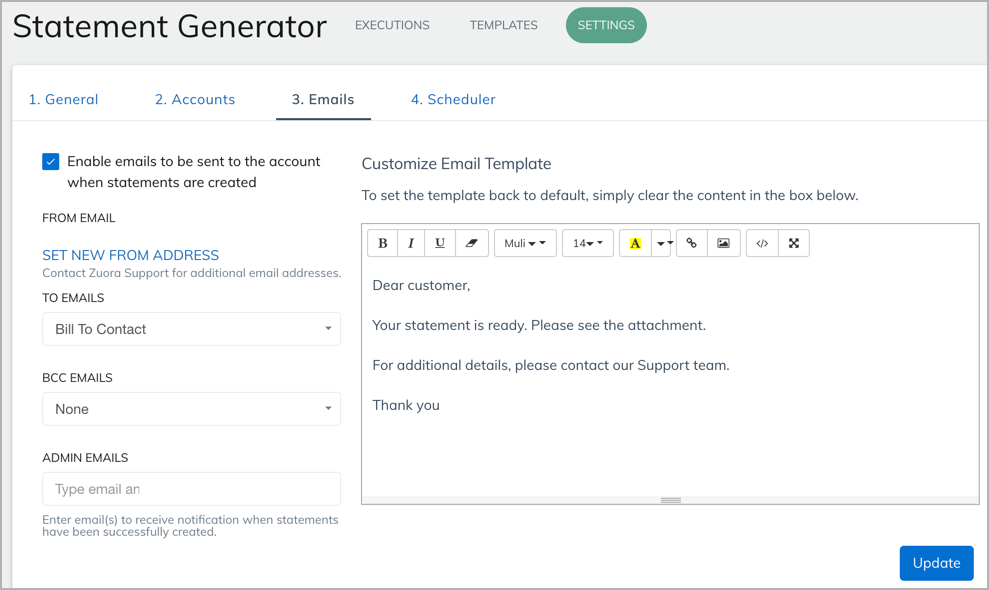
In the Emails sub-tab, configure the settings related to emails. When you complete, click Next.

-
If you want emails to be sent to accounts when statements are generated, select the option Enable emails to be sent to the account when statements are created. If this option is not selected, the following settings will not take effect.
-
In the From Emails section, ensure that an email address for your organization is displayed.
If an email address for your organization is not displayed, configure a verified sender email address. For more information, see Configure a verified sender email address for the Statement Generator.
-
From the To Emails drop-down list, select the predefined lists of emails that will receive the generated statements:
- Bill To Contact
- Sold To Contact
- All of the Above
- From the BCC Emails drop-down list, select the groups of emails that will receive the generated statements as BCC recipients:
- Bill To Contact
- Sold To Contact
- All of the Above
- In the Admin Emails field, enter the admin emails to receive notification when statements are generated.
An admin email is not required but recommended. - In the Customize Email Template section, edit the message and formatting of the template. You can switch to Code View to edit the HTML code of the template.
If you want to restore the default template, delete everything in the editing area.
Step 4: Configure the schedule for statement runs
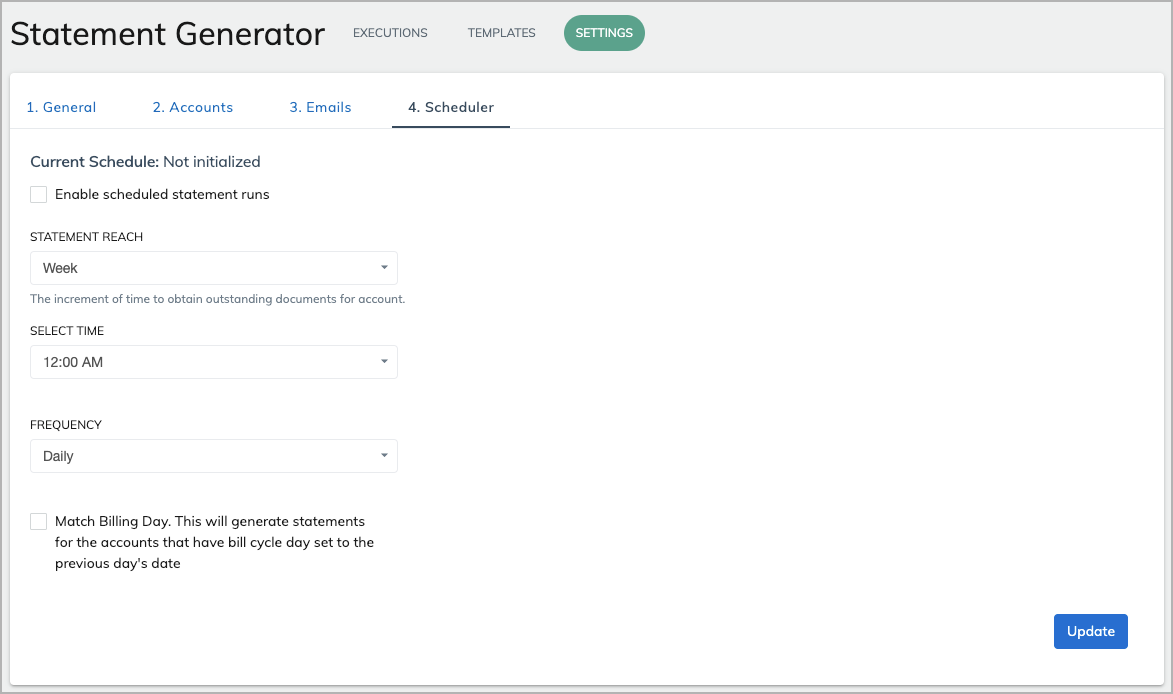
In the Scheduler sub-tab, configure the schedule settings. When you complete this step, click Update to save all the settings in the four steps. If you do not want to create a schedule, you can skip the settings in this step and click Update to save the settings from the previous steps.

-
If you want to create a schedule for statement runs, select Enable scheduled statement runs. If this option is not selected, the following settings will NOT take effect.
-
From the Statement Reach drop-down list, select the increment of time for collecting outstanding documents to be included in the statement.
For example: Statement Reach = Weekly. Statements will be gathered for the past week at the time of the executed schedule.
The statement reach only applies to the recurring schedule of statement generations. If statements are generated manually, you will be asked to identify the statement reach of that execution.
-
From the Select Time drop-down list, select the desired start time.
-
From the Frequency drop-down list, select the frequency of schedule executions:
-
Daily - Statements will be created on a daily basis.
Enable Match Billing Day to have statements created only for those accounts whose bill cycle day (in Zuora environment) is the same day as the statement execution.
For example, when Match Billing Day is enabled, the scheduler will execute on a daily basis. The Statement Generator feature will look for any accounts that meet the configured settings and have the bill cycle day of the previous day. If the account has the same billing cycle day, the statement will be generated; if the bill cycle day does not match, the account will not have a statement generated.
-
Weekly - Designate the day of the week the scheduler runs.
-
Monthly - Select the day of the month for the scheduler to run.
-
What's next?
After the initial settings are saved, you can start using the Statement Generator feature. For details, see Using the Statement Generator Feature.
