Configure multiple books in Zuora Revenue
In Zuora Revenue, at least one primary revenue book must be set up to process revenue transactions. The revenue book configuration determines revenue treatment to be applied to the transactions. It also determines the prefix of the unique revenue contract ID, which will be assigned to each revenue contract created in Zuora Revenue.
Zuora Revenue also provides the flexibility to set up more than one revenue book for the same instance so that the revenue treatment can be performed differently from one book to another. For example, you can choose to have the allocation functionality enabled for one book and disabled in another book so that you can compare the revenue recognition processing for the same transactions with allocations and without allocations. You can also implement Zuora Revenue to perform dual-guidance. To make it easier to identify the same revenue contract as processed in different ways, you can configure Zuora Revenue to group the revenue contract in the same way with the same ID number but each with a different prefix.
System requirements
If you want to set up more than one revenue book in Zuora Revenue, be aware of the following requirements:
- The revenue contract grouping logic is the same among the revenue books.
- One revenue book must be configured as the primary book and cannot be disabled. Transaction data is always processed first in the primary book to determine the revenue contract grouping. Then the groupings will be copied to other revenue books.
- The role-based access control applies to all revenue books.
- Transaction data must be collected in the same period for all revenue books. The monthly close activities must be completed in parallel.
- After the transaction data is collected for one book and the book is disabled later, this book cannot be enabled in another period.
Procedure
Complete the following steps to set up the revenue book:
- Navigate to Setups > Applications.
- Click
 to open the side menu and then click Revenue Books.
 - To add a revenue book, click the New Book icon
 .
. - In the New Revenue Book window, provide the following information and click the save icon
 .
.
Field name Description Name A unique name of the revenue book to be created. This field is required. Description A short description of the book for informational purposes. Enabled Indicate whether this book is enabled. Book Type Select the appropriate guidance for the book for informational purposes. RC Prefix The prefix that is to be used in the revenue contract ID. For example, if the prefix is RC and the RC number is 12345, the RC ID will be RC12345. This field is required. Primary Book Indicate whether this book is the primary book. If a book is selected as the primary book, the Enabled switch must also be toggled to Yes. Allocation Enabled Indicate whether the allocation functionality is enabled for this book. Postable Enabled Indicate whether the transfer accounting functionality is enabled for this book. For more information, see Transfer accounting. LTST Enabled Indicate whether the long-term/short-term reclassification functionality is enabled for this book. For more information, see Long-term and short-term reclassification. Start Date The start date when the book is active. End Date The end date when the book becomes inactive. - (Optional): After the book is created, you can assign related accounts to this book. The result is that, when the account fields are absent on the uploaded transaction lines, the accounts that you add here will be automatically populated for the transaction lines that are collected for this book.
- On the Revenue Books page, hover the mouse over the line of the book and then click the Assign Accounts icon
 .
. - In the Assign Accounts window, click
 to add a row for one company code.
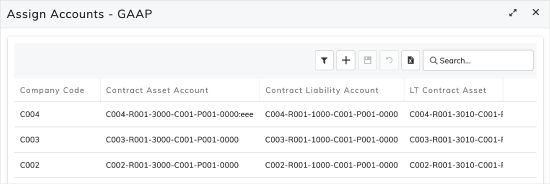
- In the added row, specify the account information in different columns. The value that you specify must comply with segment settings on the Account Setup page.
- Add as many rows as you need.
- After you are done, click
 and close the window.
- On the Revenue Books page, hover the mouse over the line of the book and then click the Assign Accounts icon
Results
Upon success, a confirmation message is displayed on the top right side of the UI and the book is listed on the page.
When more than one revenue book is enabled in the system, the Period Open/Close Templates must be created with applicable books assigned. When you are viewing revenue contracts in Workbench, you have the option to view the revenue contract within different books. Reports are also based on individual revenue books.