Define Your Anonymous User Journey
In this example, we ask anonymous users to register before they can view content.
To do this:
- Build your feature (We use this feature in all our user journeys).
- Create a registration form outcome.
- Build the rule to display the registration form outcome when the user tries to access content.
Build Your Feature
To build the feature that we use throughout this example, complete the following steps:
- Select Products > Features from the main menu.
- Select the Add a Feature button.
- Enter Article in the Title text box.
- Optionally, add a description of the feature in the Description text box.
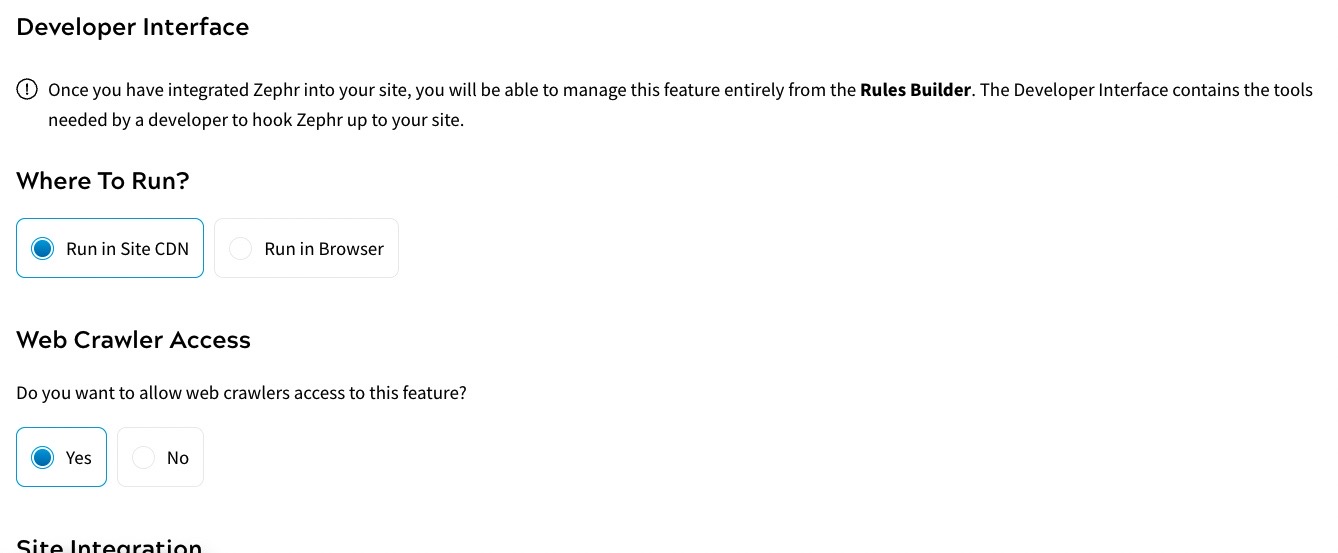
- Select the Continue button. The Developer Interface for HTML features displays as illustrated below:

This contains the tools needed by your development team when adding the feature to your site.
We can just continue to the Developer Interface as we are using an HTML integration. In an HTML integration, you wrap your features in Zephr tags, or use CSS selectors to identify the parts of your HTML document to transform, replace or remove. In this example, we can hide your content and display a registration wall. For information on the available integrations, see the Integration Methods topic.
- Complete the Developer Interface as described in the Developer Interface for HTML Features topic.
- Select the Update & Lock button.
- Select the Save button.
The rules builder displays. For further information on using the rules builder, see the Rules Builder topic.
Next, we create a registration form for use in your rule, as described in the Create Your Registration Form Outcome section.
Create Your Registration Form Outcome
After building your feature, you must add a registration form outcome to the feature rule. This ensures that when an anonymous user accesses your content, they must register before they can view it.
To create your registration form outcome in the rules builder, complete the following steps:
- Select the Outcomes segment title from the decision bar.
- Select Add Outcome.
- Enter Registration Form in the Title text box.
- Optionally, enter a description of the outcome in the Description text box.
- Select the Add a New Form or Custom Component Block button.
- Select the Add button under the Form heading. By default, the Registration radio button is selected and the Title text box is pre-filled with Registration Form.
- Define the fields for the Account Verification step in your form as described in the Create a Login, Registration, or Forgot Password Form topic
- Select the Registration button.
- Define the fields that you want to make available on your registration form as described in the Define a Registration Form topic.
- In the Enter Required Information Section, add the two user attributes that we created in the Add Your User Attributes topic and select the Required toggle for each field to make them mandotory.
- Select the Done button to save your registration form and return to the Form Details screen. The Registration Form is added to the list of components.
- Define your lead-in text, as described in the Show or Hide Content topic.
For this example, enter 20 in the How many words? text box, and select Fade Out from the Style drop-down menu.
- Select the Save button to save your outcome and return to the rules builder. Your Registration Form outcome is added to the decision bar.
We can now build the anonymous rule to display the registration form outcome when an anonymous user accesses your content as described in the Build the Anonymous Rule section.
Build the Anonymous Rule
To complete your anonymous user journey, we must build the rule.
To build the rule, complete the following steps:
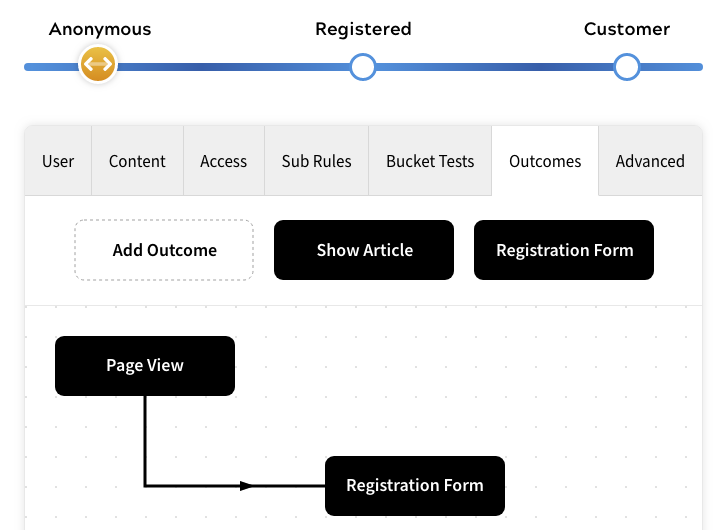
- Drag the Registration Form outcome that was created in the Create Your Registration Form Outcome section to the rules canvas.
- Drag from the white circle under the Page View node to the black circle to the left of the Registration Form outcome.
The rule is similar to the following:

- Select the Save as New Version button to save your work.
Now, we can define the registered user journey to convert registered users to customers. For further information on the steps involved in defining the registered user journey, see the Define Your Registered User Journey topic.
