Configure Third-party Authentication
You can configure the authorisation settings when using a third-party sign on. This uses OAuth 2.0 to log in to third-party applications using the Zephr login information. For further information on the OAuth 2.0 Authorization Code Grant, refer to the OAuth 2.0 Authorization Framework documentation.
To configure the authorisation settings, complete the following steps:
- Select the Third Party Authentication button in the Add a Site screen
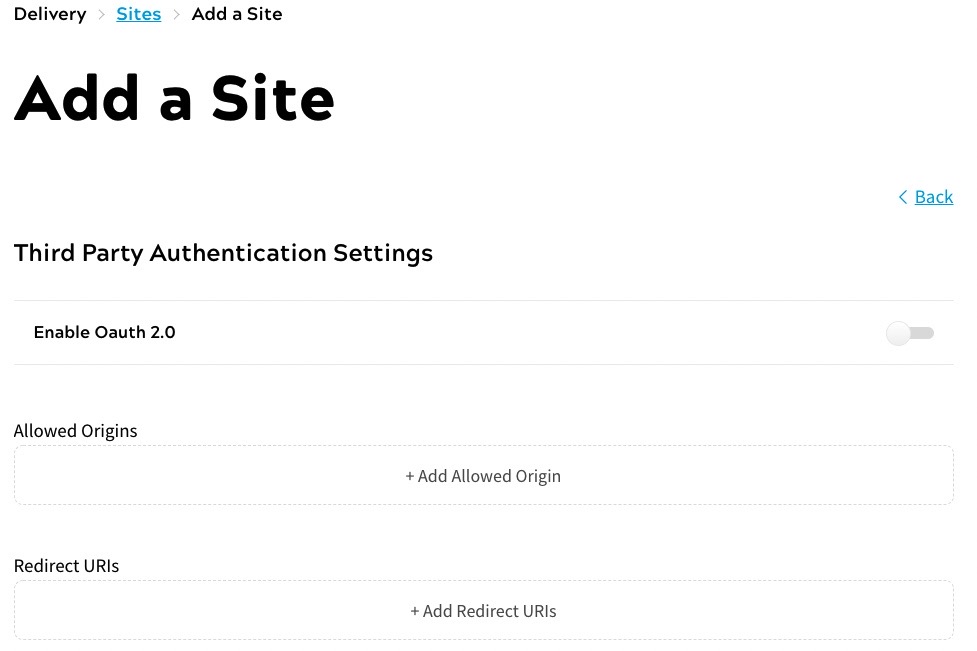
The Third Party Authentication Settings screen displays, as illustrated below:

- Select the Enable Oath 2.0 toggle to access data without sharing credentials
- Select the Add Allowed Origin button to define origins that can use the third-party authentication settings
A text box displays, as illustrated below:

- Enter the base URL in the text box
The base URL calls the OAuth 2.0 Authorization Server. For example, if the end user is logging in using Zephr credentials from Google, you could use an origin of https://www.google.com/login.
You can add further origins by repeating steps 3 and 4.
- Select the Add redirect URIs button to add a redirect Uniform Resource Identifier (URI)
A text box displays, as illustrated below:

- Enter the URI in the text box
This defines the URL to which the end user is redirected when authorization has been granted, or an error occurs.
You can add further URIs by repeating steps 5 and 6.
- Upload a logo. To do this, you can either drag a file to the drop box, or take the following steps:
- Select the Select a File to Upload button
- Navigate to your file
- Select your file
- Select the Open button
- Specify a title for the login page. To do this, enter the title you want to use on the login page in the Login Page Title text box
- Specify a title for the consent page. To do this, enter the title you want to use on the consent page in the Consent Page Title text box
- Define the placeholder for the identifier. To do this, enter the placeholder you want to use in the Identifier Placeholder text box
- Select a background colour for your page. You can select a colour in any combination of the following:
- Select an area in the colour box
- Select the eyedropper icon to choose a colour used anywhere in your screen
- Select the colour from the colour bar
- Enter the red, blue and green colour values in the R, G and B text boxes
- Select the arrows beside the RGB text boxes to use hue, saturation and lightness colour values. Enter the values in the H, S and L text boxes
- Select the arrows beside the HSL text boxes to use a hex colour value. Enter the hex value in the text box
- Select the Done button to return to the Add a Site screen
An example of using third-party authentication on your pages is given in the below Example Authentication Pages section.
Example Authentication Pages
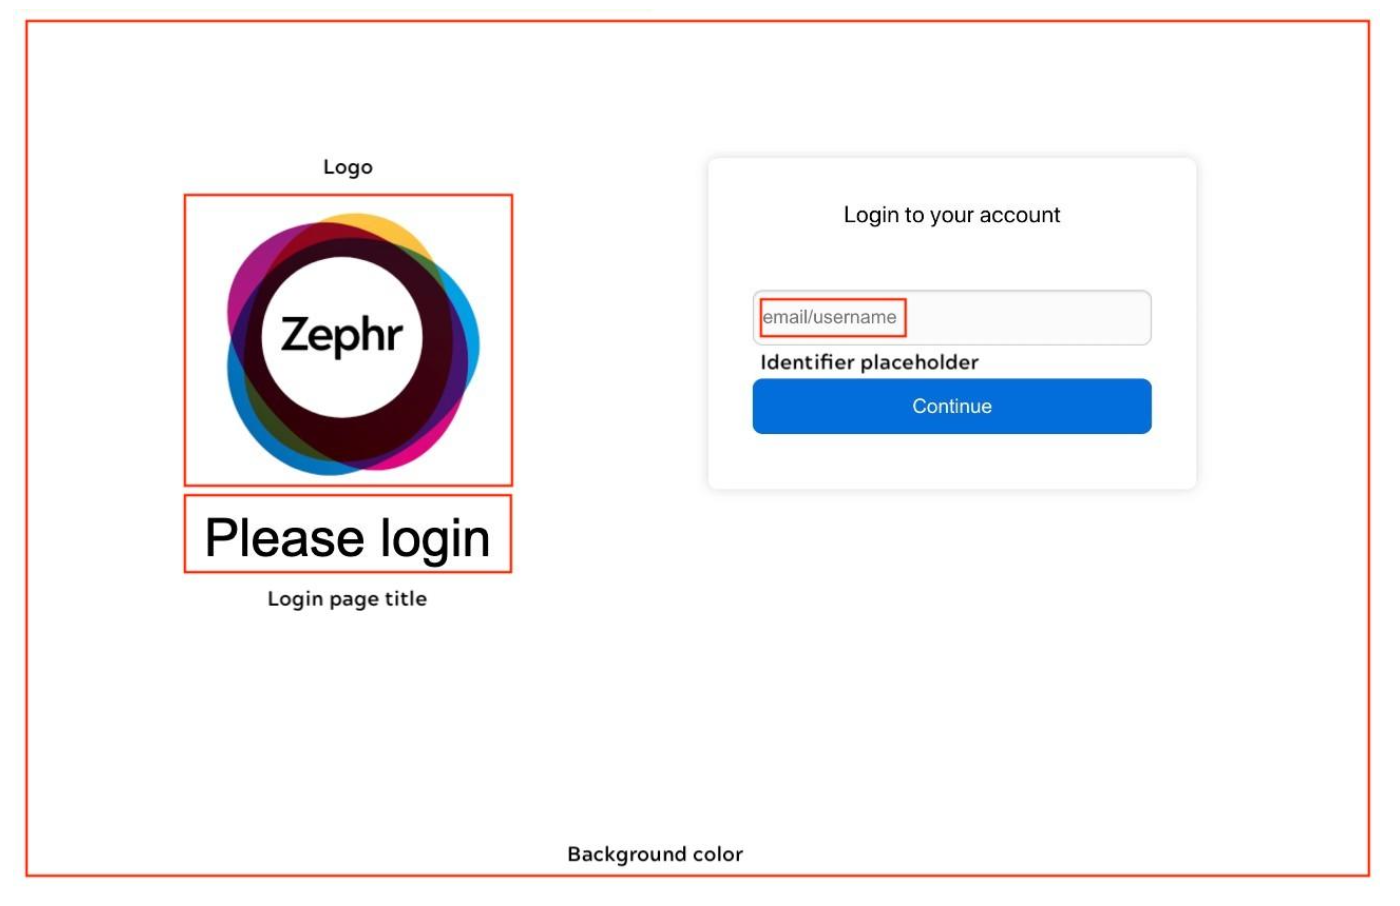
The logo, titles, identifier and background colour you define are used in log in and consent pages, which are created by Zephr to obtain authorization and consent from the end user, as follows:
- The login page asks the end user to log in, if they are not already logged in, as shown in the following illustration:

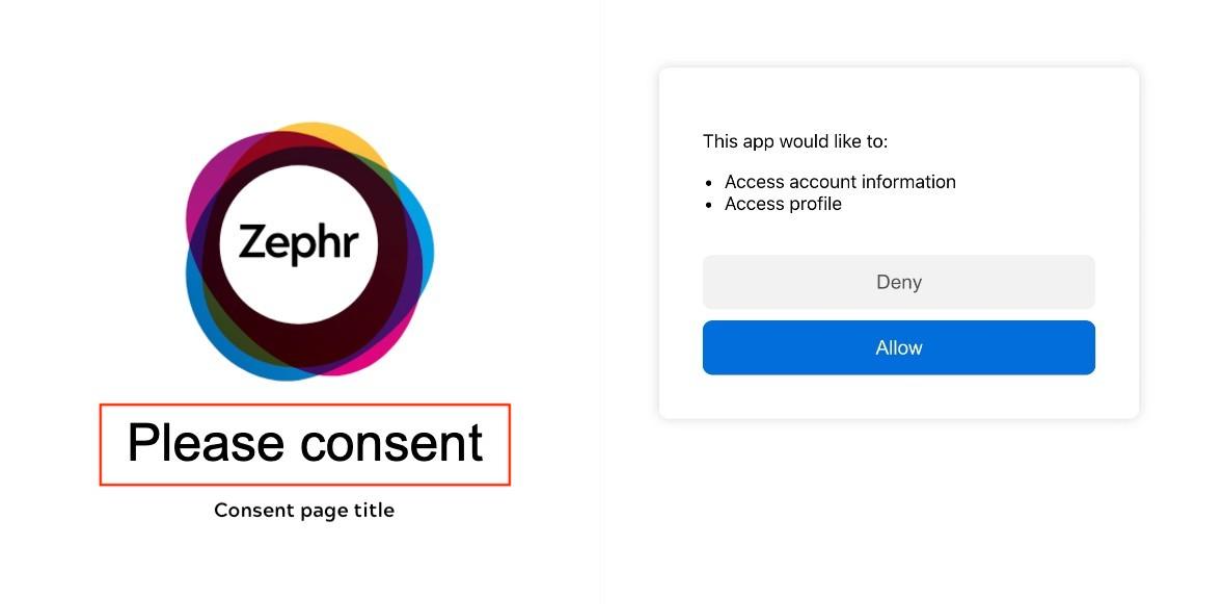
- The consent page asks the end user to consent to the third-party grants, as illustrated below:

The grants can be any of the following:
user.account readuser.profile:readuser.profile:update
When an end user selects the Allow button on your consent page, they are redirected to the URL that you specified in the redirect URI with an authorisation code, which can be exchanged for an access token.
You can find the authorisation code as described in the Get the User Token section.
Get the User Token
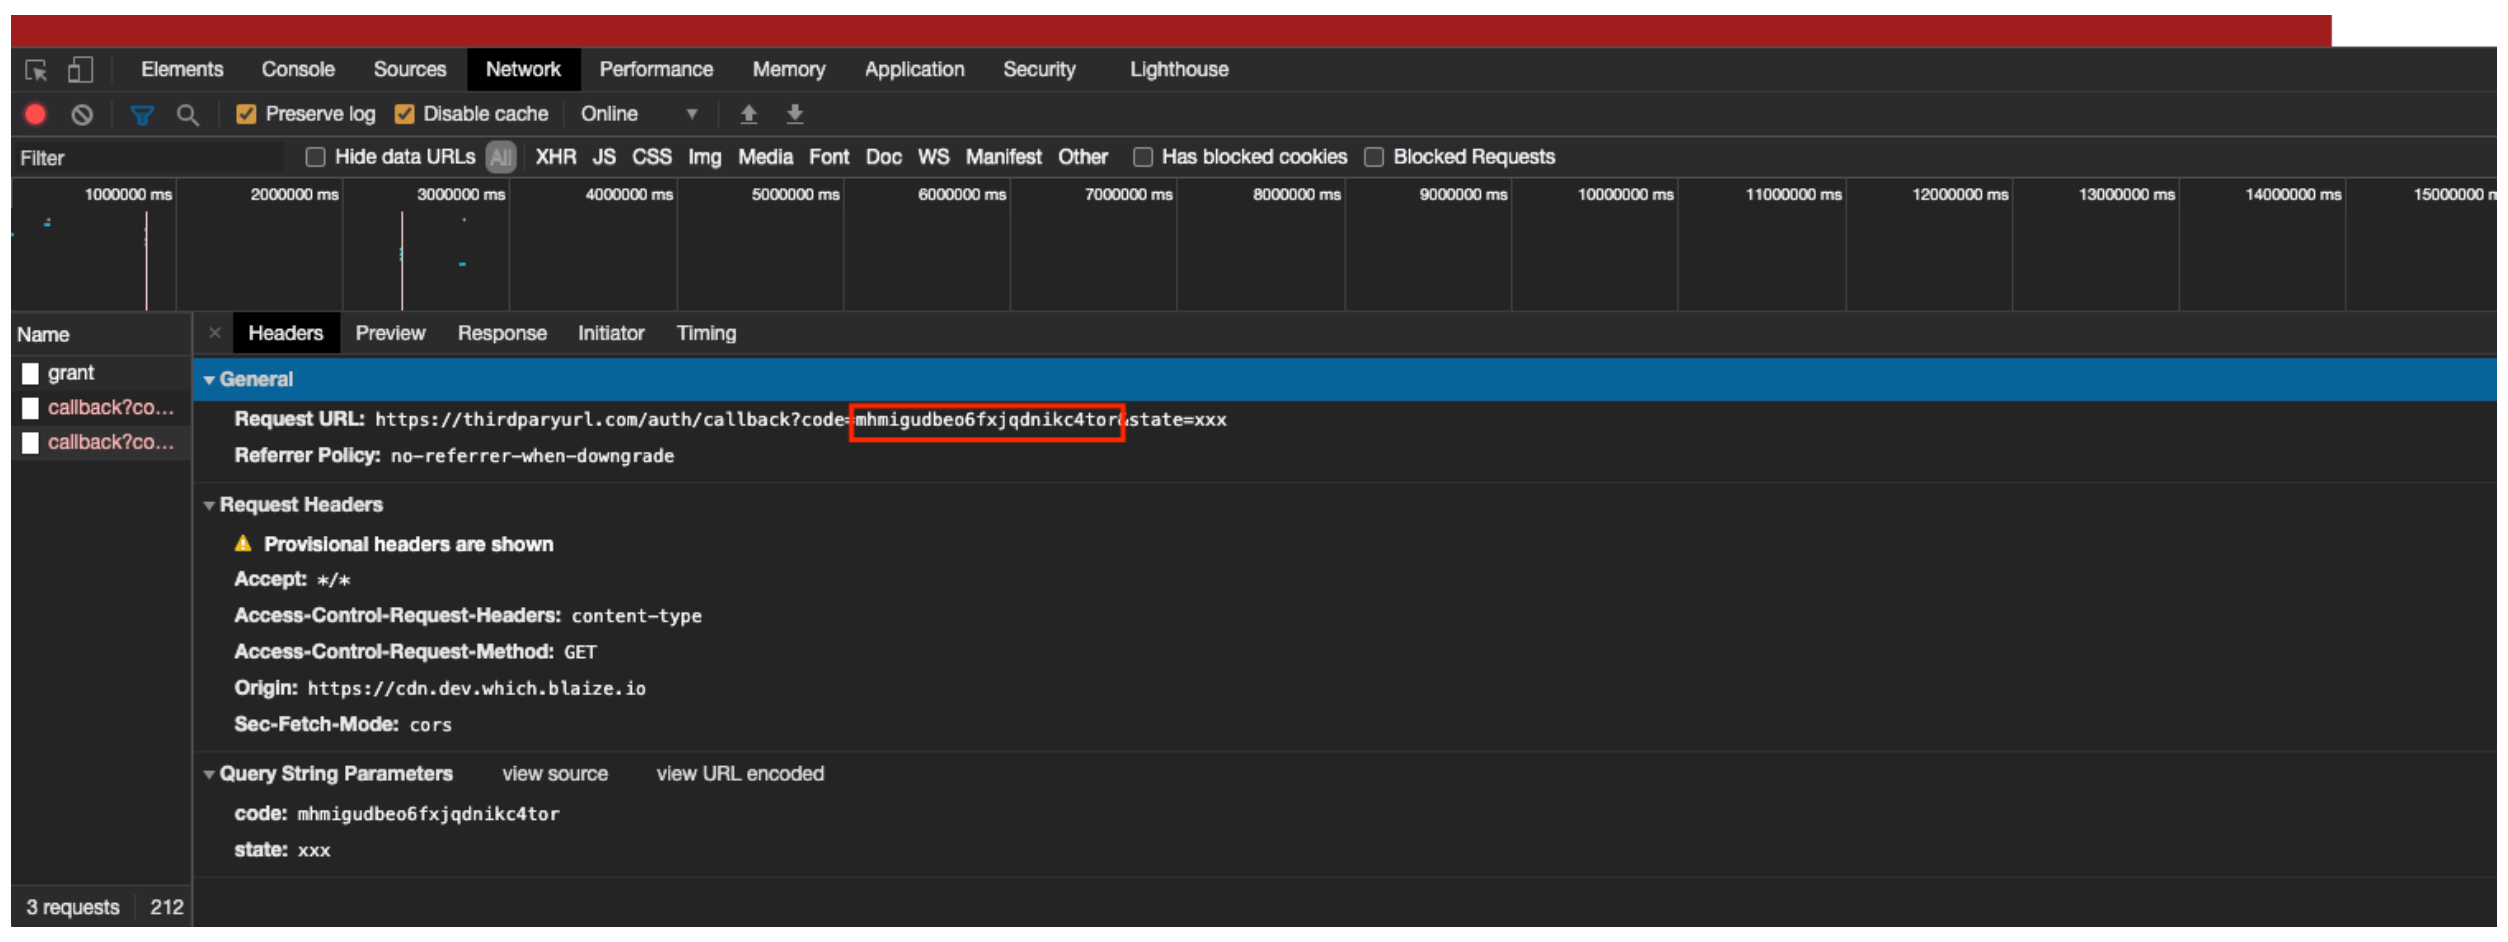
You can see the authorisation code that must be used in the first API call in the developer tools pane.
To locate the authorisation code, complete the following steps:
- In the consent page, right-click to display the context menu
- Select Inspect
The developer tools pane displays.
- Select Network from the options in the developer tool pane. If you cannot see Network, select the arrows to display more options
- Select the Allow button in the consent page
The authorisation code is displayed in the developer tools pane as illustrated below:

The endpoint token exchange call is on the Admin Console. The token exchange uses Basic Authorization, which uses the Client ID and Client Secret shown in the Third Party Authentication screen.
Note: The Client ID and Client Secret are displayed in the Third Party Authentication screen if you have enabled OAuth 2.0 in the third-party authentication settings and saved the site.
The payload must contain the following:
- Authorization code
- Redirect URI
- Grant Type
For example, the following cURL request uses an authorization code of Basic, a redirect URL of https://thirdpartyurl.com/auth/callback and a grant type of authorization_code:
curl --location --request POST
'https://console.zephr.com/zephr/oauth2/token' \
--header 'Authorization: Basic
ZzQya3R1dXl5cHE5Om12dty2x3bXJycGgwNW95YjBzdmVud2V0OQ==' \
--header 'Content-Type: application/json' \
--data-raw '{
    "code": "kcpa10fzqa9nmut95duwok0c",
    "redirect_uri": "https://thirdparyurl.com/auth/callback",
    "grant_type": "authorization_code"
        }'
The response body returned for a successful token exchange request is similar to the following:
{
    "scope": "user.account:read, user.profile:read",
    "access_token": "oa_rrcly8rsusfc1e5sdgxzv8uh",
    "token_type": "bearer",
    "expires_in": 3600,
    "refresh_token": "1if5j2aaverj80tx2nvvvutq",
    "user_id": "68c0f5ae-f857-408f-a9d6-f511df0f8ae8"
}
The access code from the response body is used in a second API call using bearer token authentication to get or update the user information. For further information on the API calls, refer to the Public API documentation. If the access token for the user has expired, you can use the refresh_token parameter in the API call, as shown in the following example cURL command:
curl --location --request POST
'https://console.zephr.com/zephr/oauth2/token' \
--header 'Authorization: Basic
ZzQya3R1dXl5cHE5Om12d2x3bXJycGgwNW95YjBzdmVud2V0OQ==' \
--header 'Content-Type: application/json' \
--data-raw '{
    "refresh_token": "1if5j2aaverj80tx2nvvvutq",
    "grant_type": "refresh_token"
        }'
