Add promo codes
Perform the steps mentioned in this section to add a new promo code.
- From the Zephr Home page, navigate to Products > Promo Codes.
- Click Add a Promo Code.
- Enter the following details:
Field Your Action Title Enter a name for the coupon. Description (Optional) Enter a description. Promo Code Type Select the type of promotion code from the following options:
- Multi-use - Choose this option for a standard code that can be utilized multiple times. When selected, you can specify:
- Code: Enter the promotional code, such as BlackFriday15.
- Usage Limit: Set the maximum number of times the promotion code can be redeemed. You can enter a maximum value of 10000 in this field.
- Unique - Opt for this option to assign a unique promotion code to each user. Upon entering the promo code and its prefix, the application will generate random codes for individual users. When selected, you can specify:
- Code Prefix: Enter the desired prefix for the code. The application will generate unique codes based on this prefix, incorporating numbers, special characters, and alphabets.
- Number of Unique Codes: Define the maximum number of codes available for user redemption.
Add Validity Check the box to set the duration within which the code should be redeemed. Select the start and end dates to specify the duration. After selecting the start and end dates, note that editing is restricted for LIVE promo codes, except for future validity dates.
Note: For live promos, you can set any future date for the end date, provided it is after the start date. The start date for live promos is immutable if it is in the past, and for expired promos, both the start and end dates are immutable. Additionally, when adding validity periods to live promos, the start date must always be a future date.
Link Code to Dynamic Offer Toggle to enable linking the newly created promo code to a specific dynamic offer. When enabled, the Discount Rules Builder, Discount Outputs, and Developer Interface sections are hidden or replaced with the Offer and Version drop-down lists.

Select the required offer and its version. The values are populated based on the selected offer, as shown in the following image:

You cannot select draft versions from the Version drop-down list. This restriction ensures consistency, as changes to a draft offer could result in different real-time behaviour for a live promo code, which remains immutable.
Discount Rules Builder Use the rules builder to determine the rules of how the promotion code will work. You can build rules for each promotion within the rules canvas by connecting decision points and outcomes. - Multi-use - Choose this option for a standard code that can be utilized multiple times. When selected, you can specify:
- In the Discount Outputs section, click Add a New Discount Output to create a new discount type, amount, and frequency.
- Enter the following details:
Field Your Action Title Enter a name for the coupon. Description (Optional) Enter a description. Discounts Click Add A Discount to configure a fixed discount, percentage discount, or price override for the promotion. You can also set the start and end dates for the promotion.
Conditions (Optional) Specify the products to which the discount should apply and set price and charge filters for the discount code.
- Products - Specify the products to which the discount should be applied.
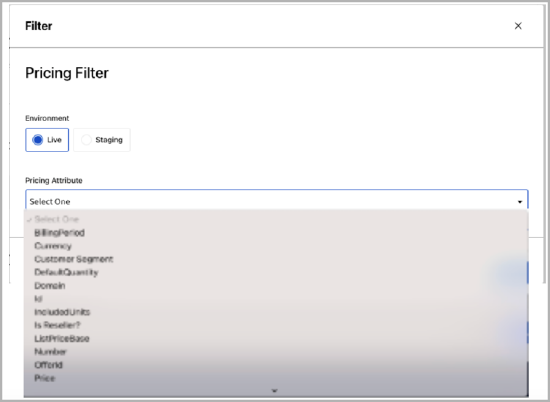
- Pricing Filter - Choose the price book value from the drop-down list. You can also specify the environment where this filter should apply, such as Live or Staging.

The values in the Pricing Attribute Field will be displayed based on the selected payment provider, such as Zuora Billing.- Charge Filter - Select the charge attribute value from the drop-down list. You can also configure the environment where this filter should apply, such as Live or Staging.
The values in the Charge Attribute Field will be displayed based on the selected payment provider, such as Zuora Billing. - In the Developer Interface section, click the
icon to unlock the developer interface. The following warning message is displayed:
- Click Unlock. The Custom Inputs section is displayed.
- Click Add Input to include custom input as necessary. Specify the title, key, and type of the custom input. The available input types include String, Number, and Boolean. Subsequently, you can establish rules that contain various branches based on evaluating these input values.
If you are unfamiliar with the concept of Input in Zephr, see Developer Interface for SDK Features for more information. - Click Save to save the details.
- After configuring all the details, click Save Draft to save in draft format. Alternatively, click the upward arrow within the Save Draft button to reveal the Save & Activate option to activate the promo code immediately.
Manage promo codes
This section provides information on time zone validation, editing validity dates, and restrictions for promo codes throughout their lifecycle.
- Time Zone Validation - Validity date evaluations are consistently handled throughout the redemption process. As a result, the Require Pricing Effective Date setting is locked and cannot be modified once the promo code is LIVE.
- Editing Validity Dates:
- Draft Promo Codes: All fields, including validity dates, remain fully editable until the promo code is set to LIVE.
- Live Promo Codes: Only future start and end dates can be edited. Dates in the past remain locked to preserve historical accuracy and compliance.
Promo codes cannot be edited once they are LIVE, except for the validity date.
