Mylo
Mylo is a Customer Identity and Access Management system (CIAM). The Zephr-Mylo extension allows you to offer Single Sign On (SSO) for your customers with Mylo, as well as mapping products from Zephr to Mylo.
Prerequisites
- A Mylo App Client set up for your site(s). When you request the App Client from Mylo, you will need to provide the following Application Configuration.
Behaviour
The extension provides:
- Zephr Plugin API endpoints to power SSO flows
- Optional syncing of Mylo customer subscriptions to corresponding Zephr products
Zephr – Mylo Behaviour Diagram
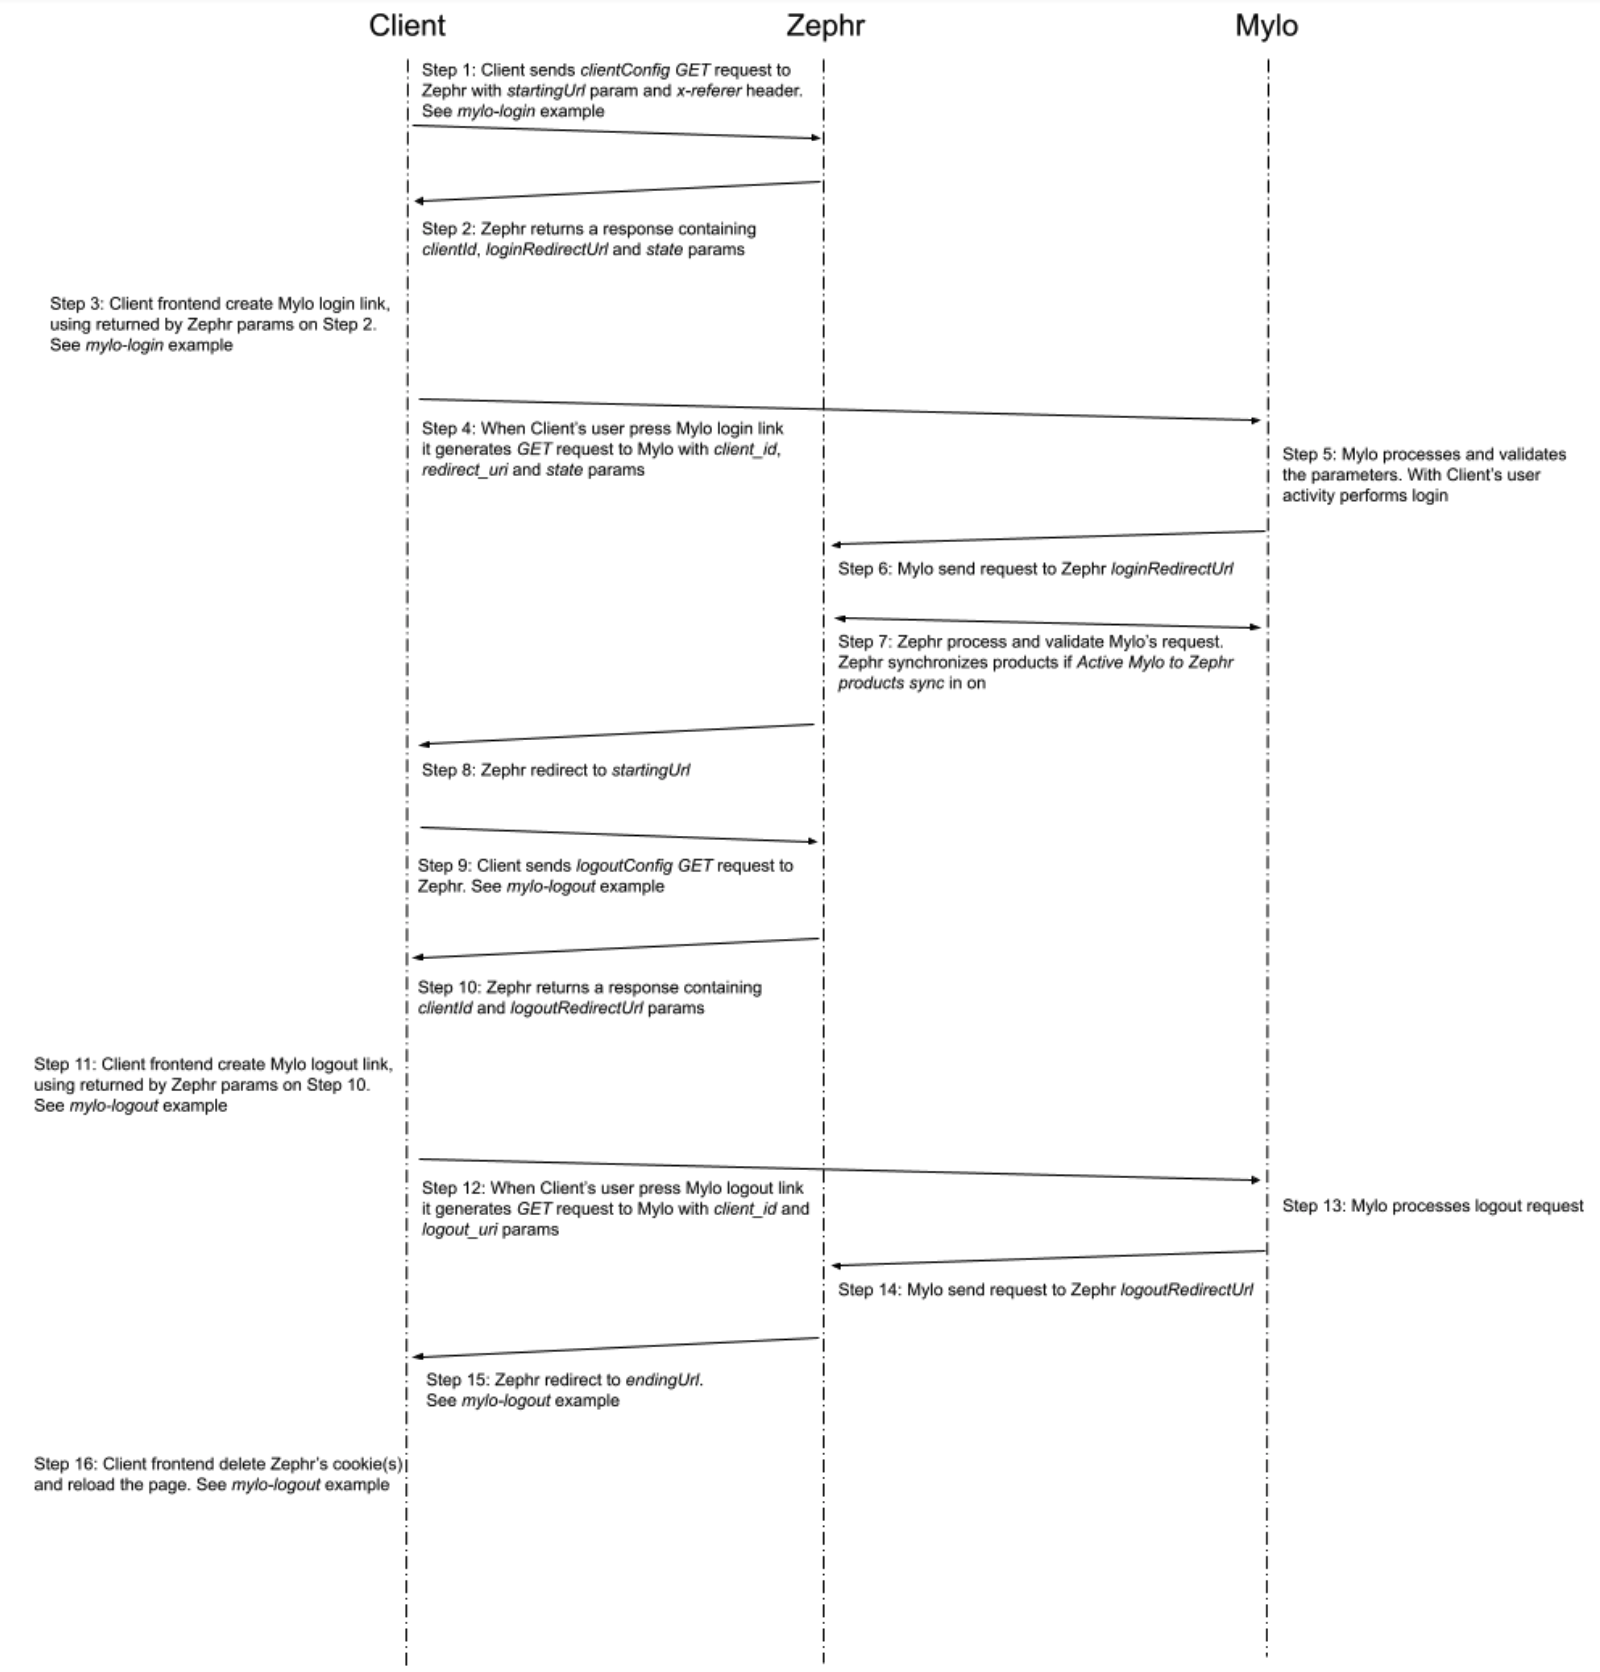
Step 1: Client sends clientConfig GET request to Zephr with startingUrl param and x-referer header.
The purpose of this step is for the Client to request a configuration from Zephr through which to construct Mylo login link.
startingUrl– this url is used in Step 8, where after a successful login to Mylo, Zephr will redirect tostartingUrl.x-referer– on Step 7 Zephr will create a session based on this value.
Step 2: Zephr returns a response containing clientId, loginRedirectUrl and state params.
Zephr returns data for Mylo login link.
clientId– should be configured from Mylo API Configuration > Client ID.loginRedirectUrl– should be configured from Mylo API Configuration > Login Redirect URL. On Step 6, after login, Mylo will send a request to this URL.state– should be used and passed to Mylo as it is.
Check the Configuration section for more configuration details.
Step 3: Client frontend create Mylo login link, using returned by Zephr params on Step 2. See mylo-login example.
mylo-login example:
<div id="mylo-login-link">Loading Mylo Sign In link...</div>
<script>
 function clientConfig() {
     var client = new (XMLHttpRequest || ActiveXObject)("MSXML2.XMLHTTP.3.0");
     client.open(
     "GET",
     `/plugins/public/mylo/clientConfig?startingUrl=${window.location.href}`,
     null
     );
     client.onload = function () {
     if (client.status === 200) {
     var response = JSON.parse(client.responseText);
     document.getElementById("mylo-login-link").innerHTML =
     '<a href="https://ciam-ui.kubestage.hearstapps.net/login?client_id=' +
     response.clientId +
     "&redirect_uri=" +
     encodeURIComponent(response.loginRedirectUrl) +
     "&state=" +
     response.state +
     '">Sign In</a>';
     } else {
     console.log("can not fetch client config");
     document.getElementById("mylo-login-link").innerHTML =
     "can not get Mylo Sign In link";
     }
     };
     client.setRequestHeader("Content-type", "application/json");
     client.setRequestHeader("X-Referer", "localhost");
     client.withCredentials = true;
     client.send();
 }
 clientConfig();
</script>
Step 4: When Client’s user press Mylo login link it generates GET request to Mylo with client_id, redirect_uri and state params.
Step 5: Mylo processes and validates the parameters. With Client’s user activity performs login.
Client’s user follows Mylo instructions to make Mylo login.
Step 6: Mylo send request to Zephr loginRedirectUrl.
This is where loginRedirectUrl from Step 2 is used.
Step 7: Zephr process and validate Mylo’s request. Zephr synchronizes products if Active Mylo to Zephr products sync in on.
Step 8: Zephr redirect to startingUrl.
Here is the startingUrl from Step 1.
Step 9: Client sends logoutConfig GET request to Zephr. See mylo-logout example.
Step 10: Zephr returns a response containing clientId and logoutRedirectUrl params.
Zephr returns data for Mylo logout link.
clientId– should be configured from Mylo API Configuration > Client ID.logoutRedirectUrl– should be configured from Mylo API Configuration > Logout Redirect URL. On Step 14, after logout, Mylo will send a request to this URL.
Check the Configuration section for more configuration details.
Step 11: Client frontend create Mylo logout link, using returned by Zephr params on Step 10. See mylo-logout example.
mylo-logout Example
<div id="mylo-logout-link">Loading Mylo Sign Out link...</div>
<script>
 function logoutConfig() {
 var client = new (XMLHttpRequest || ActiveXObject)("MSXML2.XMLHTTP.3.0");
 client.open("GET", `/plugins/public/mylo/logoutConfig`, null);
 client.onload = function () {
     if (client.status === 200) {
     var response = JSON.parse(client.responseText);
     document.getElementById("mylo-logout-link").innerHTML =
     '<a href="https://ciam-ui.kubestage.hearstapps.net/logout?client_id=' +
     response.clientId +
     "&logout_uri=" +
     encodeURIComponent(
     response.logoutRedirectUrl +
     `?endingUrl=${window.location.href}?logout=true`
     ) +
     '">Sign Out</a>';
     } else {
     console.log("can not fetch logout config");
     document.getElementById("mylo-logout-link").innerHTML =
     "can not get Mylo Sign Out link";
     }
 };

 client.setRequestHeader("Content-type", "application/json");
 client.withCredentials = true;

 client.send();
}
logoutConfig();

function destroyCookie() {
 var isLogout,
     tmp = [];
 var items = window.location.search.substr(1).split("&");
 for (var index = 0; index < items.length; index++) {
     tmp = items[index].split("=");
     if (tmp[0] === "logout") {
     isLogout = decodeURIComponent(tmp[1]);
     break;
     }
 }

 var cookieName = "blaize_session";
 if (isLogout) {
     console.log("deleting cookie " + cookieName + "...");
     document.cookie = cookieName + "=; Max-Age=-99999999;path=/";
     window.location.reload();
 } else {
     console.log("do nothing with cookie " + cookieName);
 }
}
destroyCookie();
</script>
Two GET parameters have been added to logout_uri.
endingUrl– used in Step 15. Zephr redirect toendingUrlafter Mylo logout.logout– this parameter is used in Step 16 to indicate the frontend to delete Zephr’s cookie(s) and reload the page.
Step 12: When Client’s user press Mylo logout link it generates GET request to Mylo with client_id and logout_uri params.
Step 13: Mylo processes logout request.
Step 14: Mylo send request to Zephr logoutRedirectUrl.
Here is logoutRedirectUrl from Step 10.
Step 15: Zephr redirect to endingUrl. See mylo-logout example.
Step 16: Client frontend delete Zephr’s cookie(s) and reload the page. See mylo-logout example.
Configuring The Mylo Extension
To enable the Mylo extension within Zephr, navigate to Settings > Extensions > Mylo. If you cannot see the Mylo option in your list of extensions, email support@zephr.com.
Once on the configuration screen, you’ll see two sections – Mylo API Configuration and Product Mapping.
Mylo API Configuration
Within this screen you will need to configure the following details:
- Auth URL
- Client ID
- Client Secret
- Login Redirect URL (see above for details)
- Logout Redirect URL (see above for details)
- State Param Encryption Key
- State Expiry Minutes
The details for the fields in this section will be largely provided to you by Mylo in the App Client configuration.
Once configured, click Done.
Product Mapping
Once configured, click Done.
Activate Plugin
Once you’ve input the relevant details, you will need to confirm which of your Sites the extension should be active on. To do this, use the toggles for each site under the Activate Plugin section, or choose Select All Sites.
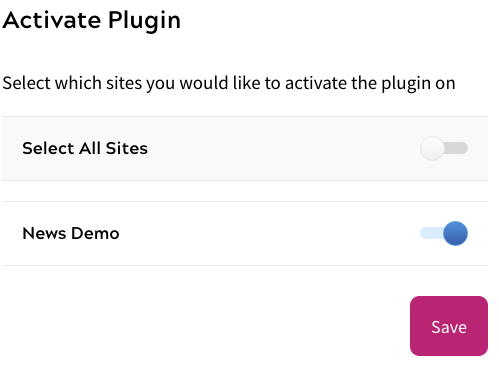
Once completed, click Save. Your extension is now enabled.
Usage
Any Business-As-Usual (BAU) information that would be useful for a Zephr Admin to know about operating and monitoring the extension. This section may not be required for some extensions, but is certainly useful for ones where there are many options for user input (e.g. forms to configure, canvas palette extensions to use etc.).
Notes
Any further notes that are useful would be useful to the operator. Anything that is very important or behaviours of the extension of which the operator needs to be very clearly aware should not be left until this section: they should either be mentioned near the top of the document or at the relevant section, in an info box or pull quote.
If scripts are to be injected by the extension, it is usually good practice to publish an example here so customers are aware of what may be added to their page upon activation.