Manage access permission for features
You can manage the user access permissions at the feature level to make sure only the relevant users have access to a feature.
A feature can be in one of the following access statuses:
- Allow All: All the users who have a role that enables the Products Module privileges can access this feature.
- Restricted Access: You can enable or disable access to this feature for users who have a role that enables the Products Module privileges.
Notes:
- Allow All is the default status when a feature is created.
- The Owner and Administrator users can always access all the features.
- To give a user the proper access to a feature, you need to also make sure that the user has a role containing the desired Products Module privileges.
For example, if a user has a role that enables the Products Module privilege but disables all the sub-privileges under it, the user can only view the feature after being added to the access list of the feature. Specific sub-privileges should be enabled to allow for a higher level of permission.
For more information about User Roles, See Roles.
Prerequisite
Before giving a user access to a feature, the user must have already been assigned a role that contains the Products Module privileges.
Otherwise, they couldn't be given access to specific features.
Manage access permission for a feature
To manage user access for a feature, take the following steps:
-
Navigate to Products > Features.
-
You can view the current general access status under the Access column.
To manage access permission for a feature, click the More Actions icon, and then click Access Permissions. Alternatively, enter a feature by clicking the title of it, and then click Access Permissions.
-
Under the General Access section, select whether to make the feature accessible to all users or to just users on the access list.
-
If Restricted is specified, a list of users who have access will be displayed in alphabetical order.
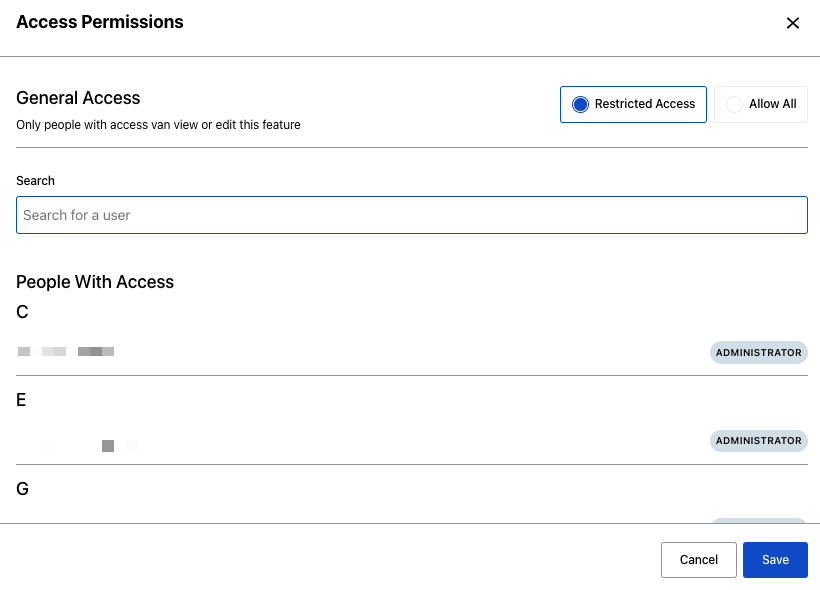
To give a user access, use the search bar to search for the email of the user, and then click the email from the dropdown list.
-
Repeat Step 4 to give more users access.
-
Click Save.
You can use the Remove button to remove a user from the access list.