BigQuery
Google’s BigQuery is a serverless data warehouse that enables scalable analysis of large amounts of data.
The Zephr integration with BigQuery allows shipping of Zephr system events in near-real-time to a nominated set of BigQuery tables.
Prerequisites
- A GCP account with BigQuery enabled
- A GCP user account with permissions to create BigQuery datasets and tables, then write to those tables.
- The `bq` command line tool set up in your local environment. (You can find details on how to get this installed and configured here).
To help customers get set up with an example BigQuery environment, we have provided a sample set of BigQuery table schema definitions and a script to create those tables in BigQuery.
There are also corresponding JSON mappings with which the plugin may be configured to write Zephr data to the created tables. If you have already created your dataset and tables in BigQuery, please skip to Plugin Configuration.
Click here to download an archive of resources to help you get set up in BigQuery.
Setting Up BigQuery
- Extract the archive to a suitable directory on your operating system and enter the extracted directory.
$ unzip zephr-bigquery-setup-example.zip

$ cd zephr-bigquery-setup-example - Read through the `sample-bigquery-setup-script.sh` to check you’re happy with what the script does (it will attempt to create a new dataset for you in your GCP account with a number of tables defined in the `bigquery-schemas` directory).
- Make the script executable:
$ chmod +x sample-bigquery-setup-script.sh - Run the script and provide the requested input:
- GCP project ID
- Name of BigQuery dataset to create
- Path to `bigquery-schemas` directory from your current directory (likely just `bigquery-schemas`).
- Once the script has finished running, check the output, then navigate to the GCP console to check what has been created for you in BigQuery.
Plugin Configuration
Getting a Refresh Token for the OAuth Flow
The following steps will get you set up with the authentication credentials you’ll need to configure the plugin. Specific information on the steps below can be found in the GCP documentation here.
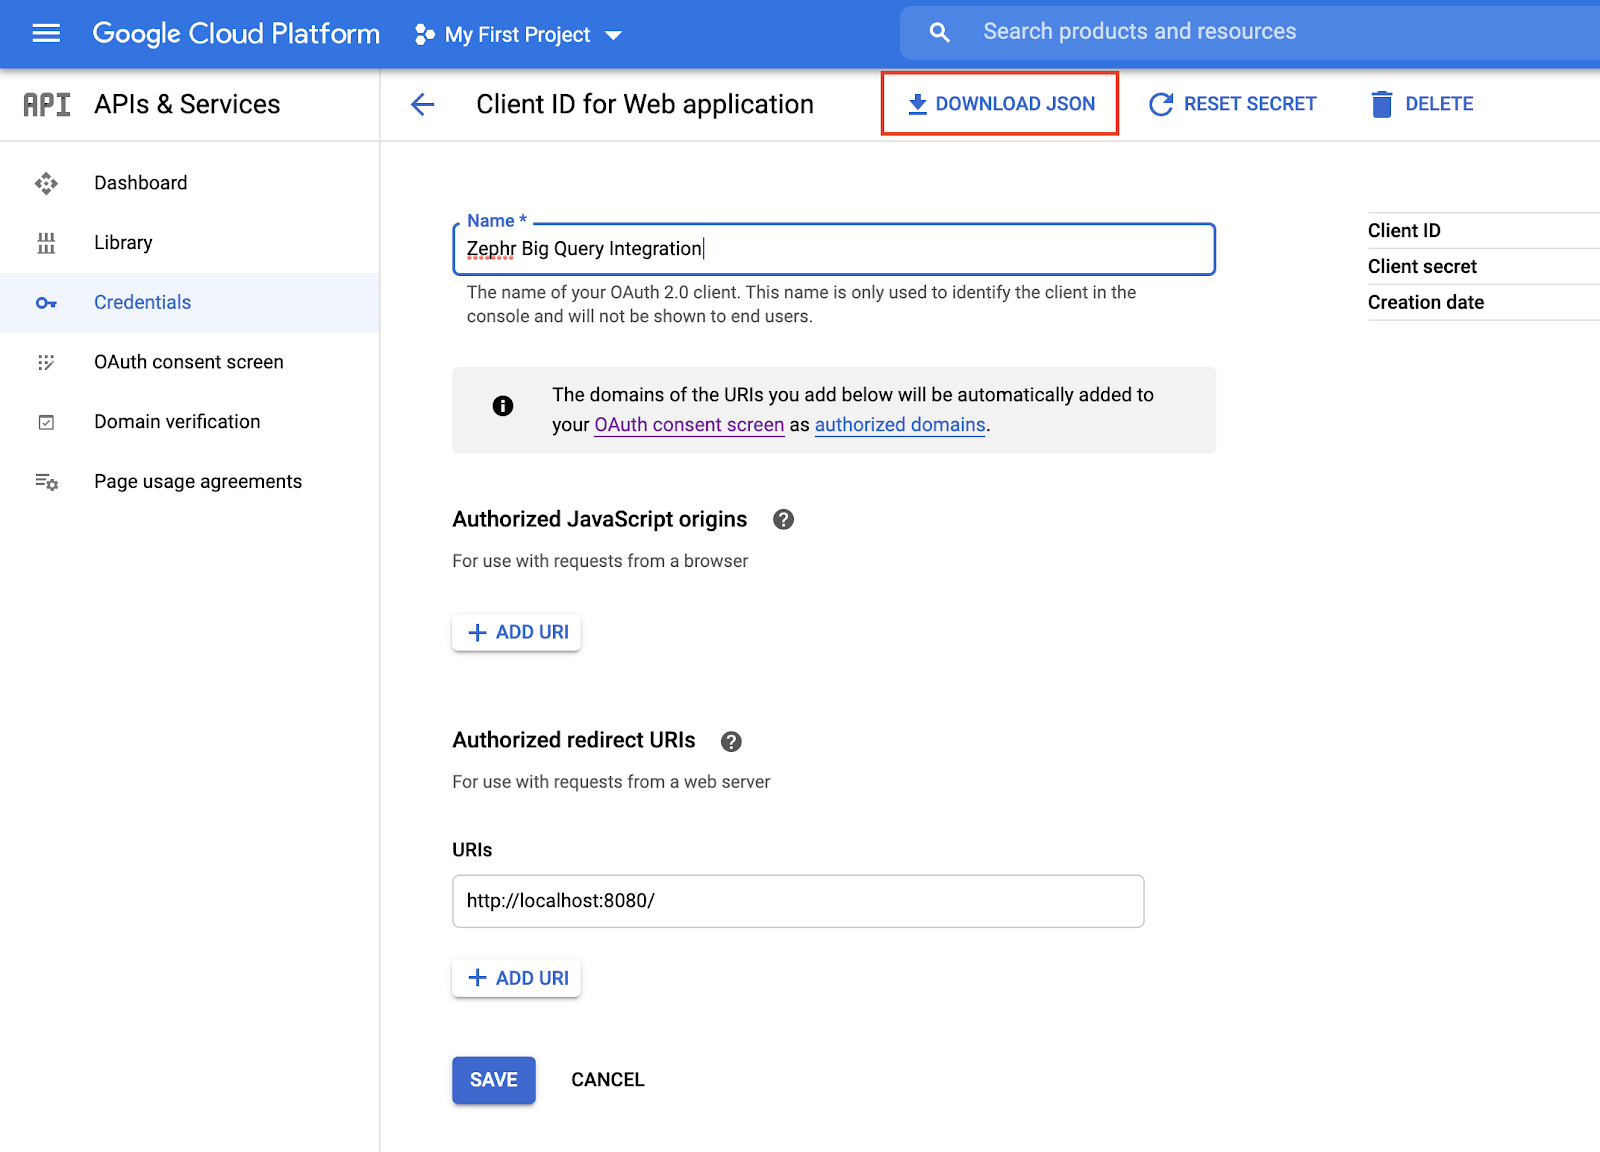
- Create an Oauth 2.0 Client ID in the APIs & Services section of GCP:
- Choose the ‘Web application’ type
- Give the Client ID an appropriate name (such as `Zephr Big Query Integration`)
- Add a URI of `http://localhost:8080/`
- Once the Oauth Client ID has been created, click back into it and obtain the Client ID credentials with the ‘Download JSON’ button

- Obtain a refresh token for the service account. For this, you will need to follow an Oauth flow. Please see these steps for guidance (it is recommended you install the script and its dependencies in a Python Virtual Environment using a tool such as Pipenv or Poetry):
- Ensure you have Python installed
- Download this script, update the SCOPE variable as so:
SCOPE = u’https://www.googleapis.com/auth/bigquery‘ - Run the script:
python main.py –client_secrets_path <path_to_client_id_credentials_json_file> - A Google Account login flow should be triggered in a browser window: use your Google account credentials.
- When you return to your terminal, you should now see an Access token and a Refresh token printed to the screen. Note: if the Refresh token is given as ‘None’, you may need to log out of GCP then re-run the script as above.
- Navigate to the Zephr Console to configure and activate the plugin, found under Settings > Extensions > Big Query.
Configuring the BigQuery Extension
To enable the BigQuery Extension within Zephr, navigate to Settings > Extensions > BigQuery. If you cannot see the BigQuery option in your list of Extensions, email support@zephr.com.
Once on the configuration screen, you’ll see three – BigQuery API, Export Data from Zephr to BigQuery, and Activate Plugin.
BigQuery API
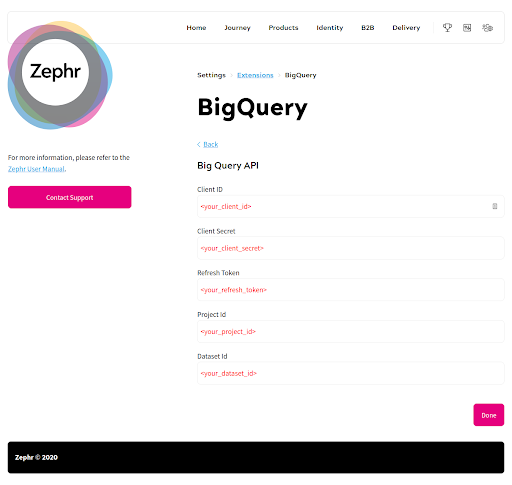
First, click into the BigQuery API section. Here, you’ll need to input the following information, which has been collected during the steps above:
- Client ID
- Client Secret
- Refresh Token
- Project ID
- Dataset ID

Once added, click Done.
Export Data From Zephr to BigQuery
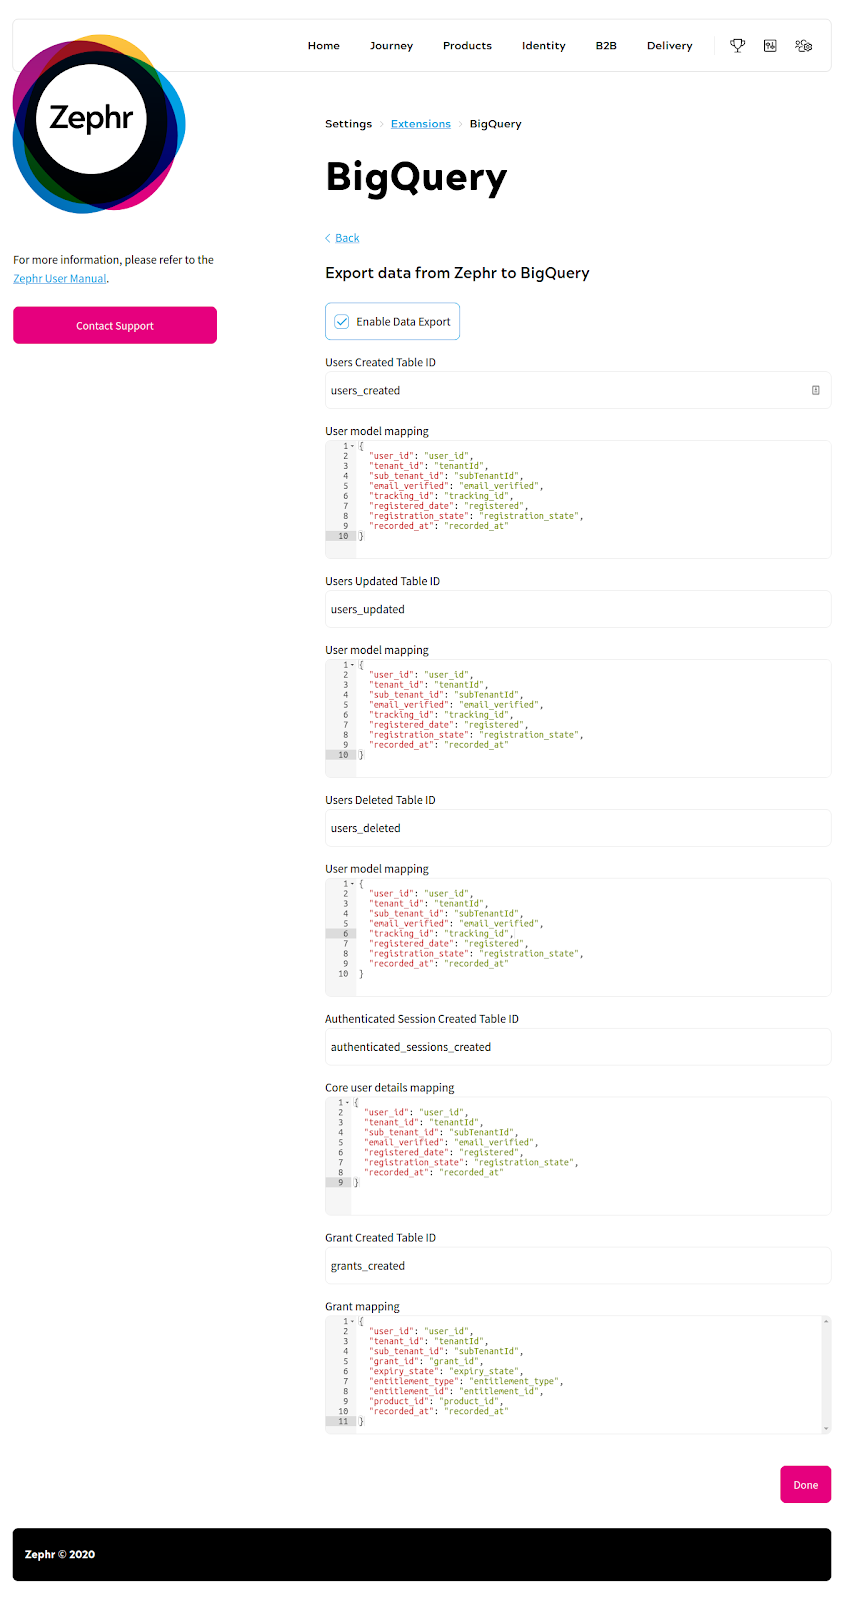
In this section, click the checkbox at the top to enable data export and add a table name and a mapping file for each system event. If you used the sample resources archive earlier in this process, you’ll be able to use the mapping files in the mappings directory.

Once complete, click Done.
Activate Plugin
Once you’ve input the relevant details, confirm which of your Sites the extension should be active on. To do this, use the toggles for each site under the Activate Plugin section, or choose Select All Sites.
Once completed, click Save. After following these steps, your extension will be enabled and you’ll see your BigQuery tables being populated with event records as your customers interact with your site(s).
Extension Limitations
- The full range of Zephr system events are not yet supported but will be added in future.
- Only event data is shipped to BigQuery: not static snapshots of your entire Zephr dataset at a given point in time.
