Legacy Payment Forms
You can use legacy payment forms to add a Paywall to your site.
Note: Legacy Payment Form was formerly known as Payment Form. We also renamed the previous Frictionless Checkout Form to Payment Form. If you want a seamless payment journey from anonymous to customer, you can use a payment form. For further information on Payment Form, see the Payment Form section.
Before you can use a Paywall, you must have set up the following:
- Your payment provider, as described in the Payments section
- A product that uses a corresponding payment option, as described in the Create a Product topic
Use a legacy payment form if you want to build separate journeys for your anonymous and registered users.
In this approach, you would use a registration form in your anonymous user rule and the legacy payment form as an outcome in your registered user rule.
To create a legacy payment form, complete the following steps:
- Select the Add button under the Legacy Payment Form headingThe Add Legacy Payment Form screen displays, as illustrated below:
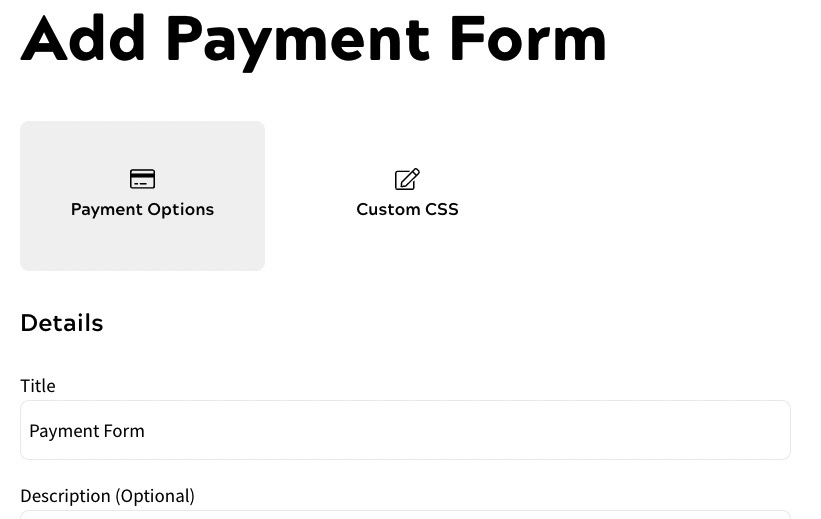
- Enter a name for your payment form in the Title text box. By default, this is pre-filled with Payment Form
- Optionally, add a description of your payment form in the Description text box
- Select the Add a Payment Option buttonThe Add a Payment Option dialog box displays, as illustrated below:
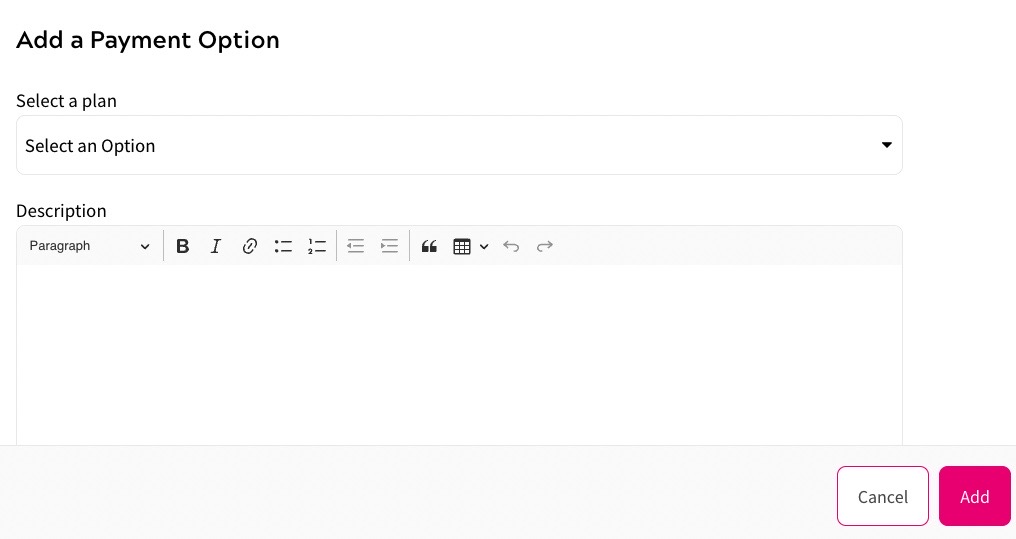
To complete the Add a Payment Option dialog box, complete the following steps:
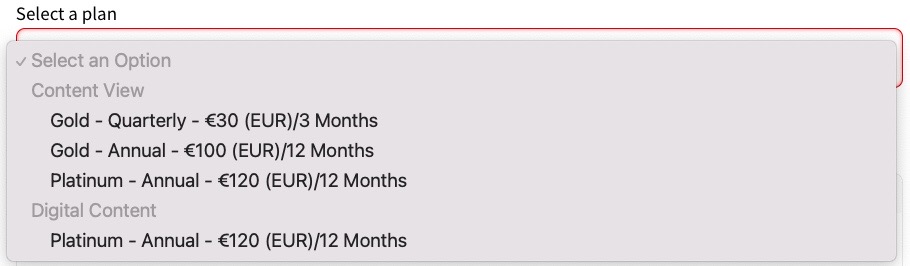
- Select the plan you want to use from the Select a plan drop-down menuIf you have several products set up, you can select plans for each product. The available plans are listed under each product, as illustrated below:
- Enter the description of the plan as you want it to appear on your site in the Description text boxNote: If you want to format the text, for example to include a heading or a list, use the formatting bar at the top of the text box.
If the payment option is part of a Scheduled Payment Plan, your users see the price for the first billing period on the payment form. Zephyr recommends that you include details of the time and manner in which the price changes as part of the description.
- Select the Add button to save your changes and return to the Add Legacy Payment Form screen. Selecting the Cancel button displays the Add Legacy Payment Form screen without saving any changesThe payment option is listed in the Payment Options section.
- If you want to add more payment options, repeat steps a and b until you have added all the options
- Select the plan you want to use from the Select a plan drop-down menuIf you have several products set up, you can select plans for each product. The available plans are listed under each product, as illustrated below:
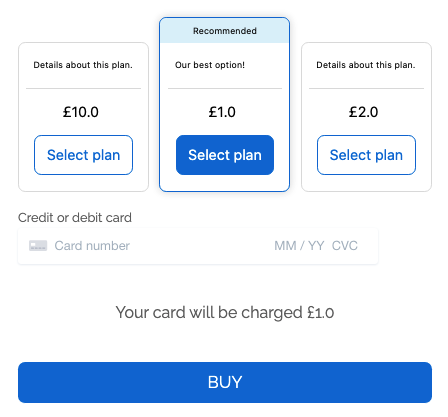
- To add the Recommended tag to a payment option in your payment form, select the Recommended toggleFor example if you offer a monthly plan at a cost of $10 each month and an annual plan at a cost of $100 each year, you could recommend the annual option as it offers the best value.
- If you have set up Promo Codes for your payment provider to use in this payment form, select the Enable Promo Codes toggle. For further information on setting up Promo Codes for your payment provider, see the Payments section
- Select the Save button to save your changes and return to the Add an Outcome screen. Selecting the Cancel button to display the Add an Outcome screen without saving any changes
- Select the Save button to add your outcome
- Continue completing the Add an Outcome screen as described in the Add an Outcome topic
You can now use the payment form in your feature rule.
When you publish your feature, the payment options display in your site in a similar way to the following: