Use the Plugin
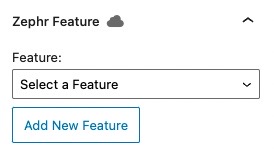
When you create or edit a post or page, you see the following option in the editor sidebar:
Note: If you cannot see the editor sidebar, select the cog icon, which is located at the top right of the screen.
You can apply existing Zephr features, or add features, to your content using the plugin as described below.
Existing Zephr Features
To use features that already exist in Zephr, complete the following steps:
- Select the content to which you want to apply the feature
For example, this could be a single Gutenberg block, a group of Gutenberg blocks, or an area in the Classic Editor.
- Select the feature you want to apply to the content from the Feature drop-down menu options in the Zephr Feature section of the editor sidebar
When you view the page, your feature rule is applied to the selected content.
Adding a Feature
To add a feature, complete the following steps in WordPress:
- Select the content to which you want to apply the feature
- Select the Add New Feature button in the Zephr Feature section of the editor sidebar
The fields display to allow you to add a feature, as illustrated below:
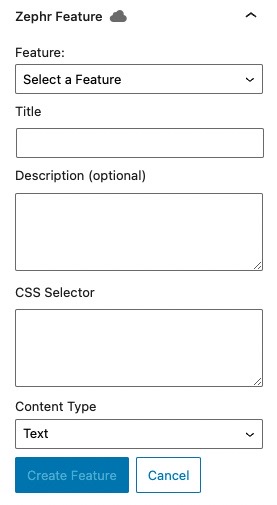
- Enter a name for the feature in the Title text box
The CSS Selector field is automatically completed.
- Optionally, add a description of the feature in the Description (optional) text box
- Select the type of content from the Content Type drop down menu. The options are as follows:
- Text
- Image
- Video
- Advertising
- Select the Create Feature button
- Save a draft or update your page
This applies the new feature to your content and creates a shell feature in Zephr.
You can now build the feature rule and create the outcomes in the Zephr Admin Console, as described in the Creating and Managing Zephr Features topic.