Treasure Data CDP
Treasure Data is a Customer Data Platform that ingests data from a variety of first, second, and third-party sources. You can use Treasure Data to do the following:
- Unify data
- Resolve identities
- Build enriched, consolidated customer profiles
- Add the customer profiles to Segments
In Treasure Data, Segments belong to Audiences, which are also called Master Segments. You can define Segments in the Treasure Data Audience Studio interface. For further information on the Treasure Data Console, refer to the About the TD Console topic of the Treasure Data documentation.
The Zephr Treasure Data CDP extension imports Segments from Treasure Data to Zephr. It also adds decision nodes for the configured Audiences under the Treasure Data segment title in the Zephr Rules Builder. You can use these decision nodes to base decisions on Segment data in your Zephr rules. This allows you to use the data from Treasure Data to create personalised user journeys for your customers.
Before you integrate Treasure Data with Zephr, ensure that you have set up the below prerequisites.
Prerequisites
The prerequisites for the Zephr Treasure Data extension depend on your implementation and whether you want to use the script provided by Zephr or host your own script to import the Segment data from Treasure Data, as follows:
- Zephr CDN
If you use the Zephr CDN and want to use the script provided by Zephr, script injection must be enabled for your tenant. Contact your Zuora account team to request that script injection is activated. If you want to host your own script, you can do this browser-side.
- Browser-side
If you want to host your own script to call Treasure Data from the browser, the method to use depends on your CMS. Below is an example script:
If you are using the Zephr CDN and have script injection activated, a script is injected to the browser when the page loads.
If you are hosting your own script, the script must be similar to the following example where <database_name>, <write_only_key>, and <audience_token> represent the information entered during the configuration of the Treasure Data extension:
<script type="text/javascript">
     !function(t,e){if(void 0===e[t]){e[t]=function(){e[t].clients.push(this),this._init=[Array.prototype.slice.call(arguments)]},e[t].clients=[];for(var r=["addRecord","blockEvents","fetchServerCookie","fetchGlobalID","fetchUserSegments","resetUUID","ready","setSignedMode","setAnonymousMode","set","trackEvent","trackPageview","trackClicks","unblockEvents"],s=0;s<r.length;s++){var c=r[s];e[t].prototype[c]=function(t){return function(){return this["_"+t]=this["_"+t]||[],this["_"+t].push(Array.prototype.slice.call(arguments)),this}}(c)}var n=document.createElement("script");n.type="text/javascript",n.async=!0,n.src=("https:"===document.location.protocol?"https:":"http:")+"//cdn.treasuredata.com/sdk/3.0/td.min.js";var o=document.getElementsByTagName("script")[0];o.parentNode.insertBefore(n,o)}}("Treasure",this);

     const treasureObject = new Treasure({
       database: "${databaseName}",
       writeKey: "${writeOnlyKey}",
     });

     const makeXMLHttpRequest = (method, url, done, values) => {
       var xhr = new XMLHttpRequest();
       xhr.open(method, url);
       if (method === "POST") {
         xhr.setRequestHeader("Content-type", "application/json");
         xhr.setRequestHeader("Accept", "application/json");
       }
       if (done) {
         xhr.onload = function () {
           done(xhr.status, xhr.response);
         };
         xhr.onerror = function () {
           done(xhr.status, null);
         };
       }
       if (values) {
         xhr.send(JSON.stringify(values));
       } else {
         xhr.send();
       }
     };

     const errorCallback = function (error) {
       console.log(error);
     };

     const callUserProfileEndpoint = function (values) {
       makeXMLHttpRequest(
         "POST",
         "/plugins/public/treasure-data-cdp/user-profile",
         function (status, res) {
           if (+status === 200) {
             console.log("Successfully stored data");
           } else {
             console.log("Unsuccessfully stored data");
           }
         },
         values
       );
     };

     const getCookies = (cname) => {
       const name = cname + "=";
       const cDecoded = decodeURIComponent(document.cookie);
       const cArr = cDecoded.split("; ");
       let key;
       cArr.forEach((val) => {
         if (val.indexOf(name) === 0) key = val.substring(name.length);
       });

       return key;
     };

     const getKeys = (getCookiesFn, callback) => {
       const tdCookie = getCookiesFn("_td");
       const jwtCookie = getCookiesFn("blaize_jwt");
       let emailAddress;

       if (jwtCookie) {
         makeXMLHttpRequest(
           "GET",
           "/blaize/account",
           function (status, res) {
             if (+status === 200) {
               let responseToObj = JSON.parse(res);
               emailAddress = responseToObj["identifiers"]["email_address"] || "";
             }
           },
           null
         );
       }

       callback({
         audienceToken: ${JSON.stringify(audienceToken)},
         keys: {
           emailaddress: emailAddress || "",
           td_client_id: tdCookie || "",
         },
       });
     };

     getKeys(getCookies, (tokensAndKeys) =>
       treasureObject.fetchUserSegments(tokensAndKeys, callUserProfileEndpoint, errorCallback)
     );
   </script>
Configure Treasure Data in the Admin Console
To configure Treasure Data in the Admin Console, complete the following steps:
To configure the API for Treasure Data, complete the following steps:
- Select the Settings icon, which is located at the top right of all screens
- Select Extensions
- Select Treasure Data CDP from the Customer Data Platform section
The Treasure Data CDP screen displays, as illustrated below:
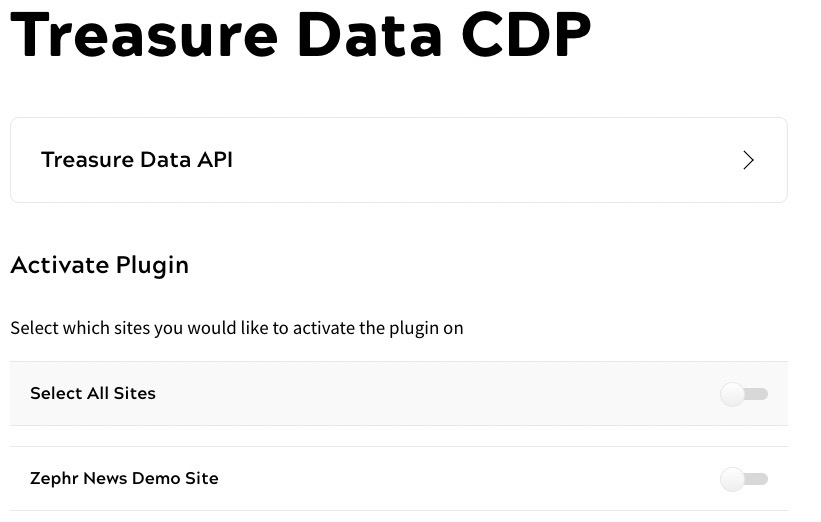
- Select the Treasure Data API button
The Treasure Data API screen displays, as illustrated below:
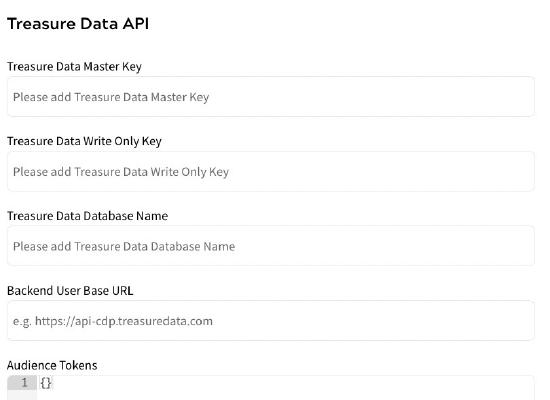
- Enter your Treasure Data master key in the Treasure Data Master Key text box
The master key is used for all allowed operations based on the user’s permission level and access.
To find your Treasure Data master key in the Treasure Data Console, complete the following steps:
- Select My settings
- Select API Keys
- Select Access Type ‘Master Key’
- Enter your Treasure Data write-only key in the Treasure Data Write Only Key text box
The write only key provides an extra security layer when controlling access to a Treasure Data account using the REST APIs. The user’s Write-only API Key only allows data to be imported to Treasure Data databases that the permissions and access levels associated with the user allow write access. This is useful when providing access to third-parties or when API keys need to be embedded in ingestion libraries, for example for web page integrations.
To find your Treasure Data master key in the Treasure Data Console, complete the following steps:
- Select My settings
- Select API Keys
- Select Access Type ‘Write-only Key’
- Enter the name of the database you want to use in the Treasure Data Database Name text box
To find a Treasure Data database name in the Treasure Data Console, complete the following steps:
- Select Data Workbench
- Select Databases
- Enter the URL that is used for requests in the Backend User Base URL text box
- Enter an array of Treasure Data Profile API tokens in the Audience Tokens text box
Profile API tokens are generated in Treasure Data, and one or more Segments can be linked to a single token. They are used to query Treasure Data for the Segments for a specific user.
If the script is injected by Zephr, you can enter values from the Zephr Extension configuration schema; if you are deploying the frontend script as a Zephr Custom UI component, you must add the values to the script manually.
Note: An example script is provided in the Example Script topic.
For further information on using Profile API tokens, refer to the Use the API Token to Increase Customer Personalization topic in the Treasure Data documentation.
- By default, the Add manually audiences and segments checkbox is not selected. This means that Zephr retrieves all the Audiences and Segments that are defined in Treasure Data
If you want to configure specific Audiences, and subsets of Segments, select the Add manually audiences and segments checkbox.
- If the Add manually audiences and segments checkbox is selected, enter the Audience ID and the IDs of any Segments in that Audience in the Audiences and Segments text box
For example, to add an Audience with an ID of
280983and a subset of Segments with IDs of140948,149949, and144665, enter the following:{ "280983": [ "140948", "149949", "144665" ] } - By default, a timeout of 5000 milliseconds is configured. To change this, update the entry in the Timeout (MS) text box
- Select the Done button to save the Treasure Data API configuration and return to the Treasure Data screen. Selecting the Cancel button displays the Treasure Data screen without saving the Treasure Data API configuration
- Enter your Treasure Data master key in the Treasure Data Master Key text box
- Select the toggles beside each site for which you want to activate the plugin. Alternatively, select the Select All Sites toggle to activate the plugin on all your sites
- Select the Save button to save the configuration and activate the Treasure Data extension on the selected sites
Once the extension is configured, you can use the Zephr segment decision node in a rule. The decision nodes can be used in either feature rules or redirects. For further information on the Treasure Data decision node, see the Features Treasure Data or Redirects Treasure Data topics.
Note: You specify which Audiences and Segments to make available in the decision node when you configure the Treasure Data CDP extension.