User Imports
Zephr offers the ability to import users via CSV file. This allows you to bulk upload Users into the Zephr User Store at any time.
If you are using Passwordless Authentication, the Users added will be able to login to your site by entering their email on the Zephr Login Form, then clicking the link emailed to them.
If you are using Passwords, you need to include password details within the CSV file. Zephr is able to accept brcypt hashed passwords using the User Import feature. If your passwords are hashed using a different system, you also need to use a password plugin. To set this up, contact your Zuora account team.
Importing Your Users
To begin the import process, you will need a CSV file of the Users you wish to add to Zephr. The CSV should be comma separated, UTF-8 encoded and include a row of headers. The headers within this file will be mapped to User Fields within Zephr.
Navigate to Settings > Import > Users within your Zephr Admin Console. Here you will see a list of your Import Jobs. If this is your first time importing Users, this list will be empty. Any imports which have been started or completed previously will be shown in this list.
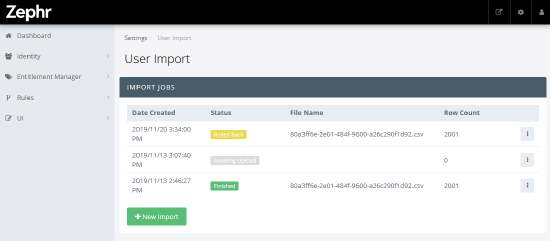
Click New Import to continue.
A new screen will load, with a Browse button for you to choose a file from. Along the top of this page, you will see the steps for importing Users into Zephr:
- Upload CSV – Allows you to upload a file
- Mapping – Allows you to map fields in this file to your existing User Schema
- Preview – Allows you to preview the upload
- Import – Allows you to confirm and set the file for processing.
Upload CSV
Once in the Upload CSV page, click the Browse button and find the file you wish to import. The CSV should be comma separated, UTF-8 encoded and include a row of headers. If you are including a Registered Date for your Users, please ensure it is in the following date/time format:
2016-04-26T16:20:00
Once selected, details of your file will appear below the Browse button. These will include the filename and size, the date the file was last modified, the number of rows in the file, details of the file headers, and the number of errors within the file.
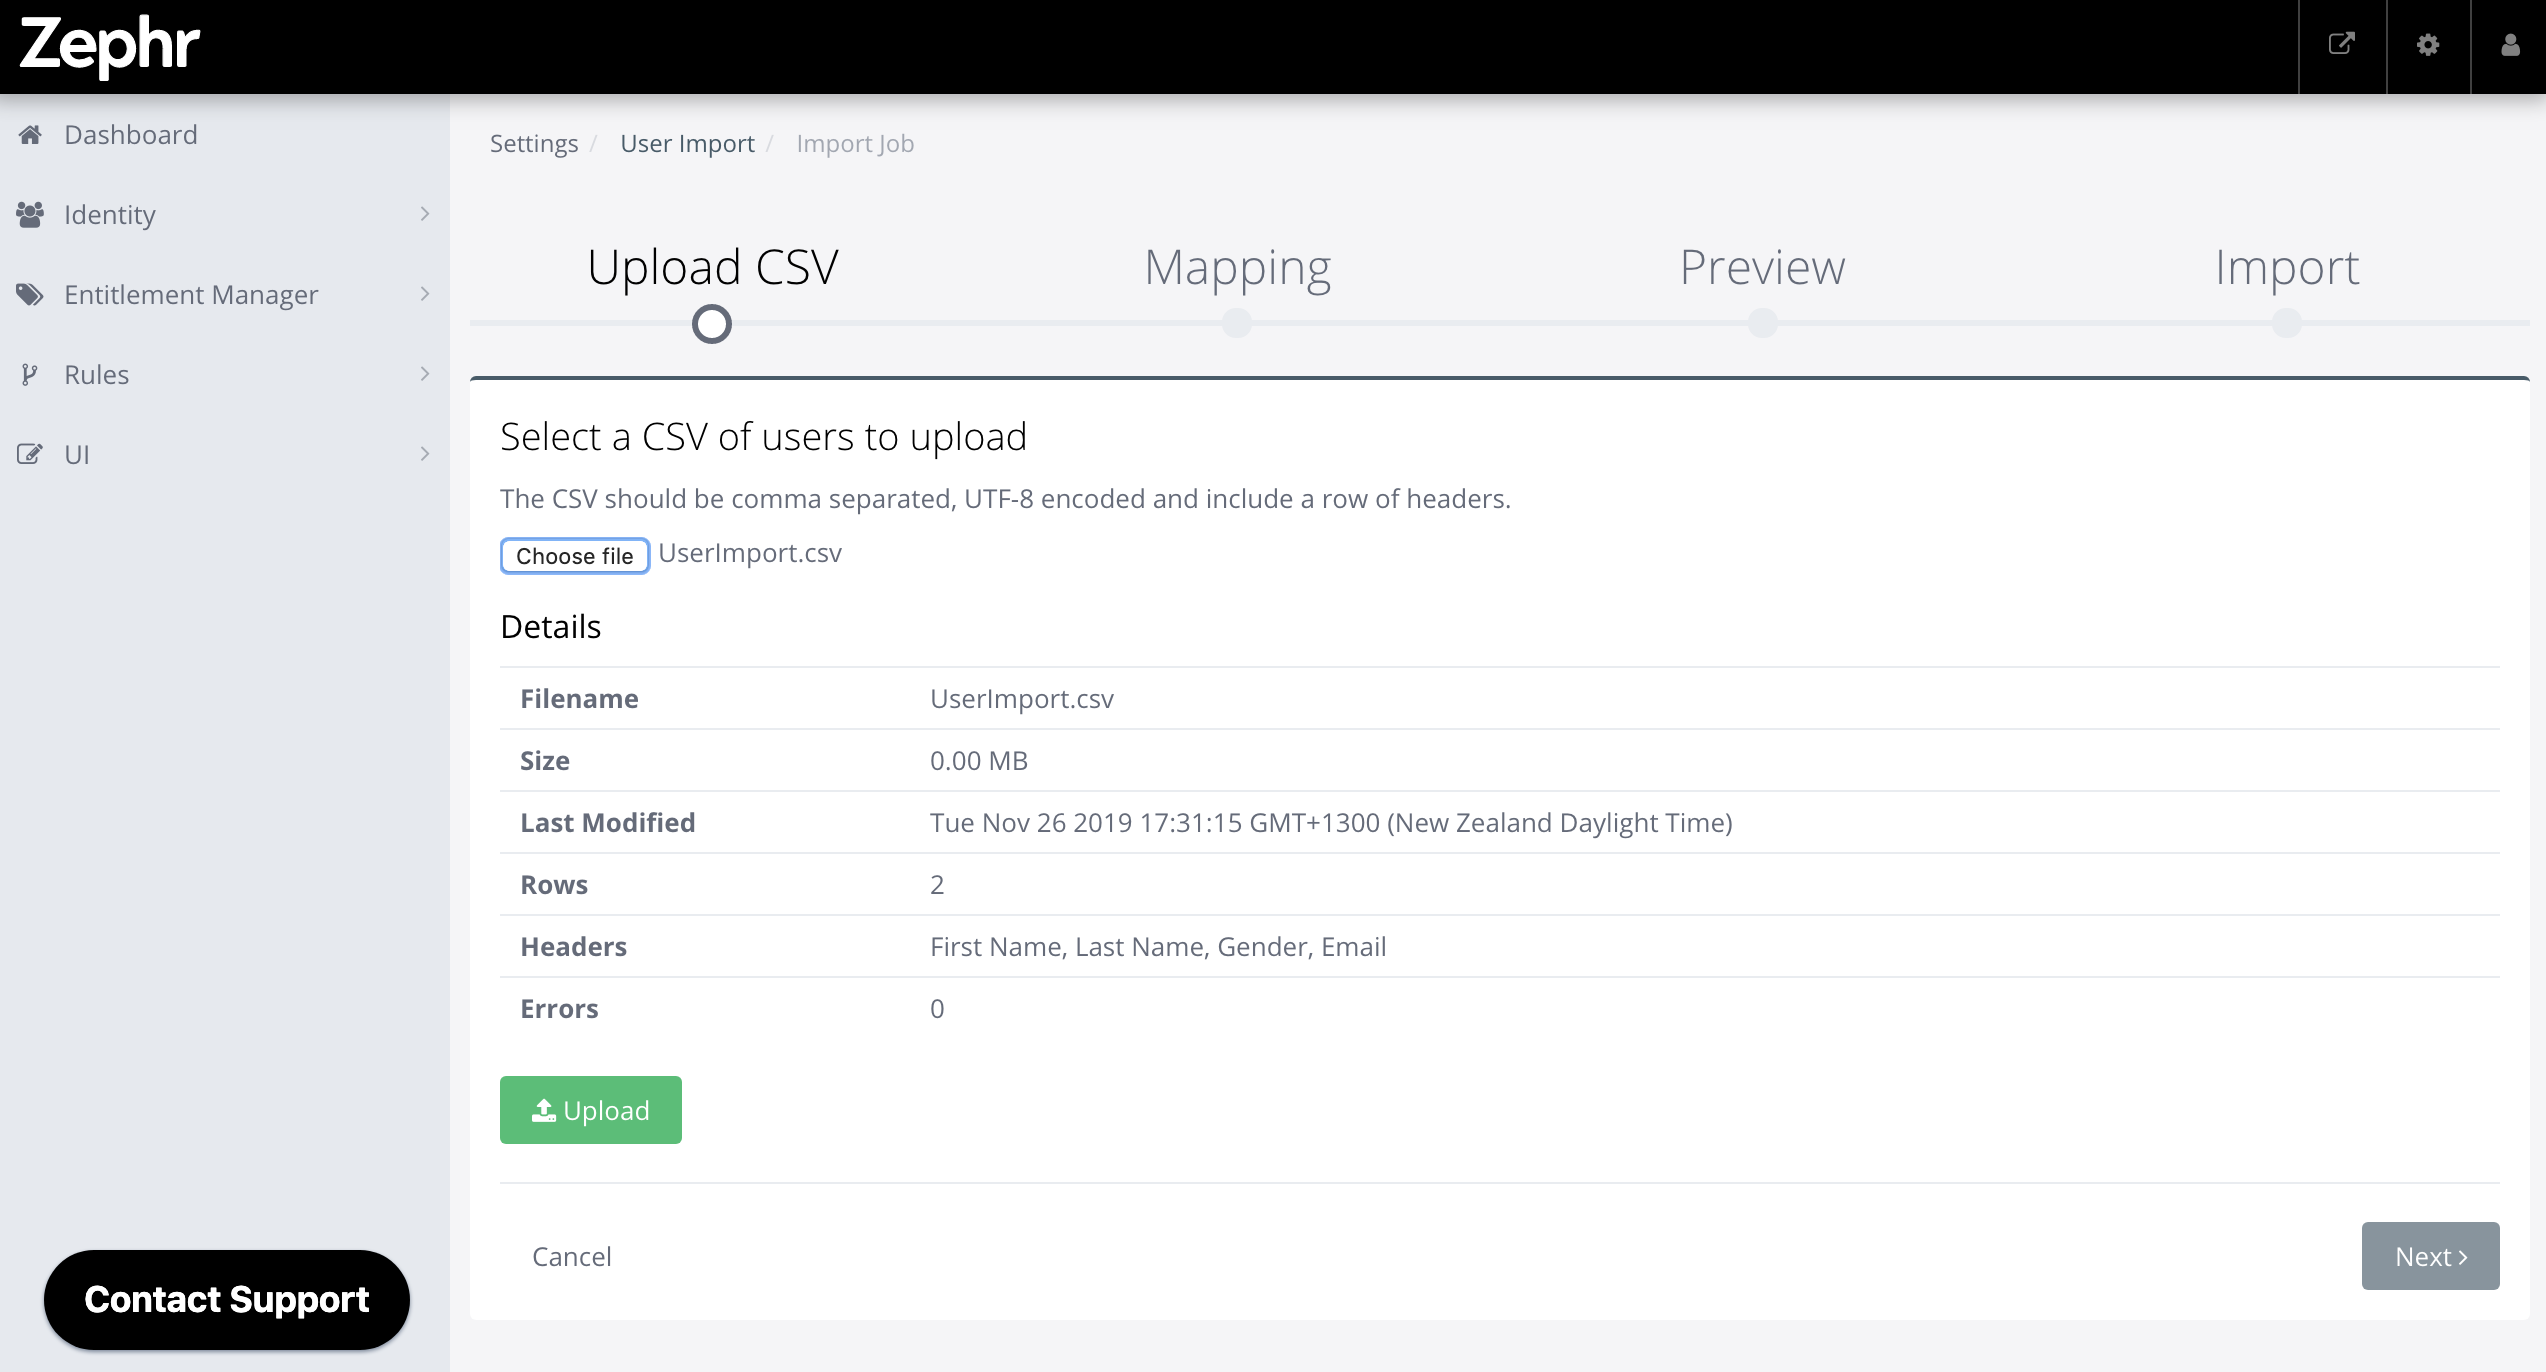
Ensure the details are correct, then click Upload.
Your file will show a loading icon, and once processed will direct you to the Mapping Screen.
Mapping
This screen allows you to map the headers from your CSV file against Attributes within your Zephr User Schema.
If you wish to add details that do not already have a corresponding User Schema Attribute, then please update your User Schema before importing the file.
You do not need to add User Schema Attributes for Email Address, Registered Date, Tracking ID, Password, or Legacy Password.
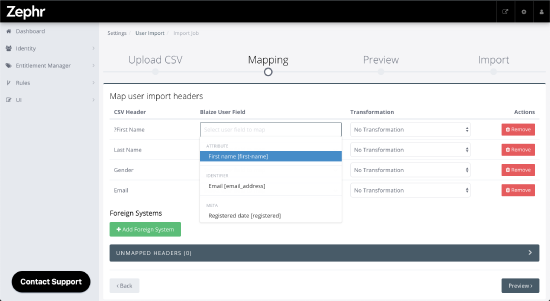
If your header names match the naming conventions of your Zephr User Schema Attributes, Zephr will auto map your fields. For any headers which are not auto mapped, click into the Zephr User Field box and select the Attribute the field should be mapped to. In the example above, you will see a CSV Header named ?First Name is being mapped to the User Field First Name.
Following this, set if you require any transformation to be done to the data – such as making the data upper case or lower case.
If there is a field in your CSV that you do not wish to upload, click the Remove button for the corresponding line. Once removed, you will see these lines in the Unmapped Headers section below. If you remove a line by mistake, click Add to move it back up into the Mapping section.
Adding Foreign Keys in User Imports
In many cases, Zephr Customers use Foreign Keys for a variety of integrations with Zephr. These are stored differently to User Schema Attributes, using Foreign Systems.
If your CSV file includes a Foreign Key, click Add Foreign System below the Mapping Table. Add the name of your Foreign Key, then click Save.
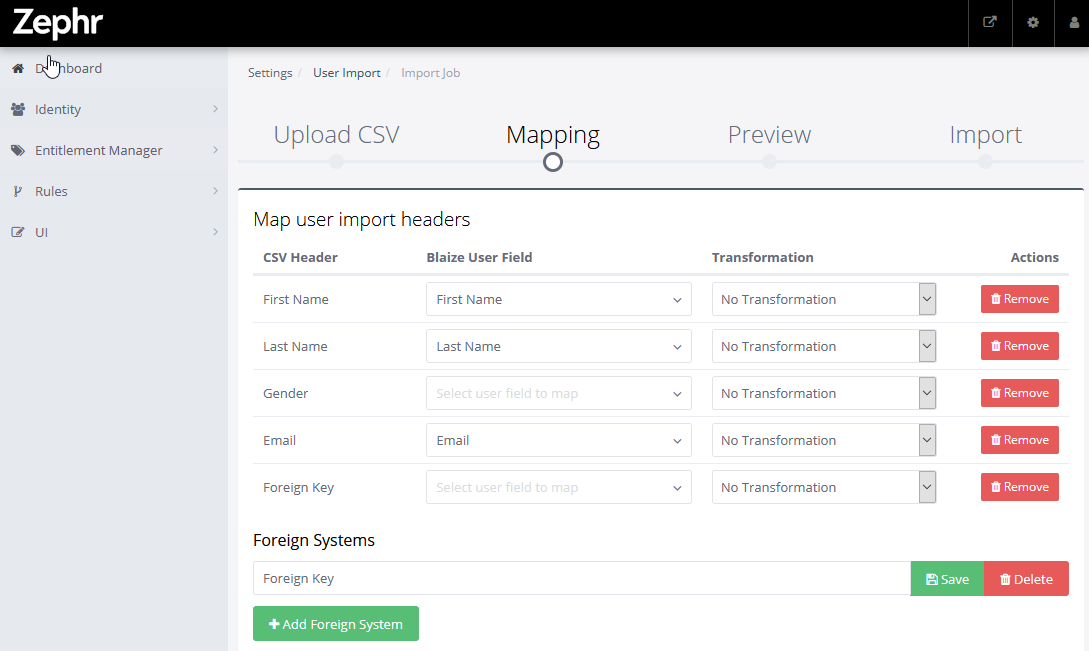
Once saved, you will find this as an option in the dropdown menu under Zephr User Field. Map this field to the relevant header within your CSV.

When you are happy with your Mapping, click Preview.
Preview
The Preview screen allows you to look at the data from your CSV as it will display within a Zephr User Profile. This will start with the first User from your CSV. From here you have the ability to skip to a particular number (e.g. User 435), or click Next User to go through your Users one at a time. There is also a Random User button, should you wish to spot check the details.
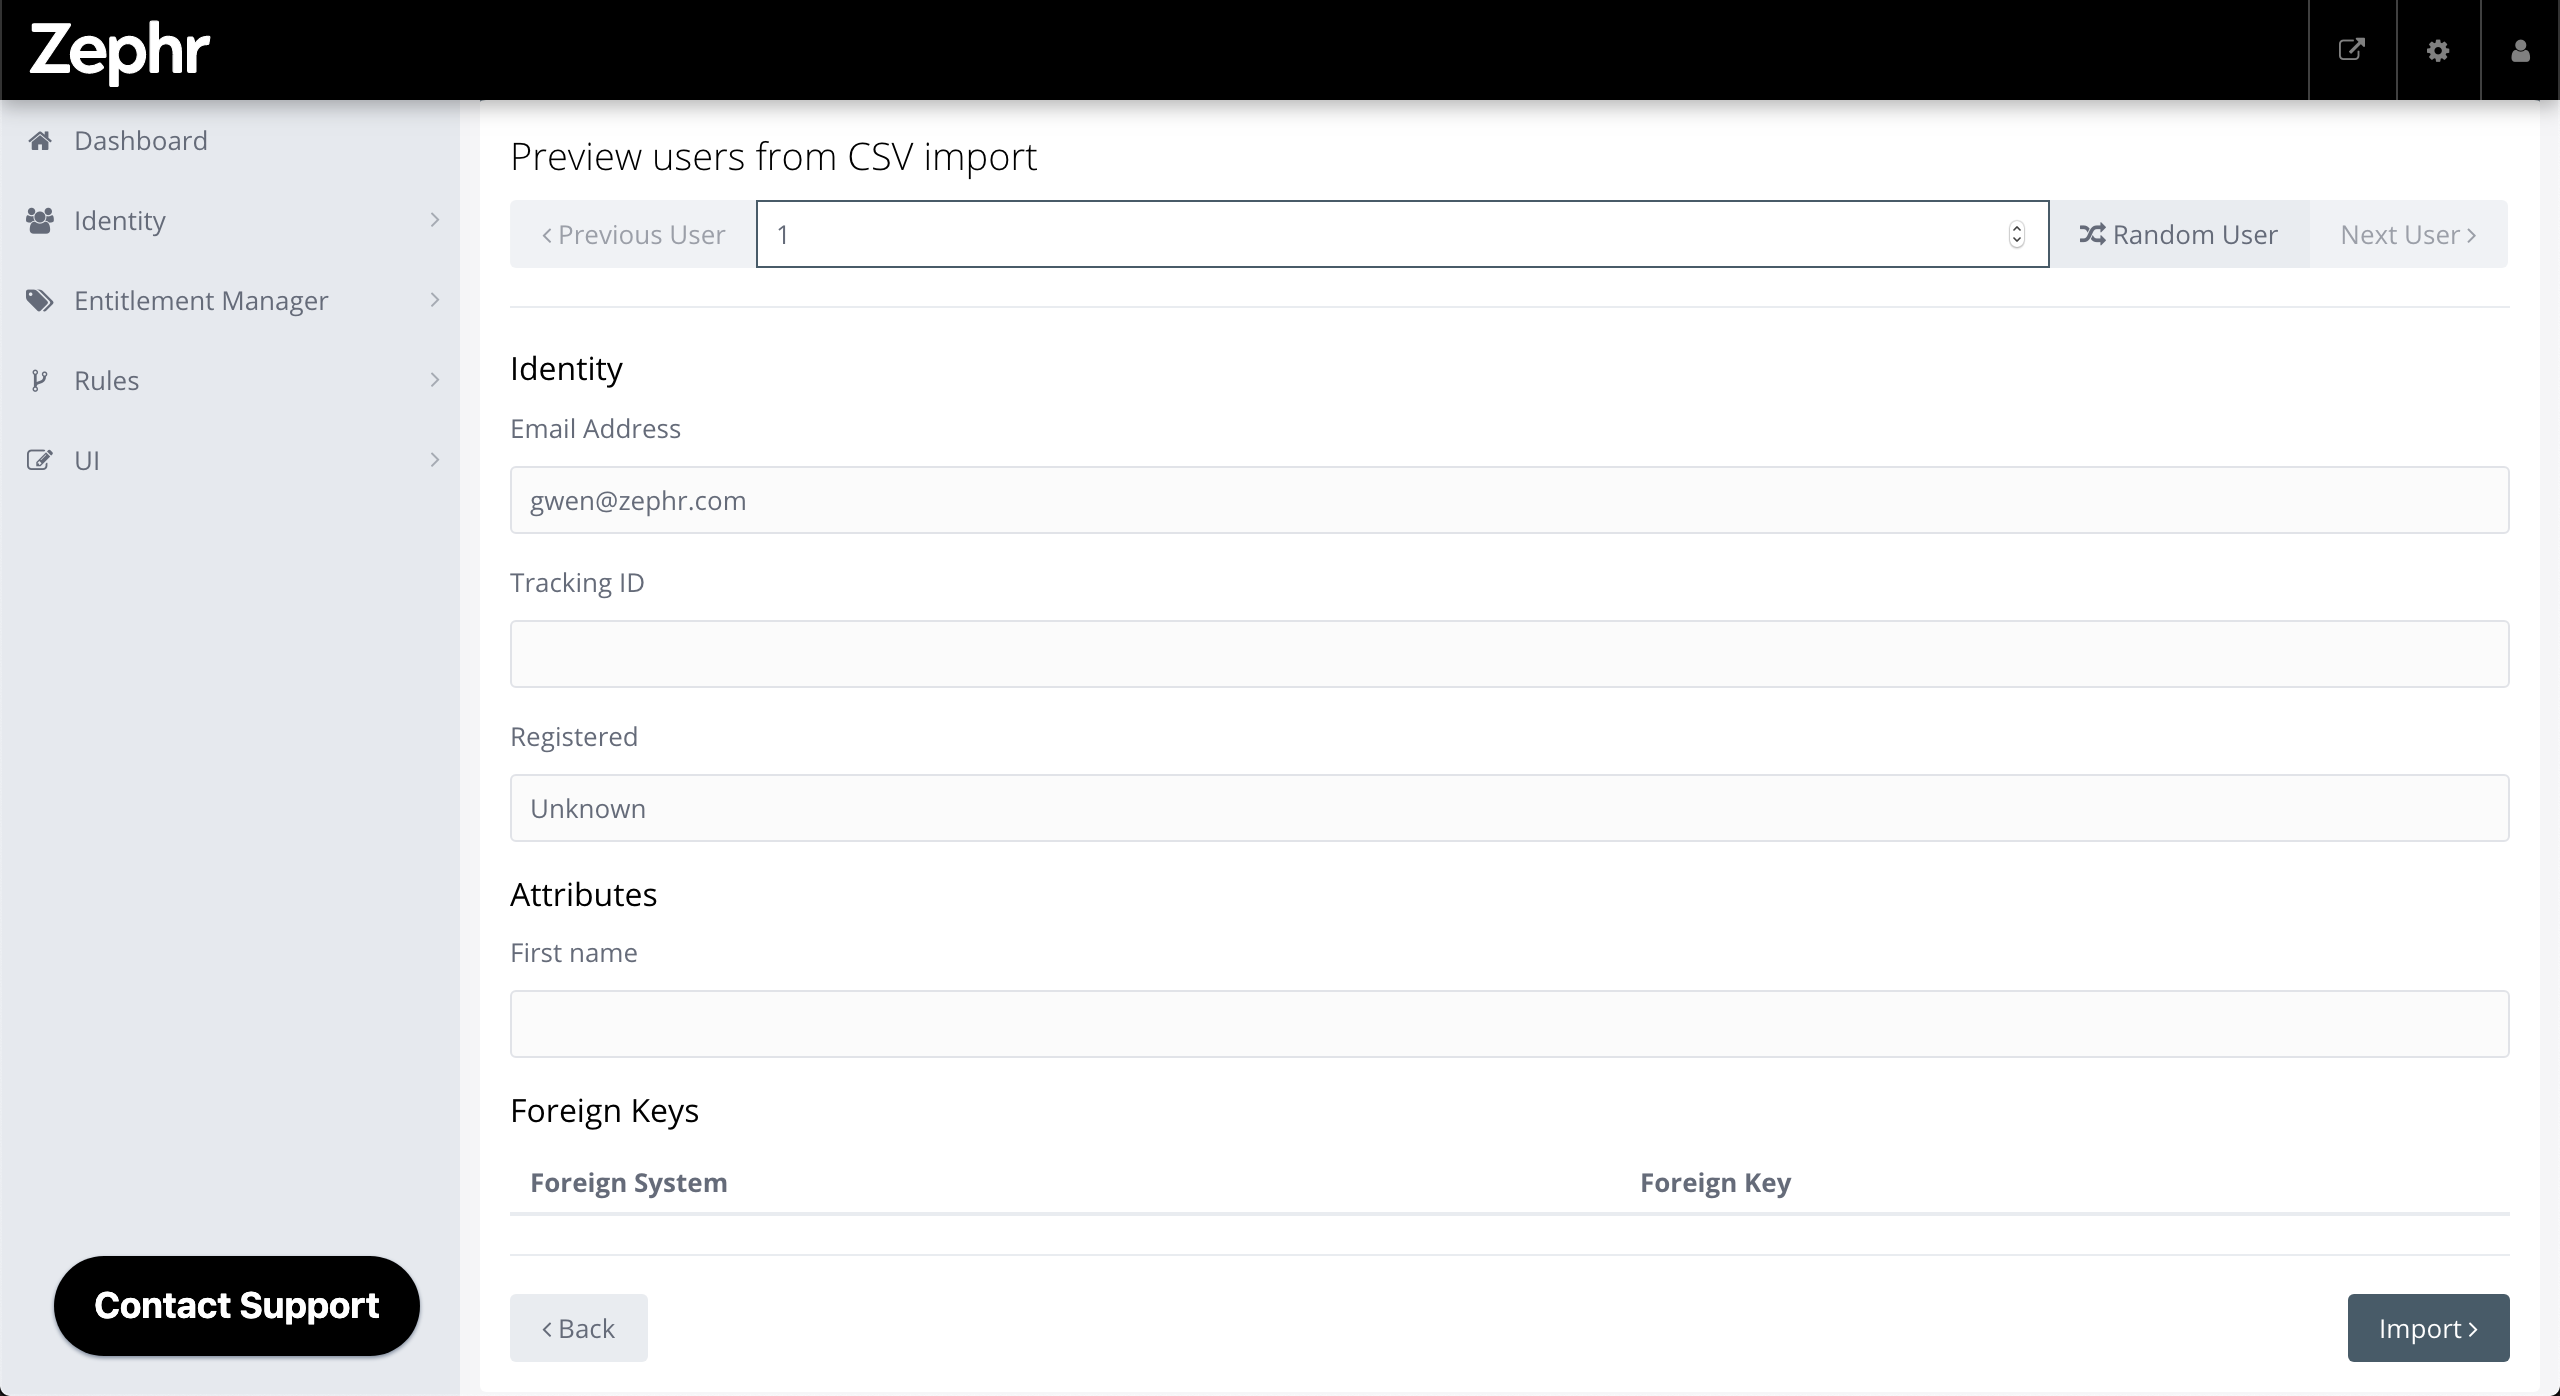
If you wish to alter your mapping, click Back to return to the Mapping Screen.
When you are happy with your data, click Import.
Import
The Import screen asks you to confirm that you wish to start the import of your Users. Once you start the import, the users will not appear in the Zephr User Store until you’ve reviewed the import and confirmed the import job. At the point you review the import, you will also have the option to rollback the import job, in which case the Users will not be added.
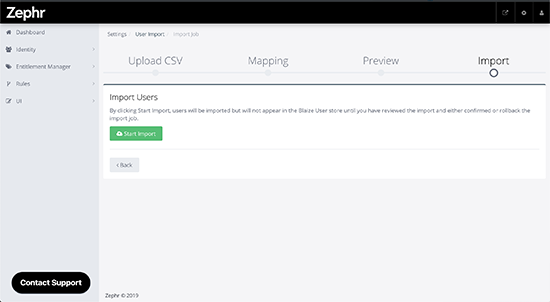
To continue with your import, click Start Import.
The time it takes to process your Users will vary based upon the number of Users you are uploading at one time. Whilst the Upload is in process, you can navigate away from this screen. To return, navigate back to Settings > Import > Users and find the import on the Import Jobs list.
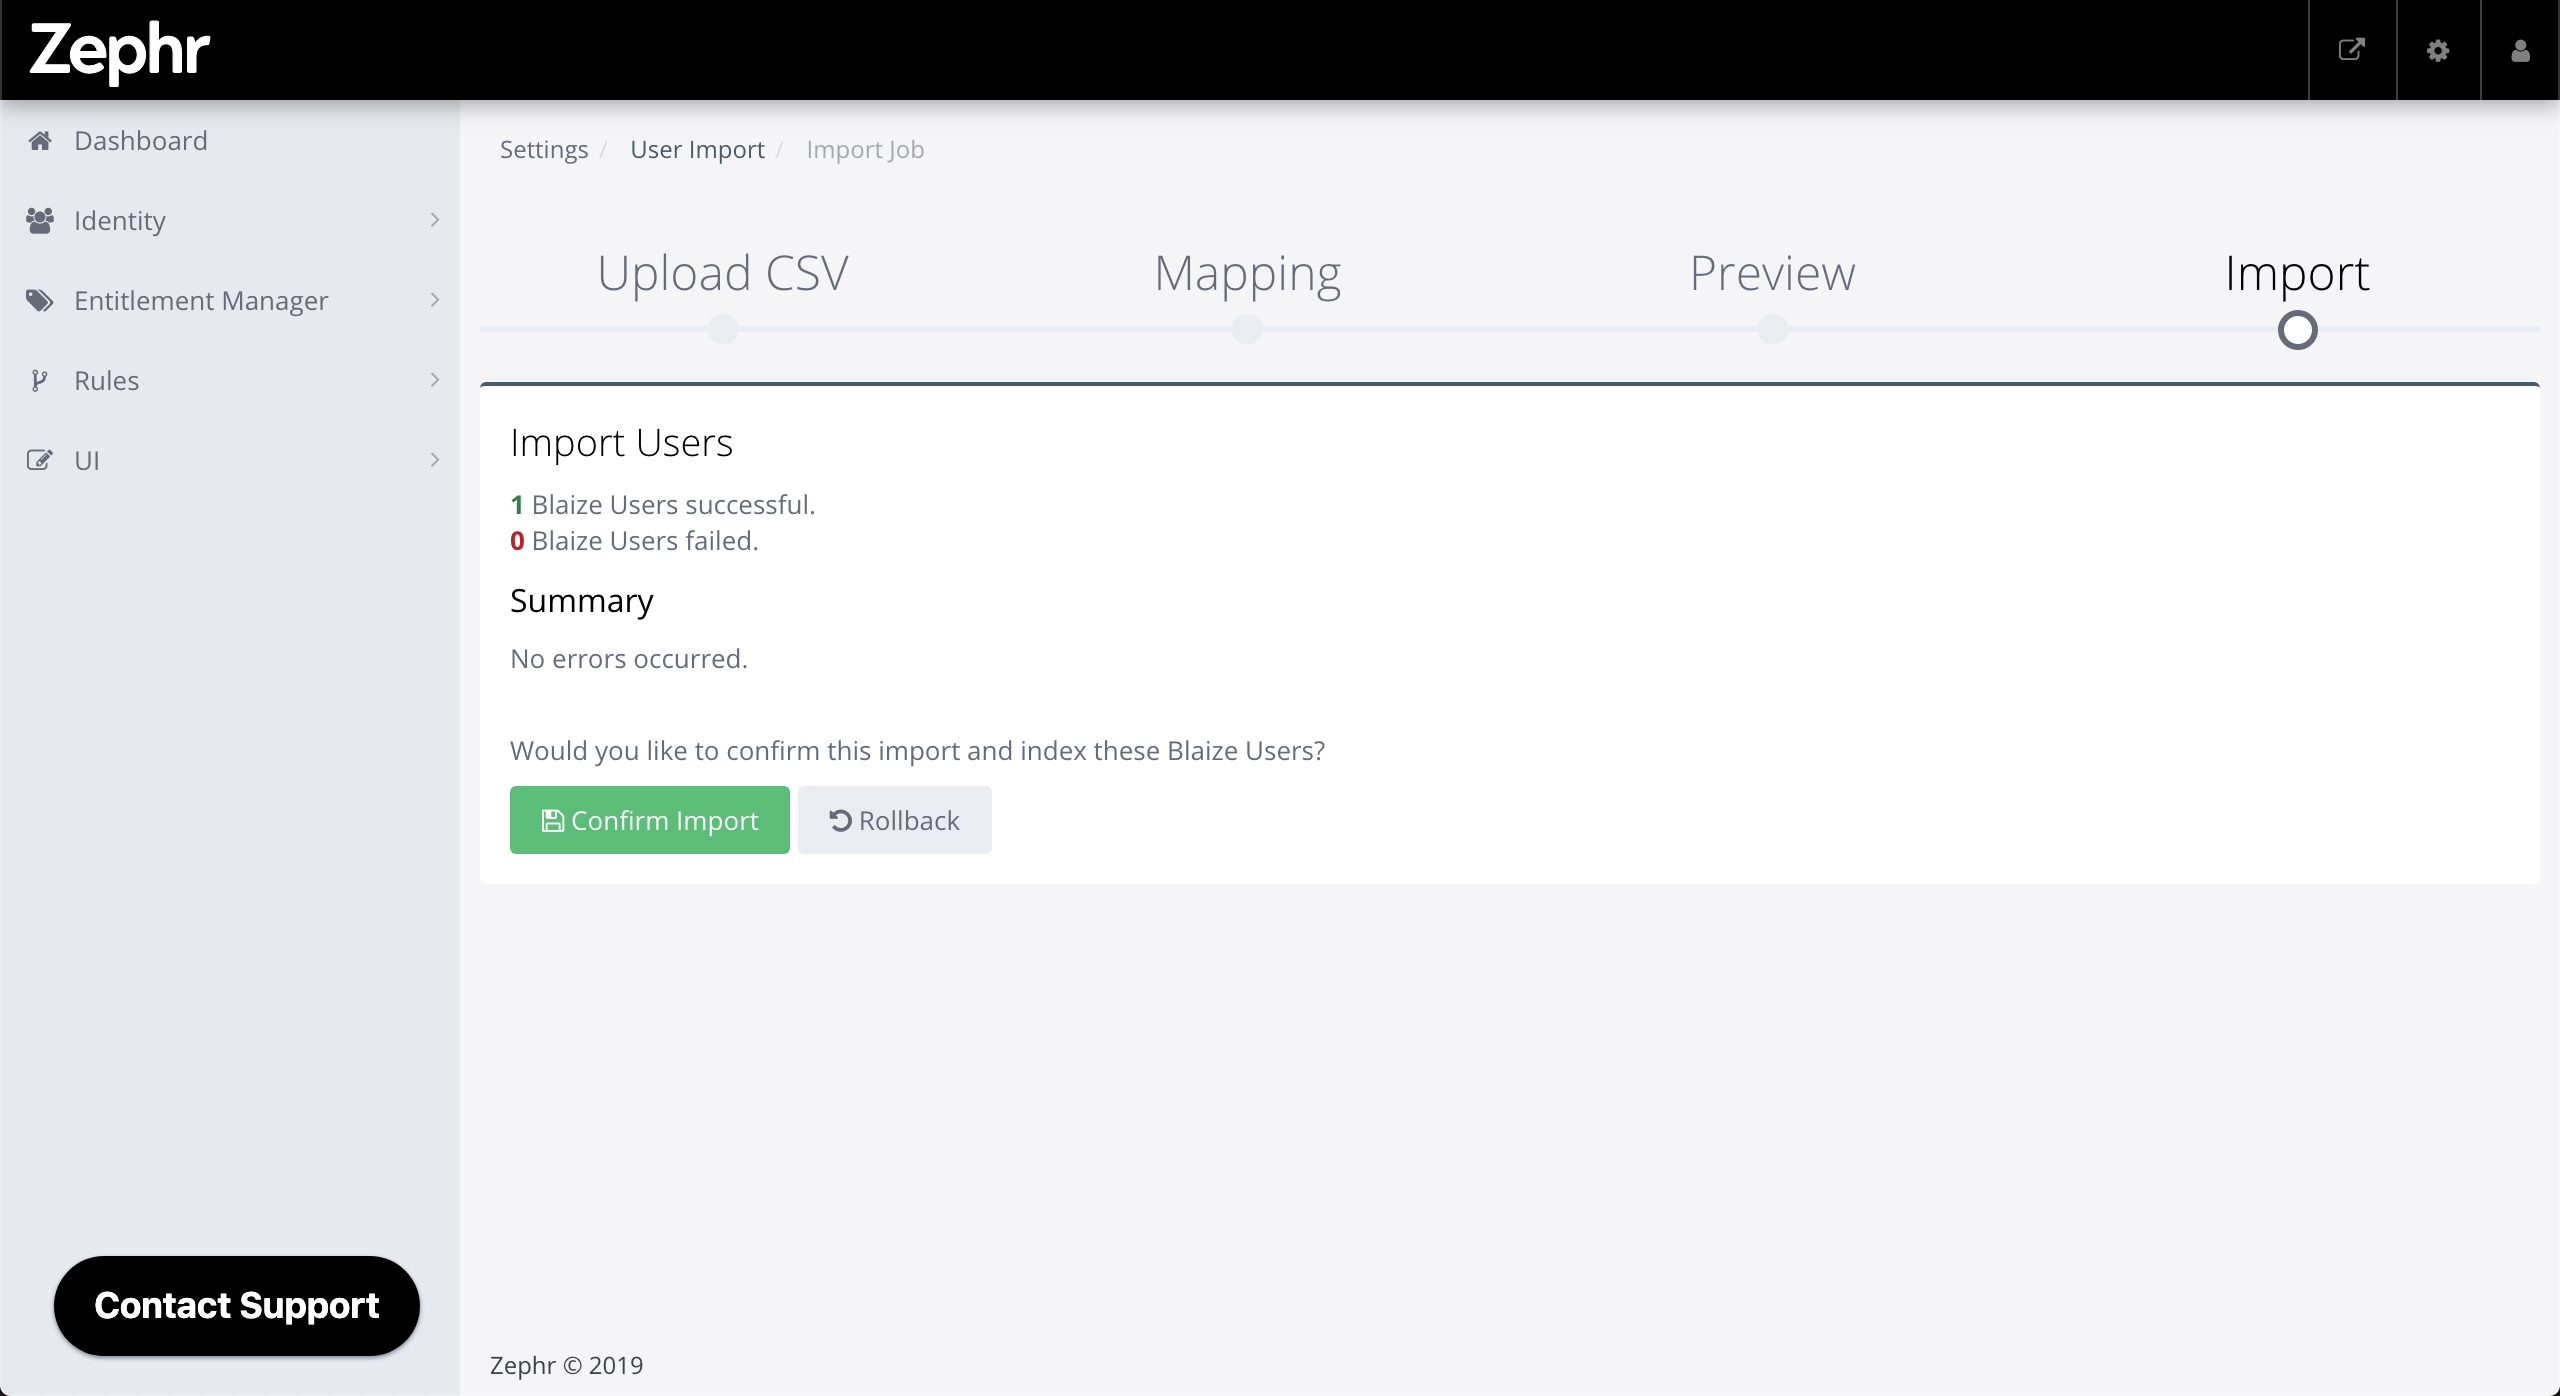
Once complete, you will see an Import Users screen stating the number of Users who have successfully been imported, along with the number of failed imports. Below this, a summary will explain to you why any errors have occured, and why User uploads have failed.
Individual user imports may fail for a number of reasons, most commonly when the User’s email address, which is a unique identifier in Zephr, is already in use. In this instance, you will see a message with the following error:
User email cannot be duplicated
Click into the Detailed Import Errors section will display a full list of errors, along with details of which User the error is applicable to.
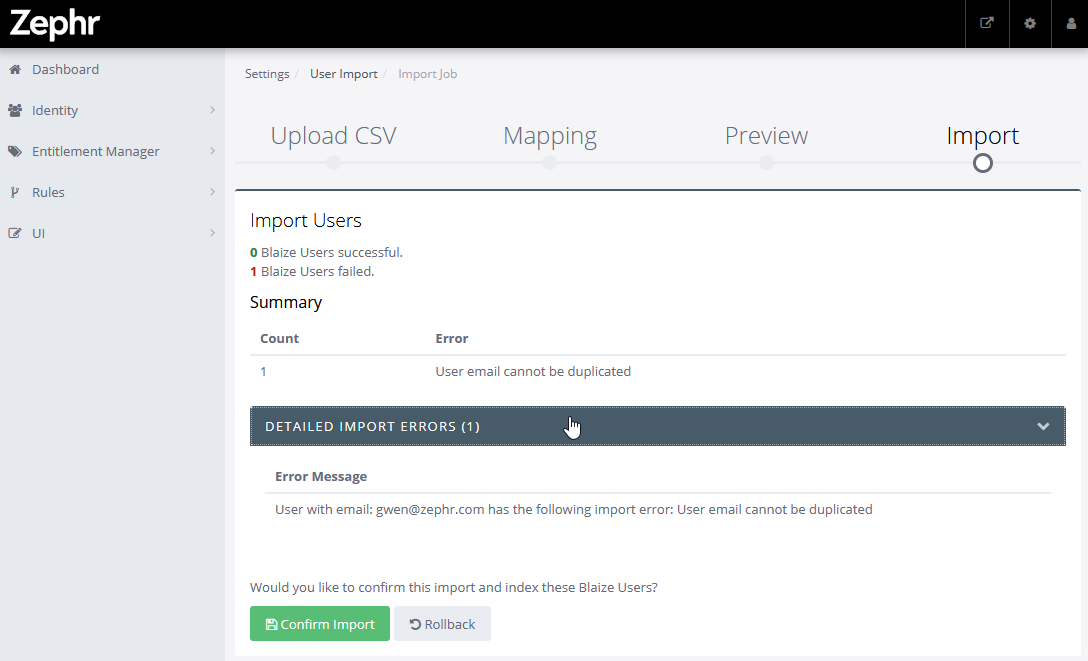
If you wish to correct any errors in the file, or remap the fields, click Rollback.
If you are happy with the success rate, click Confirm Import. Note that once you have confirmed the import, you will not have an option to rollback, and Users would need to be manually removed if there is an issue.
Once you have clicked Confirm Import, your Users will be indexed. You will see a confirmation screen when this has been completed.
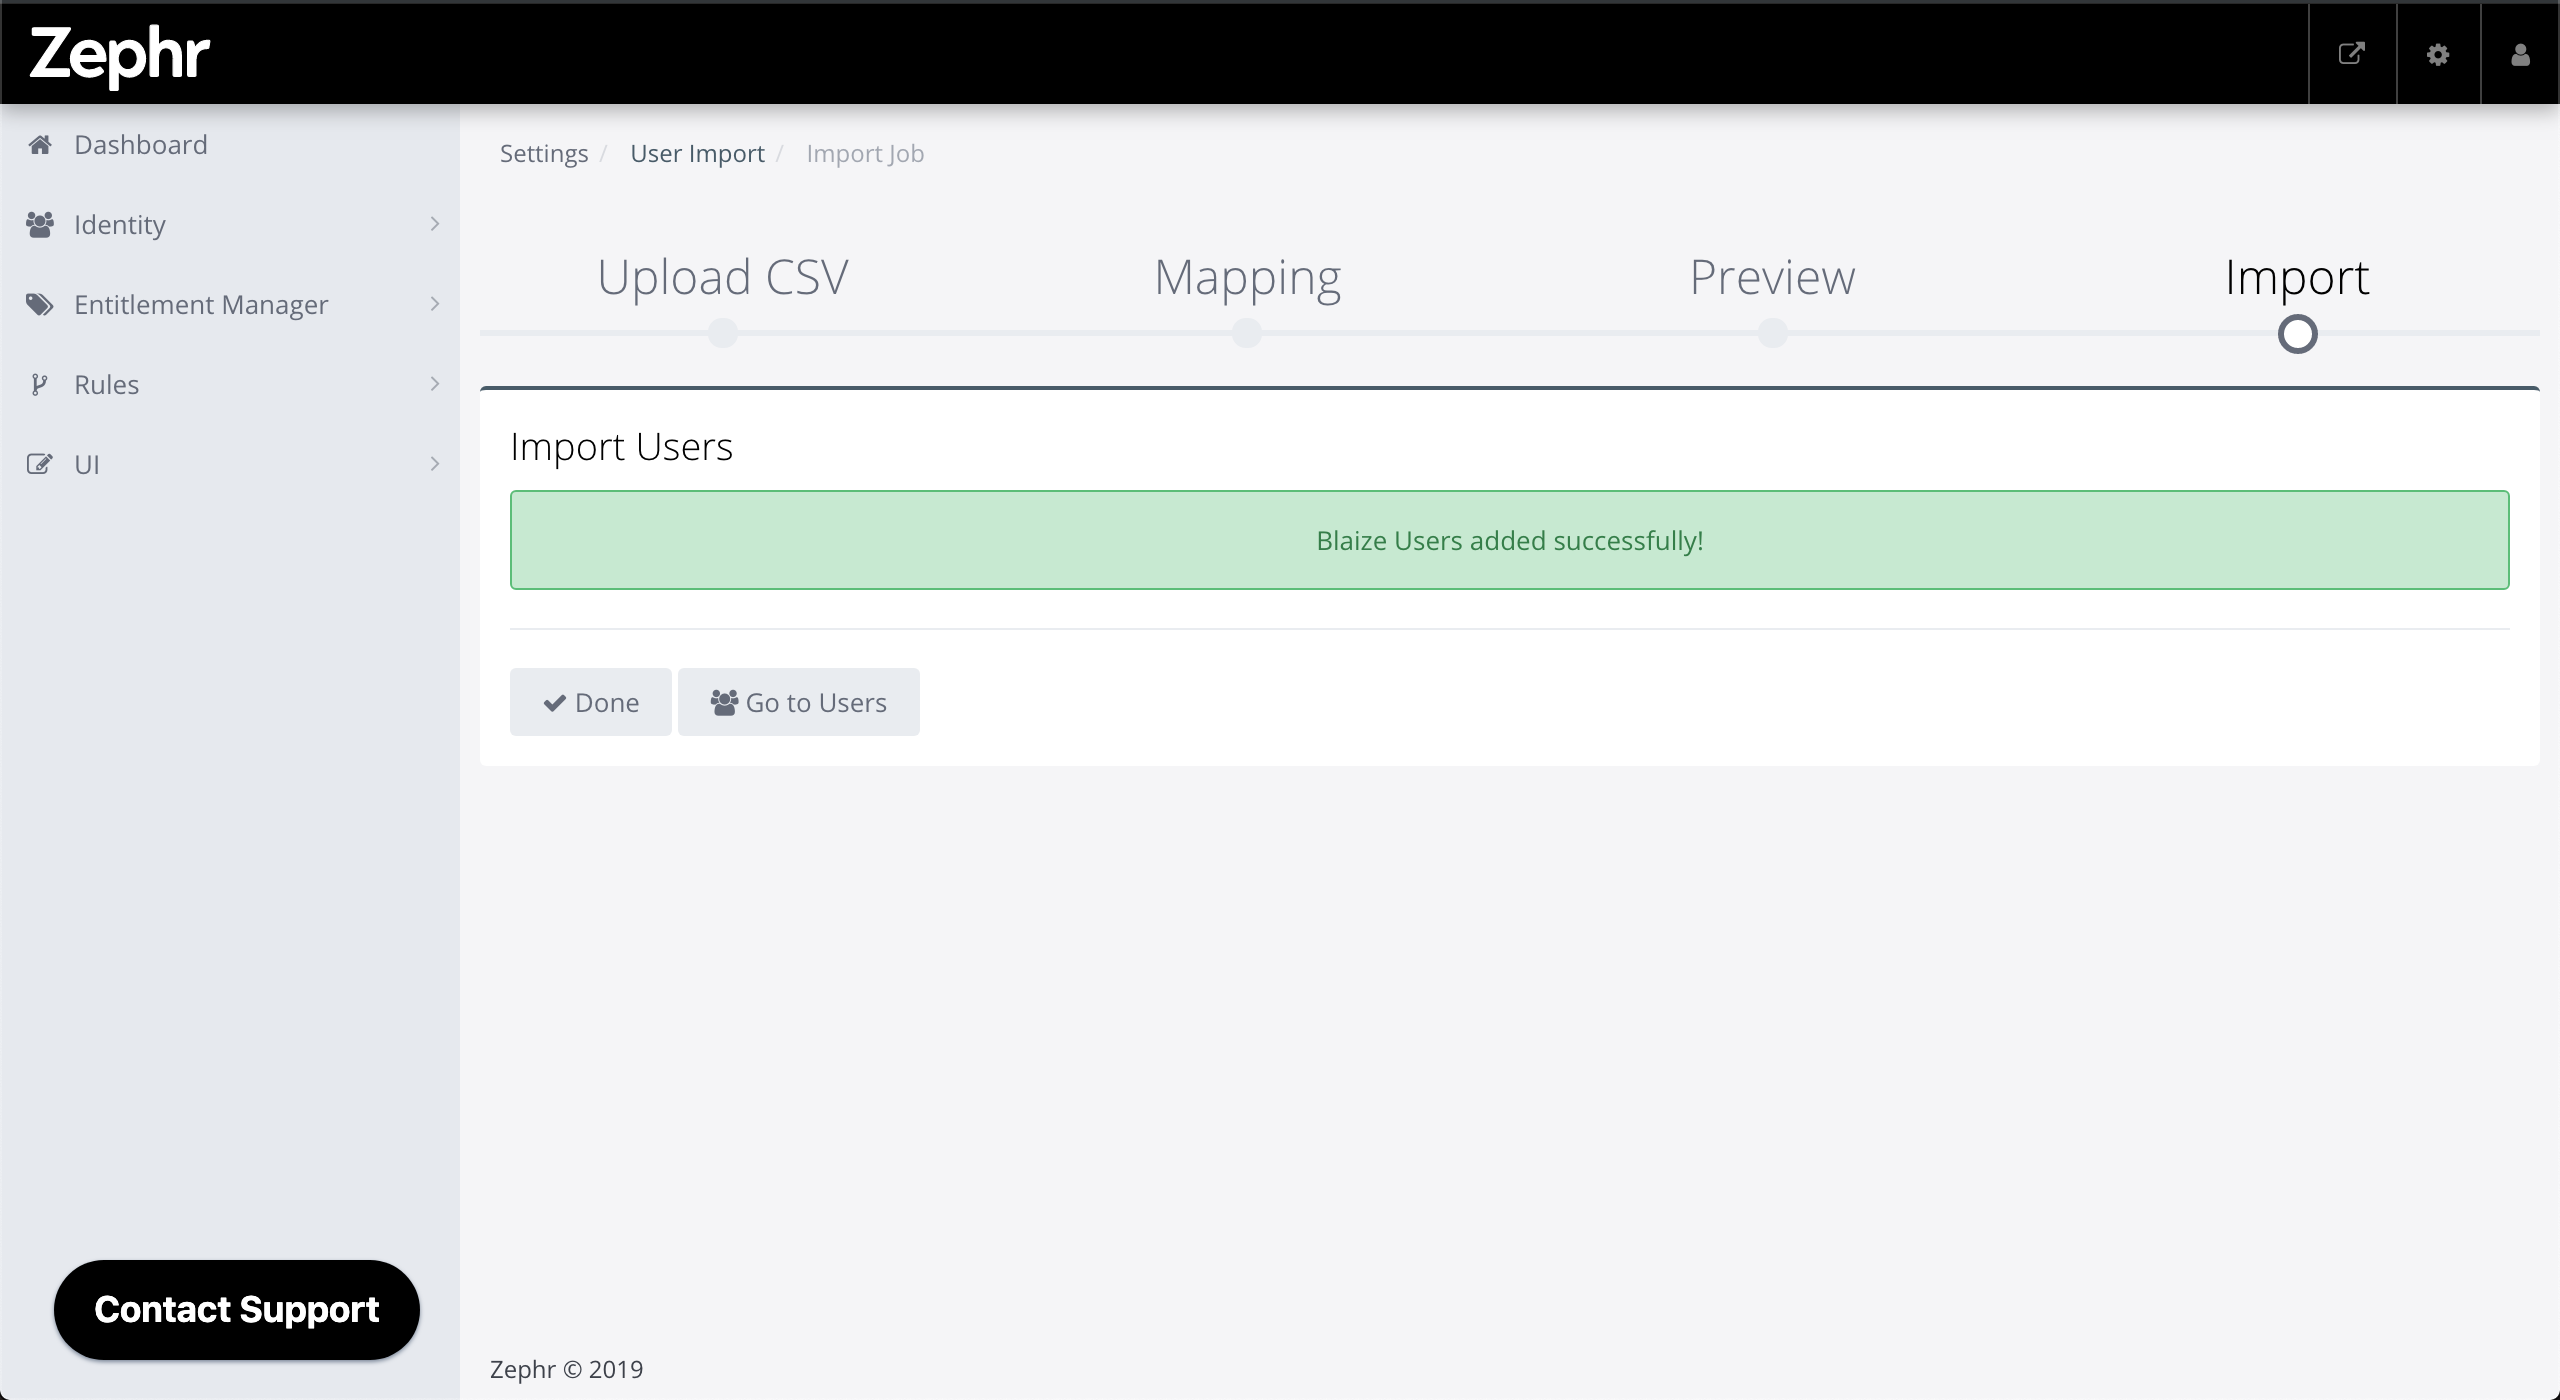
From here, click Done to return to the list of Import Jobs, or click Go to Users to view your User Store.